Workflow, workflow, Webservice, Web service
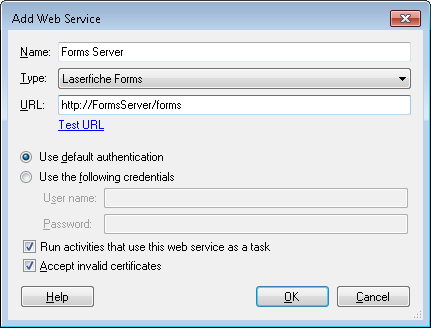
For Workflow to connect to a Web service, such as a Laserfiche Forms Server, you must configure a Web service in the Add Web Service dialog box.
To add a Web service in Laserfiche Workflow
- In Laserfiche Workflow, open the Add Web Service dialog box from one of the following places:
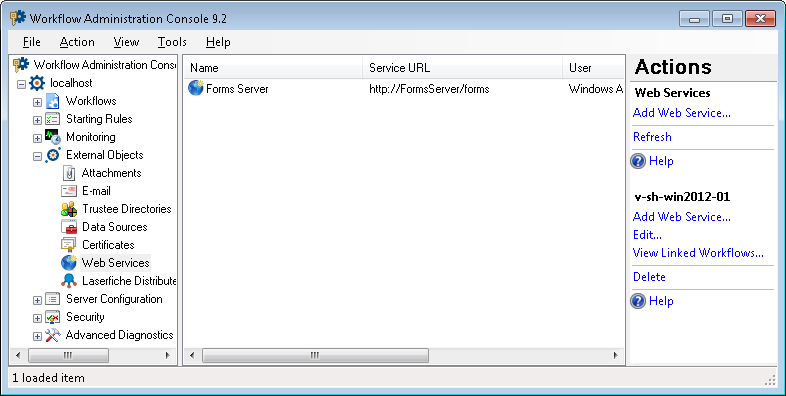
- In the Web Services node of the Workflow Administration Console, click Add Web Service.
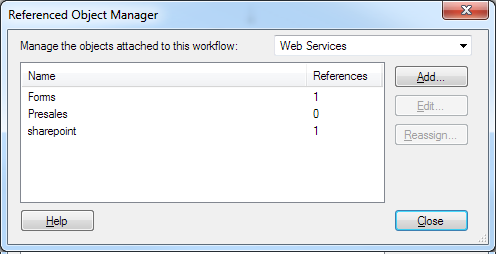
- In the Retrieve Business Process Variables activity's Server property box, select the Manage servers from the drop-down menu. In the
 Referenced Object Manager, click Add.
 - In the Add Web Service dialog box, configure the following:
- Name: Type a name for the Web service. The name you provide here will appear as an option for various Workflow activities that can interact with Web services so ensure the name is clear and informative.
- Type: Select Laserfiche Forms.
- URL: Type the Web site for the Forms server you want to connect to. Click Test URL to ensure that the URL is correct and that Workflow can connect to the Web service.
- Your sign-in information for the Forms Web service. Choose to Use default authentication to sign in to the Web service with the Windows name and password you are currently logged in with. Alternatively, choose to Use the following credentials and provide a user name and password that can access the Web service.
- Advanced: Select to Run activities that use this Web service as a task, or clear this option to run these activities within Workflow. Clearing this option will use more Workflow resources but can make the activity run more quickly. We recommend leaving this option selected unless otherwise directed by your Workflow administrator.
- Click OK.

Note: In order to connect to Forms, a Workflow server must first be authorized on the Forms Configuration page.
Note: You must also sign in as a user who has the Creator role on the Forms server.
To modify a Web service in Laserfiche Workflow
- Select a Web service in the Web Services node of the Workflow Administration Console and click Edit. Alternatively, in the Retrieve Business Process Variables activity's Server property box, select the Manage servers from the drop-down, and click Edit.
- Make any desired changes to the Web service's URL, type, authentication, or advanced task setting option in the Edit Web Service dialog box.
- Click OK.
To delete a Web service in Laserfiche Workflow
- In the Web Services node of the Workflow Administration Console, select a Web service.
- Click Delete under the Web service's name in the Actions Pane.
Related Topics

