Configuring the Notification Service for real-time updates on the Tasks page
- Laserfiche Notification Master Service: Handles registering client applications and relaying notifications.
- Laserfiche Notification Hub Service: The server URL applications use to connect and listen for notifications.
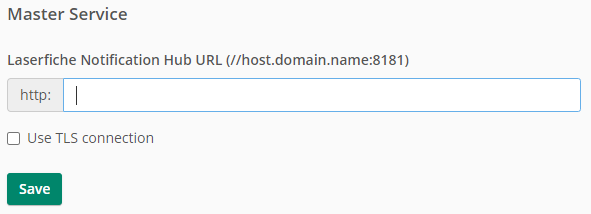
In the Forms Configuration page, select the Notifications tab, and enter the Notification Hub URL, this is the machine name hosting the Laserfiche Notification Hub Service with the port number 8181, This URL must be accessible to all who will access the Forms Inbox, as well as by the Laserfiche Notification Master Service.

Configuring Notification Service When Using TLS
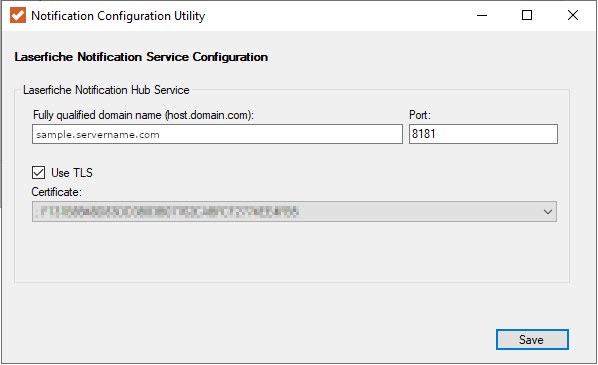
When you configure Laserfiche Forms to require TLS, use the Notification Configuration Utility, which by default can be found at the following location: C:\Program Files (x86)\Laserfiche\Laserfiche Notification\NotificationConfigurationUtility.exe

For previous versions of Laserfiche Forms, follow the steps below.
- Find the certificate hash for the certificate used in the Forms website. To get the certificate hash, go to the IIS manager, as shown in the following image:

- Run the following commands in an administrator command prompt:
netsh http add sslcert ipport=0.0.0.0:8181 certhash=#certhash appid={#appid}
netsh http add urlacl url=https://*:8181/ user="LOCAL SERVICE" listen=yes
Replace:
- #appid with a random GUID.
- LOCAL SERVICE with your local service account name.
Note: You only need to run the second command if the service account for the Hub service is not Local System or a member of the local Administrators group on the machine.
- After you run the commands, you should get the following success responses:

- Select "Use SSL Connection" under Forms Configuration: Notification Service.
- Restart Laserfiche Notification Hub Service and Laserfiche Notification Master Service.
Changing Service Ports for the Laserfiche Notification Service
By default, Laserfiche Notification Master Service uses port 8268 and the Laserfiche Notification Hub Service uses port 8181. To change these port values, modify the XML configuration files for the services.
- Master Service: C:\Program Files (x86)\Laserfiche\Laserfiche Notification\Service\Laserfiche.PushNotificationService.Master.Host.exe.config
- Hub Service: C:\Program Files (x86)\Laserfiche\Laserfiche Notification\Hub\Laserfiche.PushNotificationService.Hub.Host.exe.config
Service Account
By default, the services run as the Local System machine account. You can use the Windows Services snap-in to change this default setting if desired or specified by the IT admin.
To change the account settings for the Laserfiche Notification Service
- Click the Windows Start button on the computer the Forms Server is installed on.
- In the Start Search box, type services.msc and press ENTER.
- Double-click Laserfiche Notification Hub Service.
- Click the Log On tab, and use the This account option to specify a different user account that the service should use to log on. When you are finished, click OK.
- In the Services window, select the Laserfiche Notification Hub Service, and click Restart.
- Repeat steps 3-5 with the Laserfiche Notification Master Service.