Configuring Repository Profiles
To create or edit a repository profile
- In the settings window for the Save to Repository service task, click New Profile or Edit next to Repository profile.
- In the Profile name field, specify a name for the profile.
- In the Laserfiche Server field, enter the name of the Laserfiche Server associated with the desired repository.
- After selecting a Laserfiche Server, click in the Repository text box and then click the drop-down arrow to see the available repositories. Select one.
- In the User name and Password fields, specify the credentials that Laserfiche Forms should use to authenticate to the specified repository.
- To configure the Forms Server to secure network communications when connecting to Laserfiche, select the Use TLS connection checkbox.
- When you are finished, click Verify and save.
Note: The user specified here does not need an assigned user license. It only needs repository access rights to create and save documents, write metadata, etc.
Setting up the document import options for the profile
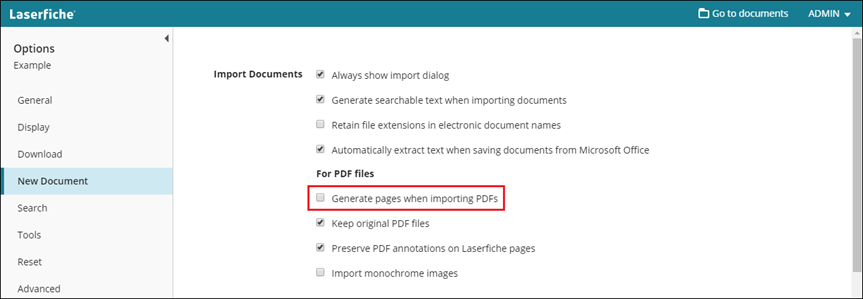
Within the repository profile user options, you can determine how the import process will handle the PDF file. Log into the repository client as the profile user created above. An abbreviated example is shown below for generating TIF images on import. For all available options refer to the Laserfiche User Guide.
- Open the Options section in web client for the specific repository profile user.
- Go to New Document.
- Select Generate pages when importing PDFs to generate a TIF from an incoming PDF.

- Click Save.
Note: The remaining options in the For PDF files section are not supported when generating pages from a PDF in Forms. PDF files are always in their original PDF file format. Annotations are not preserved and generated images are not monochrome.