Signing In to Windows Client Using Directory Server's Sign-in Page
Laserfiche Directory Server authentication should be used when:
-
Signing in with SAML
-
MFA is configured for your Laserfiche user sign in
-
A Laserfiche user wants to have an SSO experience
Configure Laserfiche Directory Server SSO
To configure Laserfiche Directory Server SSO in Windows Client, follow the steps below:
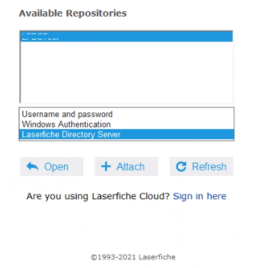
- In the Windows client, you will see an Available Repositories list appear. Select your repository, then choose the Directory Server option from the drop-down menu below the repository list. Then, click Open to start authentication, which will launch the Directory Server sign-in page.
Note: If you do not see the Laserfiche Directory Server option in the drop-down menu, click Refresh and select the repository again.
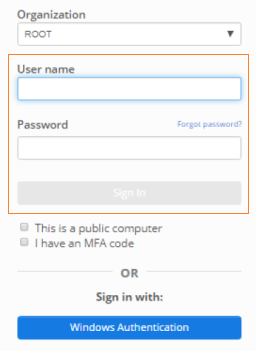
- By default, your organization's sign-in page will appear. Based on the options configured by your administrator, you may see:
- User Account Authentication: Enter your User name and Password. Click Sign In.
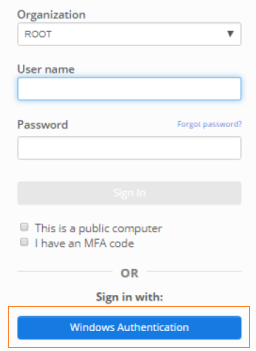
- Windows Authentication: Click Windows Authentication to sign-in using your Windows credentials.
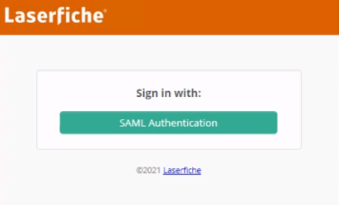
- SAML Authentication: Click SAML Authentication to go to your configured identity provider's sign-in page.
Note: Once you sign-in using Directory Server authentication, your credentials are cached for the next 8 hours. This allows for a seamless SSO experience across all supported Laserfiche desktop applications.
Note: If you are prompted to re-authenticate each time, contact your administrator or ensure that the Web Tools Agent is installed on your machine. For more information, see General Overview for Administrators.
- User Account Authentication: Enter your User name and Password. Click Sign In.
Configuring Laserfiche Directory Server Sign-In with Windows Client
If you do not see the option for your Directory Server repository, then click the Attach button in the Available Repositories.
- In the Attach Repository dialog box, click the radio button for Laserfiche Server.
- Specify the Laserfiche Server Address and Repository name in the proper fields.
- Optional: If your Laserfiche Server is configured for a TLS connection, then you should check the Use TLS Connection check-box. Click Attach when finished.
- Next, you will see a Login dialog box appear. Choose from one of the options below:
- Windows authentication: This option allows you to sign in to the Laserfiche Server directly by using your Windows credentials. Click this option to sign-in using your Windows credentials.
Note: To perform Windows Authentication through Directory Server, you must select the Directory Server instead. Then, follow the steps here to use your Windows credentials to sign-in.
- Password authentication: This option allows you to sign in to the Laserfiche Server directly by using your repository-specific user account or Laserfiche account. Click this option and type the User name and Password in the related fields.
Note: To go through Directory Server, you must make sure that Directory Server is configured using the same user name and password. Then, follow the steps here to use this user account to sign-in.
- Laserfiche Directory Server: If Directory Server SSO is configured for Directory Server, then use this option. Your Directory Server URL will automatically populate.
Note: Directory Server URL is made read-only. Only an administrator can configure this value.
- Windows authentication: This option allows you to sign in to the Laserfiche Server directly by using your Windows credentials. Click this option to sign-in using your Windows credentials.
- Click OK when finished.