Laserfiche Connection Redirects Node
This node, under Server Configuration in the Workflow Administration Console, lets you configure how Workflow User password changes will be handled so that connection profiles that rely on the Workflow User do not fail if the password is changed.

Why use a connection redirect?
If you change the password for the Workflow User in the Laserfiche Administration Console, running workflows and workflows started after the password changes will fail because they are trying to connect to the repository with an outdated password. This node allows you to create a temporary redirect during which the connection profile will try the new password if the existing password fails. By redirecting the workflows to the new password, your workflow will continue to run during this transition time.
Important: The connection redirect features should only be used while you are actively updating the Workflow User's password in the Laserfiche Administration Console and in your workflow connection profiles. Workflows that rely on a password redirect will run significantly more slowly than usual because the workflow has to wait for the password specified in the connection profile to timeout before trying the redirected password.
We recommend following these step when changing the Workflow User's password:
- Configure a connection redirect in this node.
- Change the Workflow User's password in the Laserfiche Administration Console. Learn more.
- Update the relevant connection profiles to use this new password.
- Republish any affected workflows.
- Ensure the workflows are using the new password before deleting the connection redirect from this node.
To open this node
- In the Workflow Administration Console's Console Pane, expand the Server Configuration node.
- Expand the Redirects node.
- Select Laserfiche User Password Redirects. The node will list the user redirects configured for your Workflow Server.
Tip: You can refresh this list to reflect recent changes by clicking the Refresh link in the Actions Pane. Alternatively, right-click the Laserfiche User Password Redirects node and select Refresh.
To create a connection redirect
- In the Console Pane, select the Laserfiche User Password Redirects node.
- Click Add Redirect in the Actions Pane. Alternatively, right-click the Laserfiche User Password Redirects node or an existing holiday and select Add Redirect.
- In the
 Register Connection Redirect dialog box, provide a name for the redirect profile. This name should help you remember which Workflow User and connection profile you are creating a redirect for.
 - Next to Server, use the drop-down menu to choose the Laserfiche Server specified in the connection profile you are creating a redirect for.
- Next to Repository, use the drop-down menu to choose the connection profile's repository from the drop-down menu.
- Next to User Name, type the name of the Workflow User associated with the connection profile.
- Next to Password, type the new password for Workflow User to be used during the course of the migration from one password to another.
- Click OK.

Tip: Hover over the Show Me icon  to see your password as text.
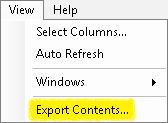
To export the contents of this node in a .csv, .xml, or .txt file
- Select the node in the Console Pane.
- Select View from the main menu.
- Click Export Contents.
- In the Export data dialog box, name the exported file.
- Select CSV File, XML File, or Tab Delimited Text File from the drop-down menu.
- Click Save.