Maps
Newly uploaded documents can be associated with a location on a map. This lets users search for and view documents in a certain area on the map. For example, a police department can see all incident reports uploaded in certain neighborhoods in the city. Or, they can search for all arrests made in a certain park.
Note: Administrator's must enable the Document location option on the
To associate a location with a newly uploaded document for the on-premises app
- Take a picture or choose a photo from the image gallery on the device.
- Edit the image to your liking, press the checkmark in the top right corner, and rename the document.
- The document location, retrieved from the photo's EXIF data, will be displayed on the Location page. You can edit the document's location description label at the bottom of the screen, then press the checkmark in the top right corner.
- If uploading multiple images from different locations, you will be asked which location you want associated with the multi-page document. You can only associate one location with a multi-page document.
Note: Cloud users have a few more options for document locations.
To search for documents by location
- If you are at the root level in your repository press the menu button
 in the top left and press Maps.
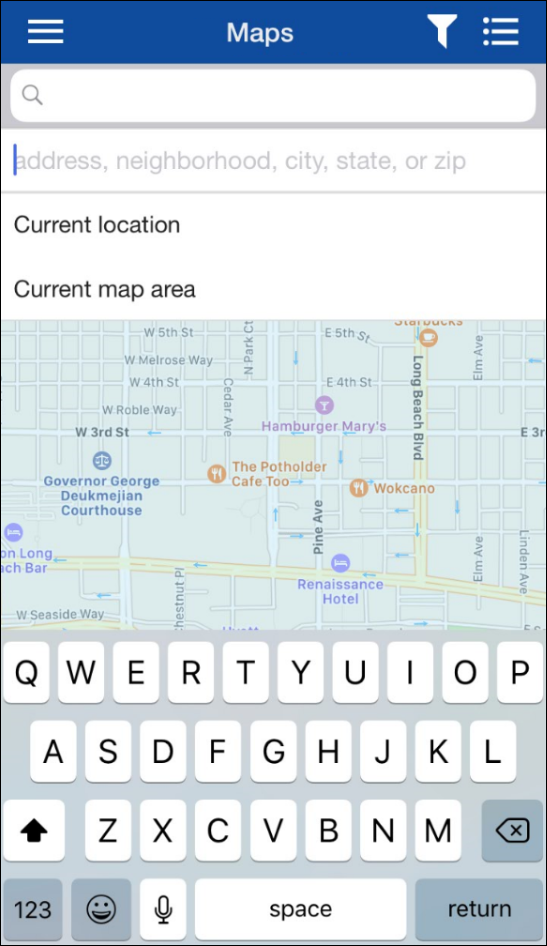
 - When first opening the map, you will see your current location. There are different ways to search for documents on the map.
- To search for all documents in a specific area:
- Current location: In the location box at the top, press the Current location button to display all documents in your current location.
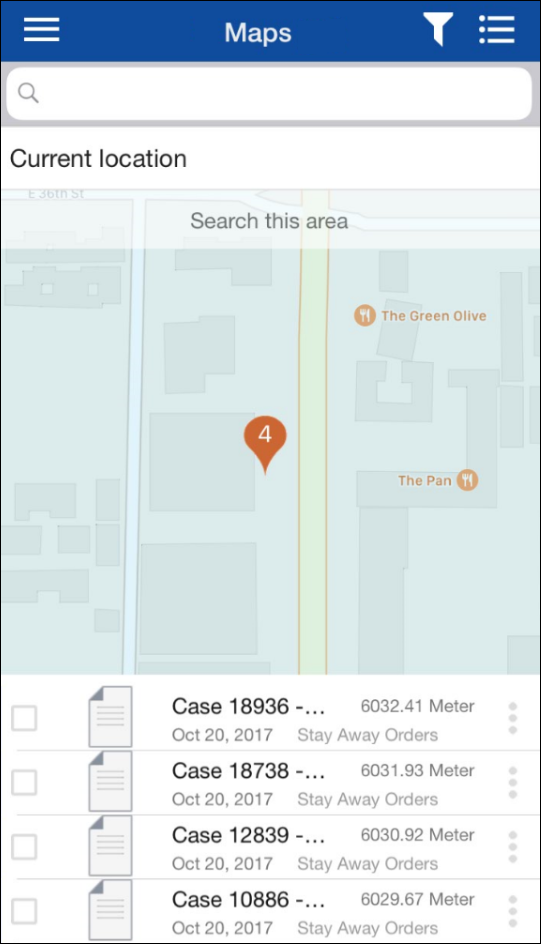
- Current map area/Search this area: To search a different area on the map, pan the map to the specific area, leave the search box blank, and press Search this area. This will display all documents associated with the location you have panned to.
- Address, neighborhood, city, state, or zip: To search for documents at a specific address, in a specific neighborhood, or in a specific city, state, or zip, press the location box at the top and enter an address, neighborhood, city, state or zip code. As you start typing, locations will be suggested to choose from. Press the device's search button.
- The documents will be displayed on the map as numbered pins. Press the pins to see the documents in a list. You can press the More options button next to each document in the list to view its metadata, share it, save it offline, etc. You can also press the List button in the top right corner of the map to hide the map and view the documents in a list. Press the Map button
 to view the map again.
 - To search for a specific document by its name, document text, fields, or annotation text, enter the search term in the search box at the top and press the device's Search button. You can also press the location box and choose to search for a specific document in your current location or current map area.
- To make your search more specific, press the Search Filter button
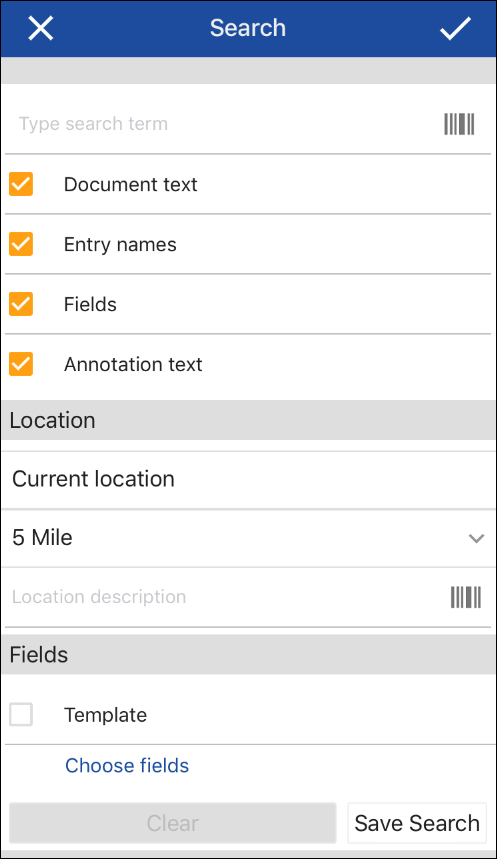
 in the top right of the map and specify your search criteria:
- Document text: Select this checkbox to search for a document by its text.
- Entry names: Select this checkbox to search for a document by it's name.
- Fields: Select this checkbox to search for a document by its fields.
- Annotation text: Select this checkbox to search for a document by its annotation text.
- Current location: Search your current location.
- Current map area: Search the area currently displayed on the map.
- Address neighborhood, city state, or zip: Search a specific address, neighborhood, city, state or zip.
- Radius: You can search for documents within a 1, 5, or 10 mile radius of the location currently displayed on the map.
- Location description: Search by the document's location description.
- Template: Select this checkbox to search for a document by a template assigned to it. After selecting this checkbox, select the template you want to search.
- Choose fields: Press Choose fields to search by specific fields assigned to the document. After selecting Choose fields, select the fields you want to search, then press OK.
- Type your search term in the search box at the top, or press the barcode button to scan a barcode to search.
- Once you've set up specific search criteria, you can save the criteria run it as a search later. Press Save Search to save the search criteria. The saved search will then be displayed under Saved Searches. To clear your search criteria and re-center the map to your current location, press Clear Search. Searches saved in Maps will also be displayed in the saved search list for repository searches.
- Press the check mark in the top right corner of the search pane to run the search.
Note: This search supports Laserfiche imaged documents as well as electronic documents.
Note: If geotag fields were configured on the Laserfiche Mobile Configuration page in Laserfiche Mobile 10.2.1 and earlier, an administrator will need to migrate the fields to a SQL table to take advantage of the new Laserfiche 10.3 geography map searches (e.g., search for documents within a certain radius).


