Customizing Tables
Note: This page applies primarily to the classic form designer.
This topic provides principles and examples for customizing tables in a form.
Selectors for Table Elements
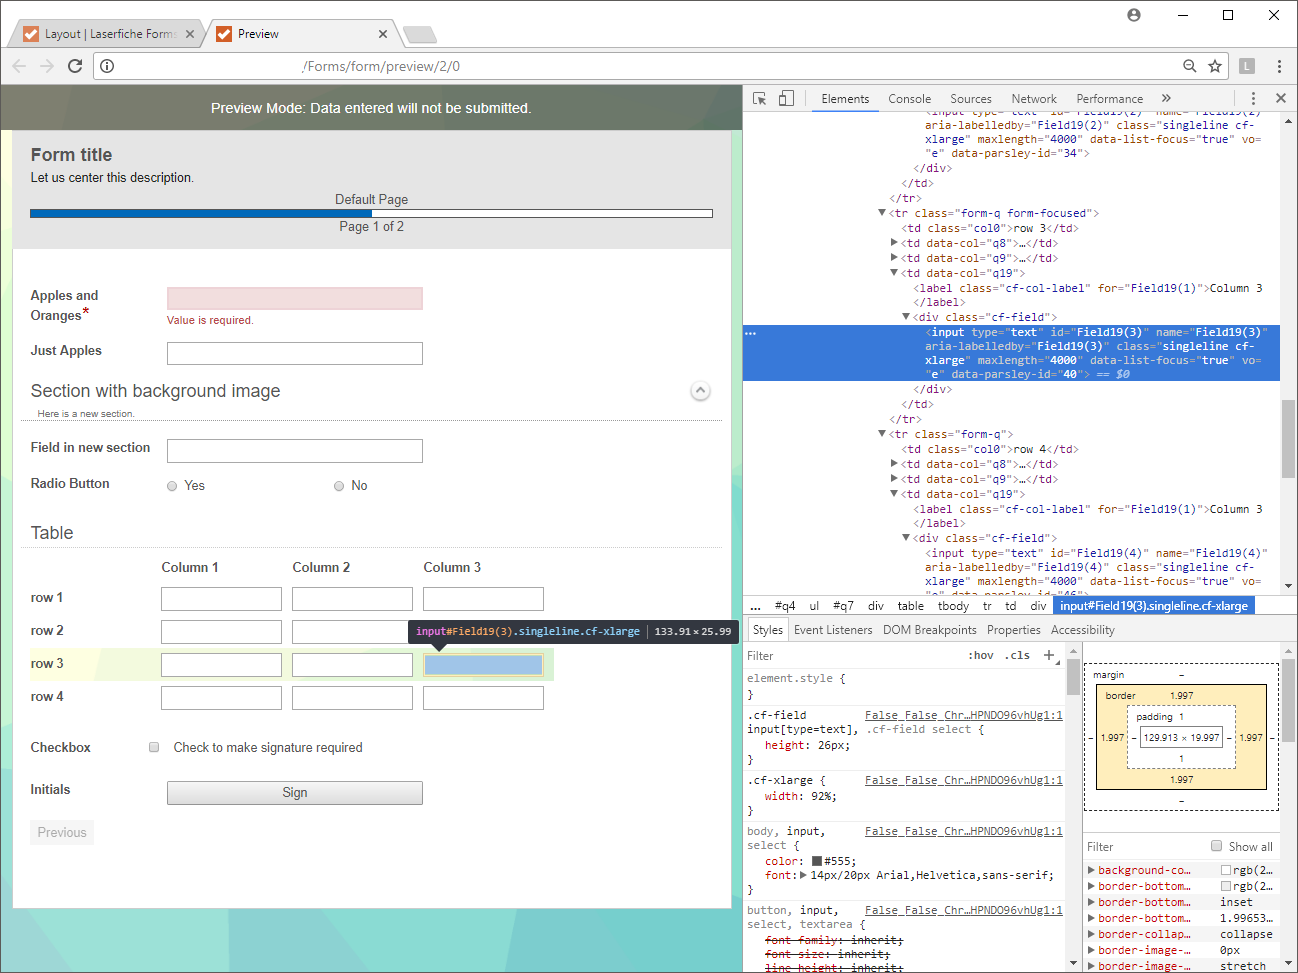
Fields in tables are not fundamentally different from other fields, apart from the format of their ids. While standalone fields have IDs of the format FieldFieldNumber, tables have IDs of the format FieldNumber(RowNumber). Every field in the same column has the same Number. The RowNumbers start from 1 and increase by 1 for each row. Suppose I want to target the entry that is in the third row, in the column with entry IDs starting with Field19. The ID for this field would be Field19(3). The following screenshot shows how you can find out what Number and RowNumber using Chrome's Developer Tools.

Iterating over Table Rows
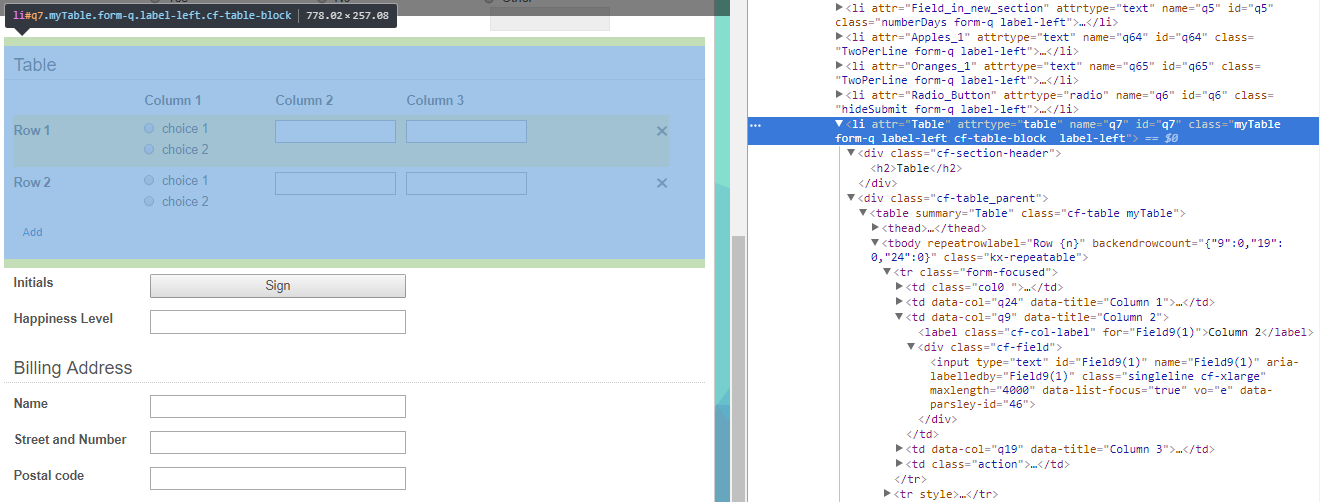
In jQuery, you can iterate over all elements that satisfy a certain condition by using the $('selector').each() function. To specify the elements to iterate over, you would first use a selector, then append .each to the end of the selector. In the following screenshot, we can see that the table is within a li element with class cf-table-block. The rows are specified within the body of the table, that is, within the tbody element. In this element, each row is represented by its own tr element. All tables have the class cf-table-block. If you want to implement a customization on a specific table, and you have more than one table on your form, you should assign a custom class to that table, then use that class' name in place of cf-table-block.

As an example, we show you how to color each row in a table depending on the radio button selection in that row. It shows you how the .each function may be used.
Coloring rows based on radio button selection
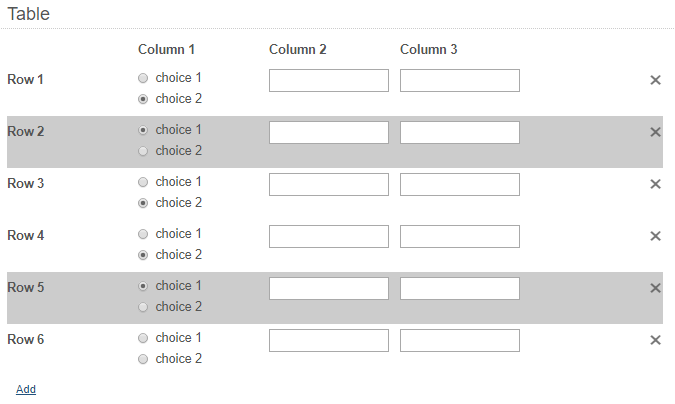
This JavaScript snippet causes a table row to be colored gray when "choice 1" is selected, and white when it is not.
$(document).ready(function () {

  rowcolorchange();

  $('.RadioTable').on('change','[type="radio"]', rowcolorchange);

  function rowcolorchange() {
    $('.RadioTable tbody tr').each(function () {
      $(this).find('input:checked').each(function () {
        if ($(this).val() == "choice 1"){
          $(this).closest('tr').css("background-color", "#cccccc");
        }else{
          $(this).closest('tr').css("background-color", "#ffffff");
        }
      });
    });
  }

});
The central piece of the code is the function rowcolorchange. This function uses the .each iterator to iterate over all elements that are within an element of class RadioTable, within a tbody element, and within a tr element. The custom class RadioTable should be assigned to your table in the form designer for this code to work.
Within each row, the program searches for an input element that is selected. If that element has the value "choice 1", the row is assigned a gray background color. Otherwise, the row is assigned a white background color. The .closest function ensures that the program searches for the closest tr element that is an ancestor of the input area, and colors that the appropriate color.
When the code runs successfully, the table should look like this:

Color Odd Rows of Table
The following JavaScript snippet assigns a non-white color to all odd-numbered rows in a table. It works for both tables with a fixed number of rows and tables where the user can append additional rows. It requires you to first assign the class rowcolortable to the table.
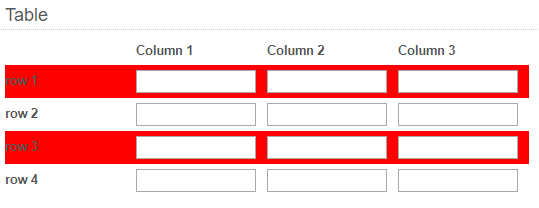
altColor assigns the color #ff0000 (red) to all "odd" tr elements, meaning the first element, third element, fifth element, and so on. It also assigns the color #ffffff (the default white) to all "even" tr elements.
The rest of the code specifies the events that cause altColor to be called. When the document is loaded, altColor is called immediately, to color any existing table rows. When the user clicks on the button that adds a new row, altColor is called again, to color any new rows added. This button is identified by its class, cf-table-add-row. When the user clicks on the button that removes a row, altColor is called. This button is identified by the class form-del-field.
$(document).ready(function() {

  altColor();

  $('.rowcolortable').on('click', '.form-del-field', function () {
    altColor();
  });

  $('.rowcolortable').on('click', '.cf-table-add-row', function () {
    altColor();
  });

  function altColor() {
    $("tr:odd").css("background-color", "#ff0000");
    $("tr:even").css("background-color", "#ffffff");
  }
});
An example of what a table colored this way looks like:

Dynamically Create Table Rows
When you create a table, you can set it to have a variable number of rows and have users click an "Add" button to add more rows. However, sometimes you may want to add a number of rows that depends on a variable that is specified elsewhere on the form. The following sample shows you how to do this with JavaScript. A certain integer is specified on a form field (in a real-world scenario, this is something that may be derived from a formula based on other fields), and the JavaScript automatically ensures that the table has a number of rows equal to that integer.
The expected behavior of the form can be seen in the following animation. After a number of days is entered in one field, the table adjusts to have the same number of rows as the number of days specified. This happens once the user moves away from the "Number of Days" field.

The JavaScript used for this was the following:
$(document).ready(function(){
  $('.numberDays input').change(function(){
    var rowNumber = $(this).val();
    $('.myTable .form-del-field').trigger('click');
    for (i=0; i<rowNumber; i++){
      $('.myTable .cf-table-add-row').trigger('click');
    }
  })
});
The "Number of Days" field was assigned the custom class numberDays. The table was assigned the custom class myTable. When the document has loaded, the script waits for a change to the numberDays field. It then stores the value of numberDays as the variable rowNumber. It deletes all existing rows except the first one in the table—by triggering a click on all the "X" buttons that delete a row. Then, it adds the required number of rows by triggering clicks on the "Add" button.