Configuring SCIM Integration with Okta
To configure SCIM in Okta:
- Open and sign into Okta.
- Expand Applications on the left, then click Applications.
- Select the desired app integration.
- Click the Provisioning tab.
- Click Integration.
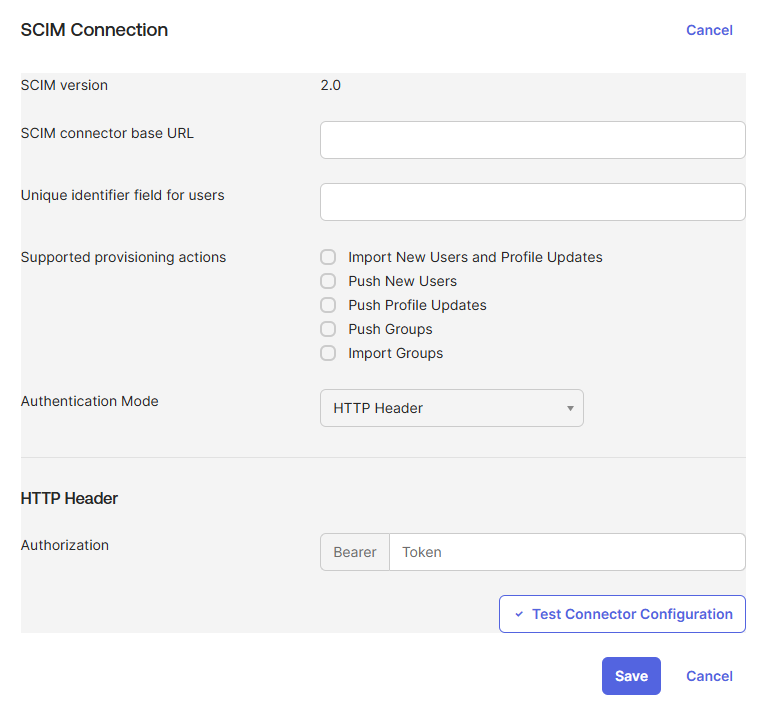
- Click Edit next to SCIM Connection.
- Paste the Management Endpoint URL you copied in step 7 of the Configuring SCIM in Laserfiche Cloud section next to SCIM connector base URL.
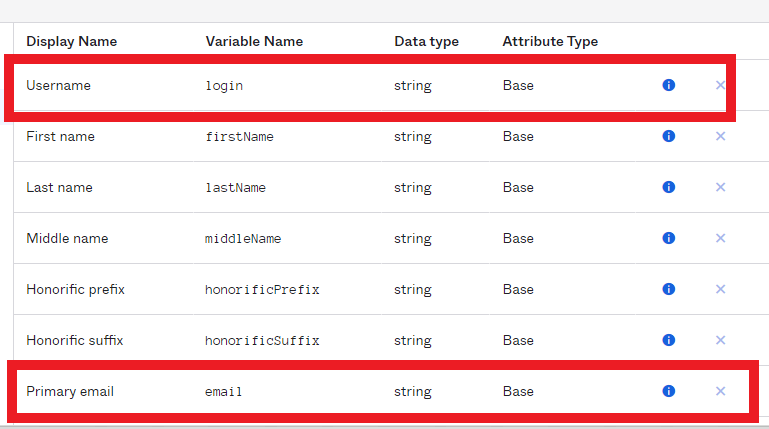
- Next to Unique identifier field for users, we recommend you enter your email and login. In Okta, these fields are displayed as Primary Email and Username.

- Next to Supported provisioning actions, select Push New Users and Push Profile Updates.
- Next to Authentication Mode, select HTTP Header.
- Paste the bearer token you copied in step 6 of the Configuring SCIM in Laserfiche Cloud section next to Authorization, under HTTP Header.
Note: If you misplace the bearer token, you can create a new one by clicking Rotate Token next to Rotate Bearer Token in the SCIM Provisioning tab in Laserfiche Account Administration.

- Click Save.
Review Okta's user administration instructions. Once SCIM is configured, adding, updating, or removing a user in Okta, will automatically add, update, or disable the user in Laserfiche.
Note: Users updated in Laserfiche will not be synced to Okta. This is a one-way communication from Okta to Laserfiche.
For more information on configuring SCIM with Okta, see the Okta Help Center.