Deadline
This activity defines one route for an entry before a timeout period or date (in a Primary Branch) and one or more for after (in a Deadline Branch). When the deadline is met, the Primary Branch is canceled and the Deadline Branch is processed instead. You can only add deadline branches, not primary branches.
Enforcing Deadlines in Workflow
Example: A company receives a purchase order from a client. To respond to the purchase order promptly, the workflow designer uses a Deadline activity that times out in three days. In the Primary Branch, the designer uses an Email activity to send the purchase order to the Receiving Department. After the Email activity, the designer uses a Wait for Entry Change activity to wait for the department's approval. If the department approves in three days or fewer, the customer receives an email that the purchase is being sent. However, if more than three days pass and the tasks are incomplete, the Deadline Branch starts and the Primary Branch ends. In the Deadline Branch, the supervisor of the Receiving Department is notified.
To set up this activity:
- Drag the activity from the toolbox pane and drop it in the Designer pane.
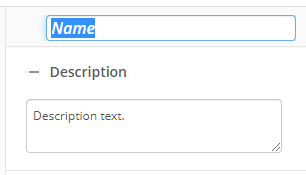
- In the properties pane, type a name and description of the activity.
- Select Deadline Branch in the designer pane.
- In the Deadline property box in the properties pane, specify the time out period.
- Select Due in to provide the length of time before the timeout.
- With the Exclude weekends and holidays option, you can exclude weekends and holidays from the specified length of time. The excluded weekends and holidays are based on those set up in your work schedule profile.
- With the Test Duration Date option, you can test the length of time before the timeout based on a provided value. When you select this option, a dialog appears, in which you can type a start date and (if you have tokens in the Due in section) sample values. When you click OK, the resulting deadline is returned.
- Select Due by to provide a specific date of the timeout.
- Select Due in to provide the length of time before the timeout.
- Drag and drop activities into Primary Branch. The Primary Branch defines the routing criteria for an entry before a specified timeout period is met.
- Drag and drop activities into Deadline Branch. The Deadline Branch defines the routing criteria for an entry after a timeout period is met.
- Optional:
To add a branch, click the following Plus in the center of the activity:

To delete a deadline branch:
- Select a deadline branch in the designer pane to highlight it.
- Click the Delete Selected Activity button
 in the toolbar.
You may want to disable branches if you only want to test specific sections of your workflow. To disable branches:
- Select a branch in the designer pane to highlight it.
- In the Description property box, clear Enable.
