Smart Invoice Profiles
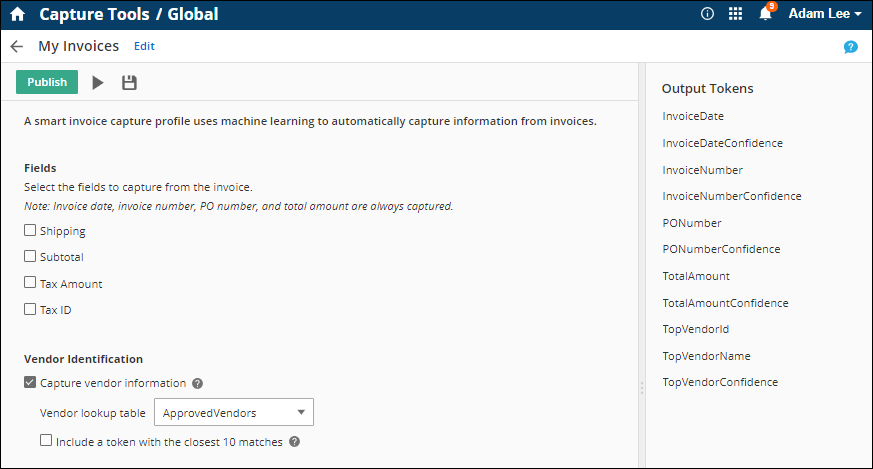
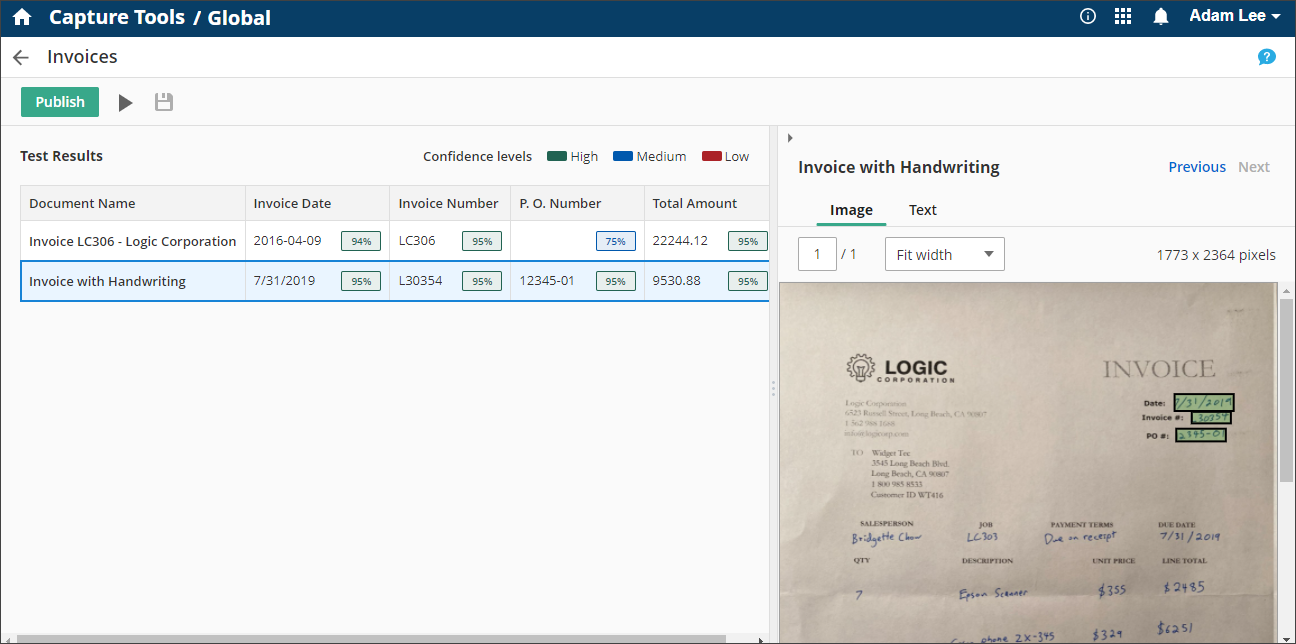
A ![]() smart invoice profile uses machine learning to automatically capture the invoice date, invoice number, purchase order number, and total amount due, in typed or handwritten form, and can also determine the vendor of the invoice by comparing invoice data to a vendor lookup table. Optionally, the profile can also capture the shipping address, invoice subtotal, tax amount, and tax ID. Similar to other capture profiles, the Run Capture Profile Workflow activity runs this smart invoice profile and outputs tokens for the captured data to be used later in the workflow.
smart invoice profile uses machine learning to automatically capture the invoice date, invoice number, purchase order number, and total amount due, in typed or handwritten form, and can also determine the vendor of the invoice by comparing invoice data to a vendor lookup table. Optionally, the profile can also capture the shipping address, invoice subtotal, tax amount, and tax ID. Similar to other capture profiles, the Run Capture Profile Workflow activity runs this smart invoice profile and outputs tokens for the captured data to be used later in the workflow.
Note: Currently, making changes to the default smart invoice profile (named Invoices) and saving it fails. If you need to configure a smart invoice profile, create a new one.
Creating a Smart Invoice Profile
To create a smart invoice profile
- On the Capture Profiles page, click Smart Invoice Profiles in the left pane. You can also click the New button or click the drop-down and select Smart Invoice Profile.
- Click New or click the drop-down next to New and select Smart Invoice Profile.
- Give the profile a name and description, then click Create.
- The invoice date, invoice number, PO number, and total amount will be automatically captured. Select one or more checkboxes next to the additional fields you want captured: shipping address, subtotal, tax amount, or tax ID.
- If you want to identify the invoice vendor and retrieve additional vendor information from the invoice, select Capture vendor information, then select the table containing the vendor information.
- The Include a token with the 10 best matches option will return multi-value tokens for the ten vendors with the closest match, not just the first vendor match. These tokens are: Top10VendorName, Top10VendorId, and Top10VendorConfidence. This allows an invoice reviewer to quickly choose alternate vendor information if there are close matches.
- When finished, save
, test,
 and publish
 the profile.
Vendor Identification
By enabling vendor identification, you can dynamically retrieve vendor information from invoices, as part of Smart Invoice Capture. Enabling vendor identification will make the following tokens available:
| Token Name | Description |
| TopVendorName | The name of the vendor as defined in the lookup table column: vendor_name |
| TopVendorID | The vendor ID as defined in the lookup table column: vendor_id |
| TopVendorConfidence | The confidence that the vendor was identified correctly, as a percentage. 100% being completely confident. |
| Top10VendorName (Optional) | The names of the top 10 vendors with the closest match, not just the first match |
| Top10VendorID (Optional) | The IDs of the top 10 vendors with the closest match, not just the first match |
| Top10VendorConfidence (Optional) | The confidence levels of the top 10 vendors with the closest match, not just the first match |
To use vendor identification, you'll need to first create a vendor table with the required columns listed below. Vendor tables are created as lookup tables under Data Management in Process Automation. Lookup tables can be created by importing Excel or CSV files, which is helpful if you have a list of approved vendors in this format or can export data in this format from a financial application.
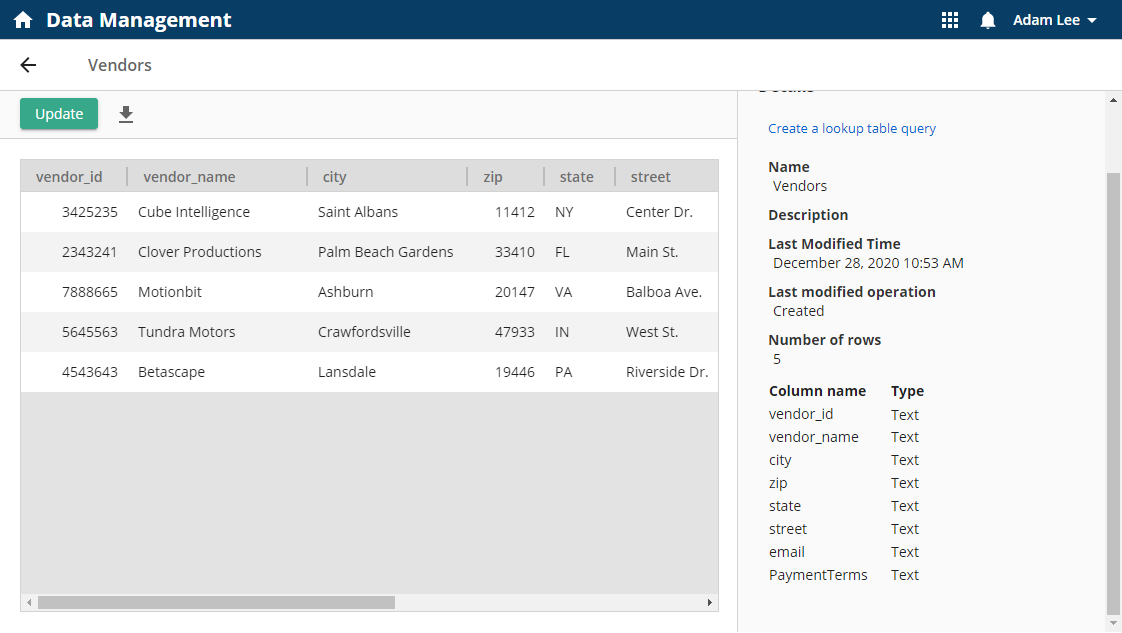
You will need to change the column names in the lookup table to match the column labels expected by Capture Profiles. You can include columns in addition to the ones required by Laserfiche to augment your lookup table.
Example: In addition to the required columns, you may want to add a Default GL Code column to reduce the need for users to manually perform invoice coding. You could also add a Payment Terms column to notate payment schedules or discounts.
Note: When importing your vendor table, we recommend editing the column types so they are all set to "Text."
Required Column Names
- vendor_id
- vendor_name
- city
- zip
- state
- street
Note: Vendor Identification is currently only supported for vendors with U.S. addresses.
Note: If you need to update your vendor list at any point, you can do so in a variety of ways.
- Manually export the lookup table, make your edits, and then import it again.
- Automatically import updated lookup tables using the Replace Lookup Table Data activity.
- Automatically add vendors, row by row, using the Capture Profile designer.
Testing an Invoice with the Smart Invoice Profile
- On the Capture Profiles page, click Smart Invoice Profile in the left pane, then open the Invoices profile.
- Click the
 Test profile button
  at the top of the page.
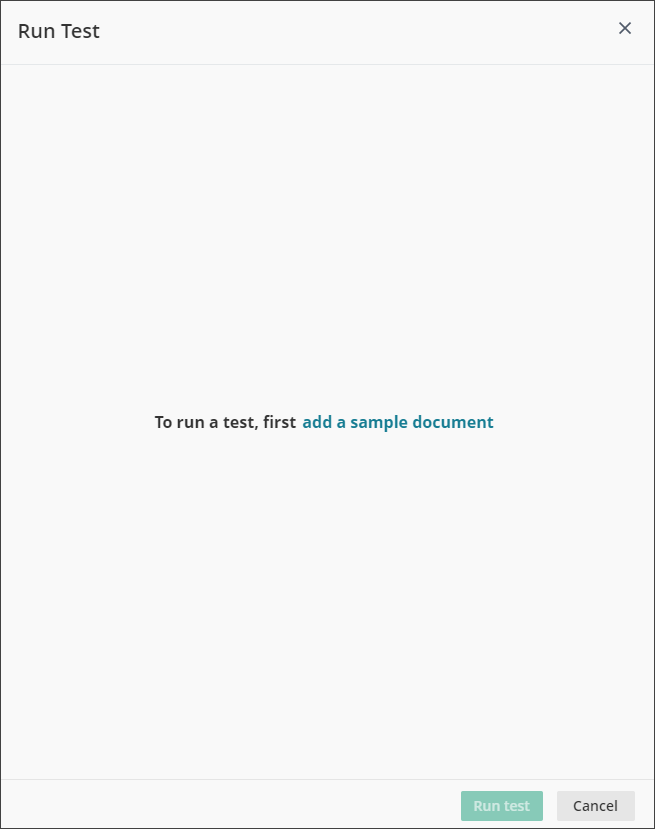
 - In the Run Test dialog box, upload the sample invoices you want to test the profile against by clicking Add sample documents.It's best to add invoices that are similar to the invoices you want the profile to run on so your results will be more accurate and meaningful.
- If you clicked add a sample document, you can add one or more image files (.png, .jpg, .gif, .bmp, and .tiff) that are samples of the pages you want to capture data from. You can add multi-page .tiff and .pdf documents if needed.
- Then, click choose files to upload to select image files.
- After uploading sample documents, click Save to start uploading the image files.
- Select the checkboxes next to the documents you want to include in the test, and click Run test. You will be prompted to save the profile if you have not already saved it.
- Follow steps 3 and 4 to add additional sample documents to test against.
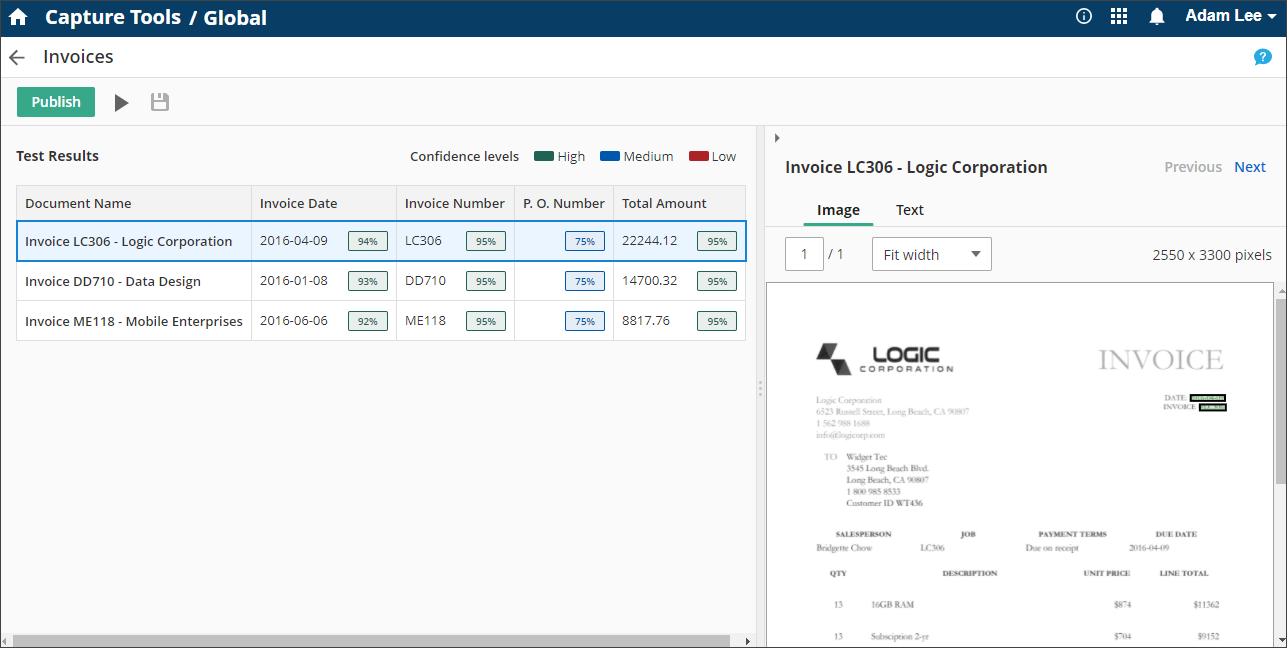
 The test results will be listed in table format. Each sample document will be listed in the left most column and the four values captured from each sample document, along with their confidence percentages, will be in the remaining columns.
 - The confidence percentages reflect how confident the machine learning algorithm is that the displayed data was captured correctly. When the Workflow activity runs this smart profile, the confidence levels will be captured as tokens so process designers can use conditions to set their own confidence thresholds and route data for additional manual validation.
- Green indicates a high confidence (81% - 100%)
- Blue indicates a medium confidence (31% - 80%)
- Red indicates a low confidence (0% - 30%).
- Click a sample document will display a preview of the document on the right so you can see the information that was captured.
- Hover over a green box on the image or text will display the value captured.
- The Fit width drop-down menu lets you zoom the image to different zoom levels.
- Click Text above the image preview to display the OCRed text of the sample document. Viewing the document text can help diagnose accuracy issues. If OCR results are poor, a higher quality document may be needed.
- Click the Prev or Next links to move to the previous or next sample document.
- The confidence percentages reflect how confident the machine learning algorithm is that the displayed data was captured correctly. When the Workflow activity runs this smart profile, the confidence levels will be captured as tokens so process designers can use conditions to set their own confidence thresholds and route data for additional manual validation.
Note: Smart Invoice Capture supports multi-page invoices; however, the profile will only search for data across the first 10 pages of the invoice.
Once tested, you can run this profile using the Run Capture Profile activity in Workflow.
Free Training: View the Getting Started with Accounts Payable in Laserfiche guide in Aspire.
