Escalation
This activity runs a sequence of activities based on a timeout period. You can define one initial sequence of activities to run in the primary branch, and one or more to run after a specified wait time in the escalation branch.
You can add as many escalation branches as you would like, but you can only have one primary branch. All branches that start must complete before the workflow can continue. Learn about tokens this activity produces
Example: Henry is asked to comment on a document. The workflow designer starts by adding an Escalation activity. In the Primary Branch, the designer adds a Wait for Entry Change activity to wait for Henry to leave his comments. If he does not do so in two days, an Escalation Branch engages and sends an email to his manager using an Email activity and tags the document as Urgent using an Assign Tags activity. If Henry does not comment on the document after another day, another Escalation Branch engages and sends a high-priority email to his manager using one Email activity and emails a warning to Henry with another Email activity. If Henry does not comment on the document after two more days, his manager will receive an email each day, and Henry will receive a warning each day. For the workflow to continue, Henry must satisfy the wait condition in the Primary Branch by commenting on the document.
To set up this activity:
- Drag the activity from the toolbox pane and drop it in the Designer pane.
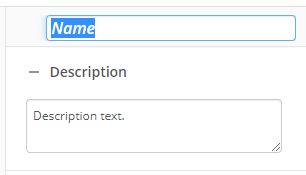
- In the properties pane, type a name and description of the activity.
- Select the escalation branch in the designer pane.
- In the Initial Wait property box in the properties pane, specify a wait period.
- Escalate after times out after a length of time.
- With the Exclude weekends and holidays option, you can exclude weekends and holidays from the specified length of time. The excluded weekends and holidays are based on those set up in your work schedule profile.
- With the Test Duration Date option, you can test the time out period based on a provided value. When you select this option, a dialog appears, in which you can type a start date and (if you have tokens in the Escalate after section) sample values. When you click OK, the resulting escalation date is returned.
- Escalate on times out after a specific date and time.
- In the Repeat Options property box, select Run branch multiple times to have the escalation branch repeat if the primary branch has not been completed. You can exclude weekends and holidays based on the schedule set in your work schedule profile.
Note: The wait time between each repetition of an escalation branch starts after the escalation branch last finished. For example, if an escalation branch has an Email and Wait Condition activity and is set to repeat after one hour, the branch will repeat one hour after the wait condition is met. It will not repeat one hour after the escalation branch started.
- Drag and drop activities into Primary Branch. Primary Branch defines the routing criteria for an entry before a wait period.
- Drag and drop activities into Escalation Branch. Escalation Branch defines the routing criteria for an entry after a wait period.
- Optional: Add one or more branches by clicking the following Plus in the center of the activity.

Note: When there are multiple escalation branches, the wait time for all branches start at the same time. The times are not additive.
To delete an escalation branch:
- Select an escalation branch in the designer pane to highlight it.
- Click the Delete Selected Activity button
 in the toolbar.
You may want to disable activities if you only want to test specific sections of your workflow. To disable activities:
- Select an activity in the designer pane to highlight it.
- In the Description property box, clear Enable.
