Set Records Management Properties
Records management in Laserfiche allows you to process records and record folders through their life cycles. This activity allows you to set properties on individual records or record folders. The activity includes various common management actions, such as cutting off a record and setting a filing date. The activity allows you to specify the management action and the record to which you want to apply the management action. See Records Management to learn more about records.
To set up this activity:
- Drag the activity from the toolbox pane and drop it in the Designer pane.
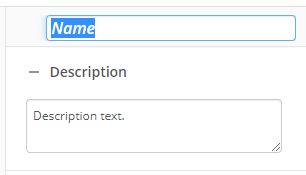
- In the properties pane, type a name and description of the activity.
- In the Connection Profile property box, select the repository you want the activity to use.
- In the Action property box, set the action you want to perform. Each action is described in detail following this section.
- In the Apply Properties To property box, select the entries on which the actions are applied.
Example: You import a Word document in Laserfiche. You complete the document two weeks before importing it, and want to update the filing date so the date reflects when the document was completed. To use that document, you would add a Find Entry activity to your workflow definition. You would then reference the entry using the Output Entry of the Find Entry activity in the Apply Properties To property box.
Set Filing Date
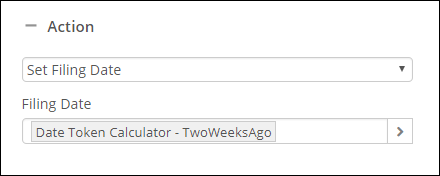
The filing date of a record is the date on which the record is created. You might want to set a different filing date for various reasons. In one case, you may have created a record two years ago but are just importing it into Laserfiche. In another case, you imported a blank Word document into Laserfiche but only completed the document two weeks after import. The action in this activity allows you to set the filing date to something other than what the default filing date is.
Example: You import a blank Word document in Laserfiche, but you completed the document two weeks before importing it. The following image shows the configuration for a process that automatically updates the filing date to two weeks before the file was added to the repository:
Set Event Date
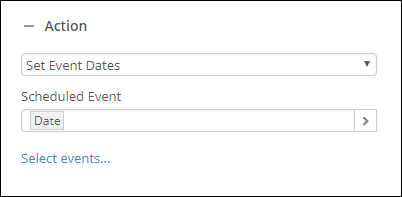
An event is an occurrence that causes a record with an Event, Time+Event, or Interval+Event cutoff instruction to be cut off, or that may trigger an alternate retention schedule. You can use this activity to set an event date associated with a record folder's cutoff instructions, or with an alternate retention schedule. See Setting an Event Date to learn more about this action in Records Management.
Example: The following configuration cuts off the record in the Apply Properties To property box on the date on which the workflow runs:
Cutoff
Cutting off a record or record folder means the record or record folder is closed and cannot be modified or deleted. It also marks the beginning of the retention schedule. As long as no disposition actions have been performed, records and record folders can be uncut off. See Cutting Off a Record or Record Folder to learn more about this action in Records Management.
Set Retention Schedules
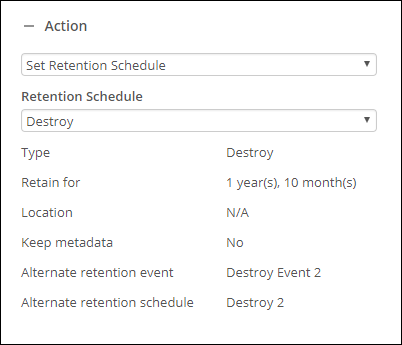
A retention schedule is a collection of rules that governs how records are to be stored and for how long. A retention schedule is created and defined in the Laserfiche Repository Administration area. The action in this activity allows you to select one of the retention schedules configured under Retention Schedules in Laserfiche Administration Console and then apply that to the record in the Apply Properties To property box of the activity.
Example: The following configuration makes the record in the Apply Properties To property box eligible for destruction, along with the metadata of the record, after 1 year and 10 months. If the retention event does not occur, the alternate event is taken.
Add Hold
Adding a hold to a record or record folder prevents users from modifying the record and stops the record’s records management life cycle. When you add a hold, you must provide a reason for the hold, such as legal or regulatory actions. You can select this reason from a list of existing holds or choose to create a new reason. You can also add a due date used for reference. The due date is when the hold is expected to complete. If you select a reason from a list of existing holds, the due date is tied to the existing hold you choose.
Once the need for the hold passes, the hold may be removed and the document will become modifiable again, continuing through its record life cycle. See Adding and Removing Holds to learn more about this action in Records Management.
Example: Your company policy is to destroy financial records after 1 year. However, at the time of audit, you must ensure that the records are not destroyed, modified, or transferred. You would apply a hold for the duration of the audit. Once the audit is over, you can use the Remove Hold option to remove the hold.
Remove Hold
Removing a hold can only be performed on the record on which the hold was placed. If you add a hold to a parent folder, you cannot directly remove a hold from a document within that parent folder; you must instead remove the hold from the folder. See Adding and Removing Holds to learn more about this action in Records Management.
Example: You applied a hold to financial records so that the financial records would not be tampered with during an audit period. However, once the audit is over, you want to destroy the records. You can use the Remove Hold option to remove the hold.
Set Cutoff Instructions
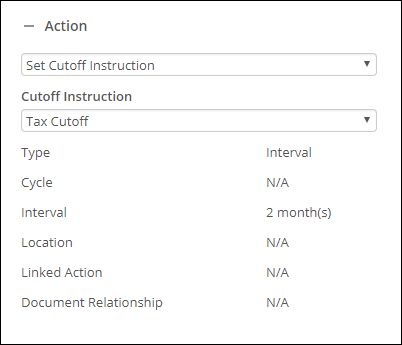
A cutoff instruction defines when a record folder or record will become eligible for cutoff, and therefore when its retention schedule will begin. Each type of cutoff instruction provides a different way of calculating cutoff eligibility, offering you a more flexible solution to managing your records. See Cutoff Instructions to learn more about this option in Records Management.
Example: The following configuration means the record in the Apply Properties To property box is eligible for cutoff exactly two months after the filing date. If the record is filed February 15, the record is eligible for cutoff on April 15:
You may want to disable activities if you only want to test specific sections of your workflow. To disable activities:
- Select an activity in the designer pane to highlight it.
- In the Description property box, clear Enable.
Free Training: Automating Records Management in Laserfiche Cloud course in Aspire.
