Configure Encrypted SAML Assertions
Microsoft Entra ID and Okta provide an optional feature of encrypting the SAML assertions emitted to Laserfiche. Both identity providers include an option where you can import a public key certificate from Laserfiche.
This feature is optional and provides an additional layer of security beyond the standard measure of communicating over encrypted HTTPS/TLS channels, but introduces additional certificate administration overhead.
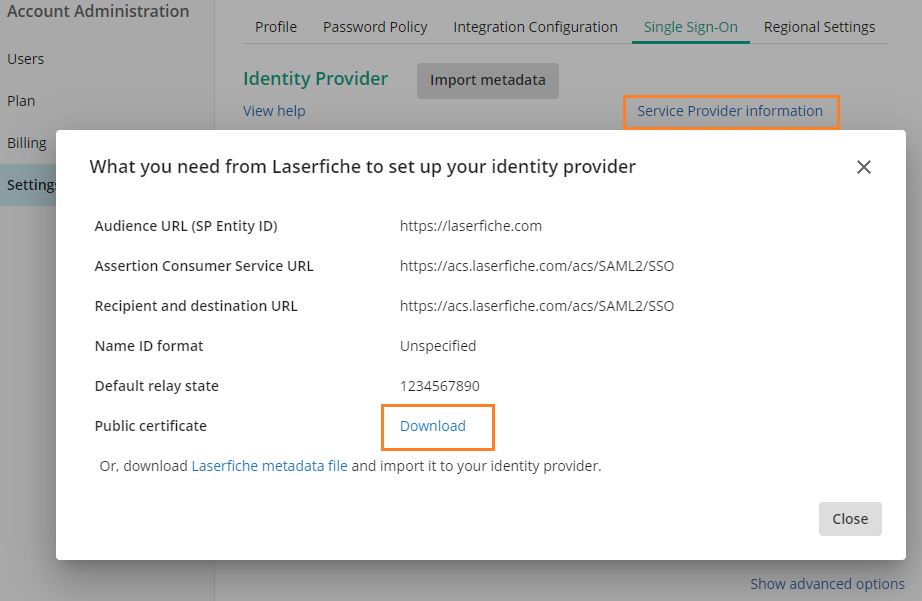
To download the certificate from Laserfiche
- Sign in to Laserfiche Cloud and navigate to the Account Administration service.
- View the Settings page and select the Identity Provider tab.
- Select the Show service provider information link to view additional information.
- Locate the Public certificate field and select the Download link to download the public key certificate that you can import into your identity provider.

Configure Microsoft Entra SAML token encryption
- Sign in to the Microsoft Entra admin center.
- On the Laserfiche application page, select Token encryption.
- On the Token encryption page, select Import Certificate to import the certificate downloaded from the Laserfiche Cloud service provider information dialog.
- Activate encryption by selecting the ... menu next to the thumbprint status and select Activate token encryption certificate.
See Microsoft's documentation for additional information
Configure Okta Assertion Encryption
- Sign in to the Okta Admin Console.
- Go to Applications > Applications and select the Laserfiche app integration.
- Select the General tab.
- In the SAML Settings section, select Edit.
- On the Configure SAML step, select Show Advanced Settings.
- Next to the Assertion Encryption field, choose whether the SAML assertion is encrypted.
- The Encryption Certificate field appears when Assertion Encryption is set to Encrypted. Upload the certificate downloaded from the Laserfiche Cloud service provider information dialog.
- Finish the remaining steps in the Application Integration Wizard.
See Okta's application integration wizard SAML field reference for additional information