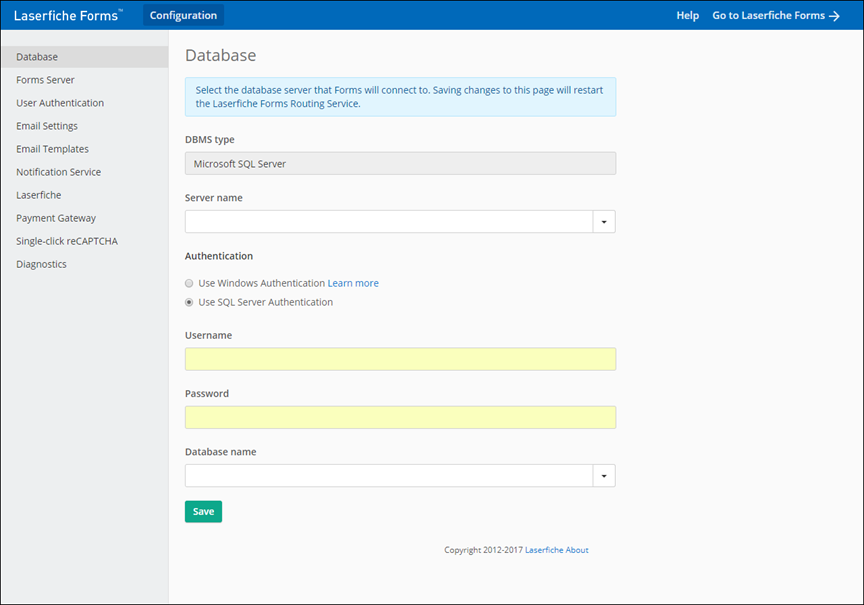
In the Database tab of the Configuration page, you can specify the database Forms will use and how forms will connect to it.
Note
: To connect to the Forms database, an account must have the following roles:
db_datareader,
db_datawriter,
db_ddladmin.
You must also grant the execute stored procedure permission. To grant the account this role for the Forms database, create a database role "db_executor" and grant the account the execute permission:
CREATE ROLE db_executor;
GRANT EXECUTE TO db_executor;You can also do this with the following query:
GRANT Execute ON [dbo].FormsDatabase TO [domain\user]

Database settings
When configuring a Laserfiche Forms installation, the first step is to connect Laserfiche Forms to the database it will use to store information.
To connect Forms to a database
- Open the Laserfiche Forms Configuration page to the Database page.
- In the Server name field, enter the name of the machine where the database is located.
- Under Authentication, select whether to Use Windows Authentication or Use SQL Server Authentication.
- In the Database name drop-down list, select the database that Forms will use, or enter the name of the new database you want to create.
- At the bottom of the page, click Save. If you specified a new database name, you will be prompted to create it. Clicking Save will restart the Laserfiche Forms Routing Service. If the service fails to restart automatically, restart it manually and then continue the configuration. Learn more
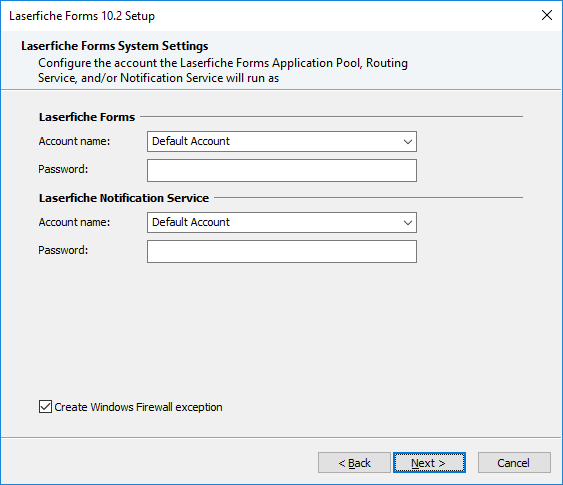
Note: If you select Use Windows Authentication, Laserfiche Forms will attempt to use the account specified during installation to connect to the database server. Learn more
Note: You must specify a Microsoft SQL server. Other database management systems are not supported at this time.
Using Windows Authentication with the database server
You can set Forms to use Windows Authentication to connect to your database server. Use this setting if you want Forms to sign in to your database server with Windows credentials. When this option is selected, Forms will use the account specified during installation to authenticate to the database server.
Note: If the ![]() account specified during installation will not authenticate to your database server, you will need to manually change the account settings for the Laserfiche Forms Routing Service and Application Pool in order to use this feature.
account specified during installation will not authenticate to your database server, you will need to manually change the account settings for the Laserfiche Forms Routing Service and Application Pool in order to use this feature.
To change the account settings for the Laserfiche Forms Routing Service
- Click the Windows Start button on the computer the Forms Server is installed on. (If you are running Windows 8, from the desktop select Settings from the Charms bar.)
- Select Control Panel.
- Select Administrative Tools. (If you are running Windows 7 or 8, you may need to select System and Security and click Administrative Tools.)
- Double-click Services.
- Find the Laserfiche Forms Routing Service in the list and double-click it.
- In the Laserfiche Forms Routing Service Properties dialog box, click the Log On tab.
- Select the account that the routing service should log on as. Click Apply to save any changes you make. When you are finished, click OK.
- In the Services window, select the Laserfiche Forms Routing Service, and then click Restart.
To change the account settings for the Laserfiche Forms Application Pool in IIS
- From the desktop, click the Windows Start button. (If you are running Windows 8, from the desktop select Settings from the Charms bar.)
- Select Control Panel.
- Select Administrative Tools. (If you are running Windows 7 or 8, you may need to select System and Security and click Administrative Tools.)
- Double-click Internet Information Services (IIS) Manager.
- In the IIS Manager, expand the node of the machine where Forms is installed. Then, click Application Pools.
- Right-click the FormsAppPool and click Advanced Settings....
- In the Process Model section, click the ... next to Identity.
- Select the built-in or custom account that the FormsAppPool should run as.
- When you are finished, click OK.
Upgrading to Forms 10.x
When upgrading to Forms 10, you'll need to upgrade the database that Laserfiche Forms uses. After clicking Save at the bottom of the page, you'll be prompted to update your database to 10.
You can check the upgrade's progress by querying the Forms database for the number of rows that still need to be migrated. Use this SQL query to get that number: SELECT COUNT(*) FROM [cf_bp_data] WHERE [member_path] is NULL
Important: If you are upgrading to 10 and you using a Forms 9.0 database server, you will need to manually disable Federal Information Processing Standard (FIPS) compliant algorithms on the Forms Server before upgrading the database. After disabling FIPS compliant algorithms, restart the Forms Server machine and proceed with the upgrade. Once the Forms database has been upgraded, you can enable FIPs compliant algorithms again. Learn more about enabling and disabling FIPS compliant algorithms.
