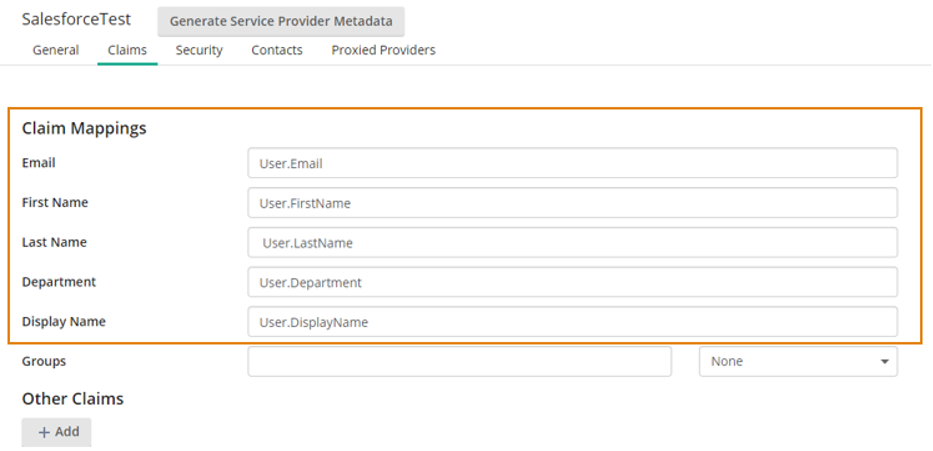
After registering the SAML identity provider, view the Claims tab to map SAML claims to Directory Server claims. Directory Server supports several pre-defined claims that will be applied to the user's profile. View your SAML identity provider's settings to find the corresponding claim.
- In Laserfiche Directory Server, click Settings.
- Click the Identity Providers tab.
- In the left pane, click the name of your identity provider.
- Select the Claims tab.
- In the Claim Mappings section, type the attribute names you configured in your identity provider's configuration site. For example, the following image shows the custom attributes created in Salesforce, typed into the corresponding field names:

- To add group claim mappings, see Group Claim Mappings.
- To add custom claim mappings, see Custom Claims.
- Click Save to finish.
Note: SAML attribute Name is needed for Directory Server claim mappings. SAML attribute FriendlyName will not work for claim mappings. To learn more about intercepting the SAMLResponse, navigate to Intercepting the SAML Response.
Note: For more information on claim mappings, navigate to configuration pages for your specific SAML identity provider: Okta, Salesforce, Shibboleth, and Microsoft Entra ID.
Note: Claims are automatically updated in Laserfiche Directory Server when a user signs in based on the SAML token.