If multi-factor authentication has been enabled, Laserfiche users are required to configure MFA during their next sign in
- Sign in using your current credentials.
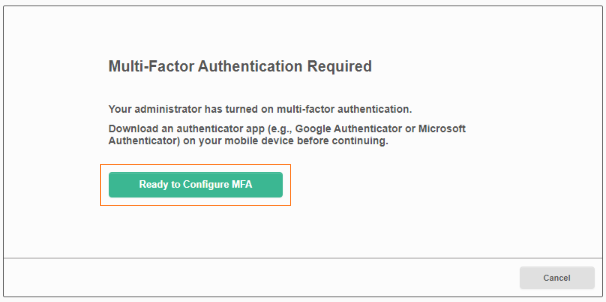
- If multi-factor authentication has been enabled, you will be automatically redirected to the Multi-Factor Authentication Required page. Click Ready to Configure MFA to continue.
- Download an authenticator app, such as:
- Google Authenticator
- Microsoft Authenticator
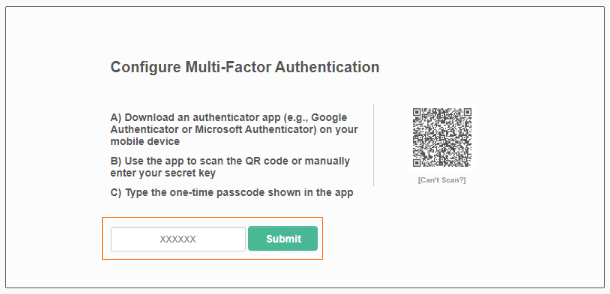
- To configure MFA on your authentication app, choose one of the options below
- Use the app to scan the QR code provided on the Configure Multi-Factor Authentication page
- Click [Can't Scan?] to receive a secret key. Then, manually type the secret key into the authentication app.
- In the Configure Multi-Factor Authentication page, type the one-time passcode shown in the authenticator app. Click Submit.
Signing in Using Multi-Factor Authentication
After multi-factor authentication has been configured, follow these steps to sign in.
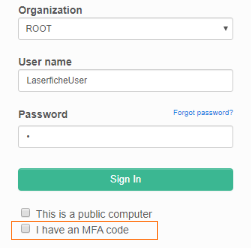
- Enter your user credentials in the sign in page. Check the box for I have an MFA code. For an example, see the image below.
- Once the check-box is checked for I have an MFA code, the Sign In button will gray out. Using your authentication app, enter the code. For an example, see the image below.
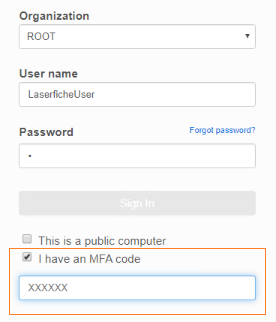
- Click the Sign In button to sign-in.
Note: If the device with the secret key is lost or changed, contact your administrator to clear your existing MFA secret. Administrators can learn more about clearing the MFA secret by navigating to Clear MFA Secret.