Web Services
exchange, Exchange, sharepoint, Sharepoint, SharePoint, Forms, HTTP Web Request, HTTP Form Post
To add a Web service
- Open the Add Web Service dialog box from one of the following places:
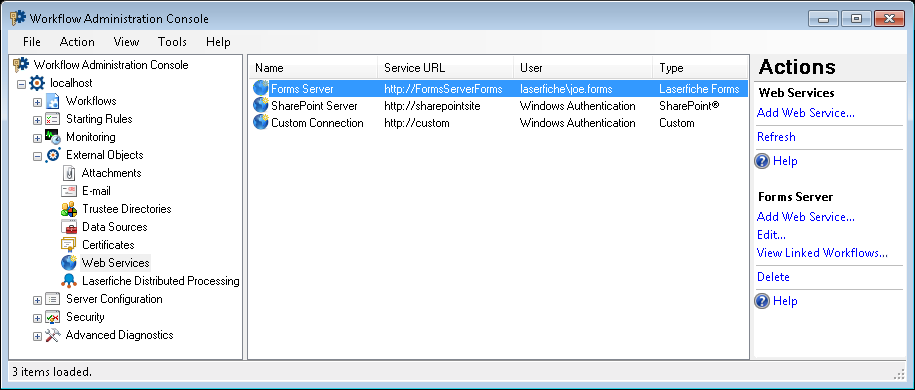
- In the Web Services node of the Workflow Administration Console, click Add Web Service.
Show me this node.
- In the Server property box for the Create List Item activity, the Invoke Business Process activity, or the Retrieve Laserfiche Forms Content activity, select the Manage servers from the drop-down menu. Alternatively, select Manage Web services from the HTTP Web Request or HTTP Form Post activity's Web Services property box. In the
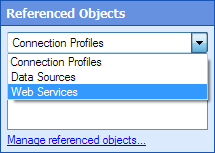
- Select Web Service from the
Note: The Web Services option only appears if you have already configured one or more Web services with a Create List Item, Retrieve Laserfiche Forms Content, HTTP Web Request, or HTTP Form Post activity. To show the Reference Objects property box, select a blank area in the Designer Pane and click the Advanced button
at the top of the Properties Pane.
Note: If you open a workflow file that refers to a Web service not configured on your Workflow Server, the text [Not found] will be added to the end of the Web service's name. In this situation, click the Add button. The Add Web Service dialog box will be populated with all the properties that were saved with the workflow file. Make any necessary changes, and click OK. Alternatively, if you configure a new Web service from the Workflow Designer with the same name as the Web service that wasn't found, the not-found service will be replaced and all references will be updated. If you configure a new Web service with the same name in the Workflow Administration Console, you will need to manually assign the new Web service to each activity.
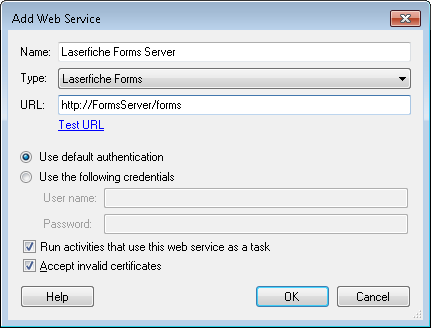
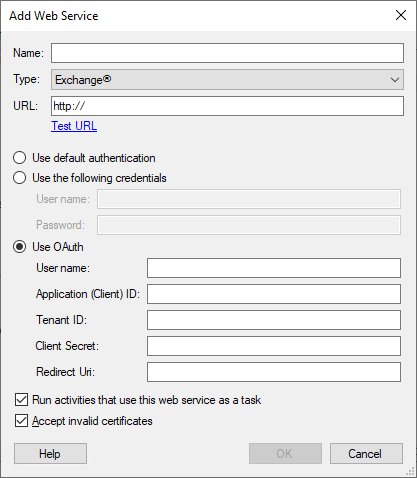
- In the Add Web Services dialog box, configure the following:
- Name: Type a name for the Web service. The name you provide here will appear as an option for the Workflow activities that can interact with Web services, so ensure the name is clear and informative.
- Type: Select the type of Web service you want to connect to. If Exchange® is selected, the option to Use OAuth will be displayed in addition to the two other authentication options.
- URL: Type the website for the Web service you want to connect to. Click Test URL to ensure that the URL is correct and that Workflow can connect to the Web service.
- Specify your login information for the Web service. Choose to Use default authentication to log into the Web service with the Windows name and password you are currently logged in with. Alternatively, choose to Use the following credentials and provide a user name and password that can access the Web service.
Note: To configure a Forms server, you must login as user who has the Creator role on the Forms server. More information.
- If connecting to a Microsoft 365 Exchange service, select Use OAuth and provide the credentials necessary for that service:
- Username: The username of the account associated with the mailbox.
- Application (client) ID: This is the application ID assigned to your app. The ID can be found in the portal where the app was registered.
- Client secret: The client secret generated for the app in the app registration portal.
- Tenant ID: The directory tenant that granted the app the permissions requested, in GUID format. The ID can be found in the portal where the app was registered.
- Redirect Uri: The destination URI when returning authentication responses (tokens) after successfully authenticating users. Also referred to as reply URLs.
Note: You must create an app registration within the Microsoft 365 or Azure management portal to obtain the information necessary. When registering for Exchange API access, the Exchange user created for this purpose must have "full_access_as_app" permissions with full access to all mailboxes.
Note: For Exchange Online, set the URL to https://outlook.office365.com/ews/exchange.asmx, and the redirect URI to https://login.microsoftonline.com/common/oauth2/nativeclient unless otherwise specified by Microsoft.
- Advanced: Clear the Run activities that use this Web service as a task to run these activities within Workflow. Selecting this option runs these activities as external processes, freeing Workflow resources. Clearing this option will use more Workflow resources but can make the activity run more quickly. We recommend leaving this option selected unless otherwise directed by your Workflow administrator.
- Advanced: Clear Accept invalid certificates to only accept valid certificates from the Web service. You may want to clear this option if a secure connection to this Web service is important; however, in many cases, this level of security is not necessary. Select this option to accept invalid, out-of-date, or self-signed certificates from the Web Service.
- Click OK.
Note: The URL must start with http:// or https://.
Note: To connect to a Laserfiche Forms server, you must first specify your Workflow Server on the Forms Server Configuration page. If the Workflow Server is not specified in Forms, Workflow will receive an HTTP (401) Unauthorized error when connecting to the Forms server, and the Forms server will record a "WFAPIAccessDenied" event log message with additional details.
Important: If you are using an HTTP connection and provide a user name and password (as opposed to using default authentication), this information may be sent unencrypted and unsecured over your network.
- In the Add Web Services dialog box, configure the following:
- Name: Type a name for the Web service. The name you provide here will appear as an option for the Workflow activities that can interact with Web services, so ensure the name is clear and informative.
- Type: Select the type of Web service you want to connect to.
- URL: Type the website for the Web service you want to connect to. Click Test URL to ensure that the URL is correct and that Workflow can connect to the Web service.
- Specify your login information for the Web service. Choose to Use default authentication to log into the Web service with the Windows name and password you are currently logged in with. Alternatively, choose to Use the following credentials and provide a user name and password that can access the Web service.
- Advanced: Clear the Run activities that use this Web service as a task to run these activities within Workflow. Selecting this option runs these activities as external processes, freeing Workflow resources. Clearing this option will use more Workflow resources but can make the activity run more quickly. We recommend leaving this option selected unless otherwise directed by your Workflow administrator.
- Advanced: Clear Accept invalid certificates to only accept valid certificates from the Web service. You may want to clear this option if a secure connection to this Web service is important; however, in many cases, this level of security is not necessary. Select this option to accept invalid, out-of-date, or self-signed certificates from the Web Service.
- Click OK.
Note: The URL must start with http:// or https://.
Note: To connect to a Laserfiche Forms server, you must first specify your Workflow Server on the Forms Server Configuration page. If the Workflow Server is not specified in Forms, Workflow will receive an HTTP (401) Unauthorized error when connecting to the Forms server, and the Forms server will record a "WFAPIAccessDenied" event log message with additional details.
Note: To configure a Forms server, you must login as user who has the Creator role on the Forms server. More information.
Important: If you are using an HTTP connection and provide a user name and password (as opposed to using default authentication), this information may be sent unencrypted and unsecured over your network.
To modify a Web service
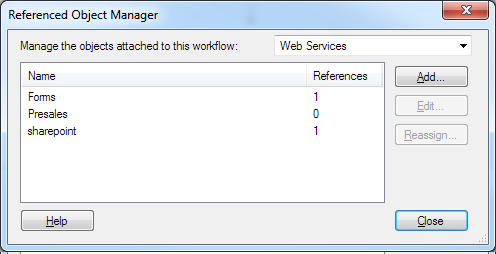
- Select a Web service in the Web Services node of the Workflow Administration Console and click Edit. Alternatively, open the Referenced Object Manager from the Referenced Objects property box, select a Web service, and click Edit.
- Make any desired changes to the Web service's URL, type, authentication, or advanced task settings in the Edit Web Service dialog box.
- Click OK.
To delete a Web service
- In the Web Services node of the Workflow Administration Console, select a Web service.
- Click Delete under the Web service's name in the Actions Pane, or right-click the Web service and select Delete.
To assign a different Web service to multiple activities in a workflow
Example: The ABC Company has a new SharePoint® server. Instead of individually updating each activity that accesses the old SharePoint® server, you can update all the activities once with the Reassign option.