Administration Console Document Classes
In the Quick Fields Administration Console
- Click
 Document Classes in the top toolbar.
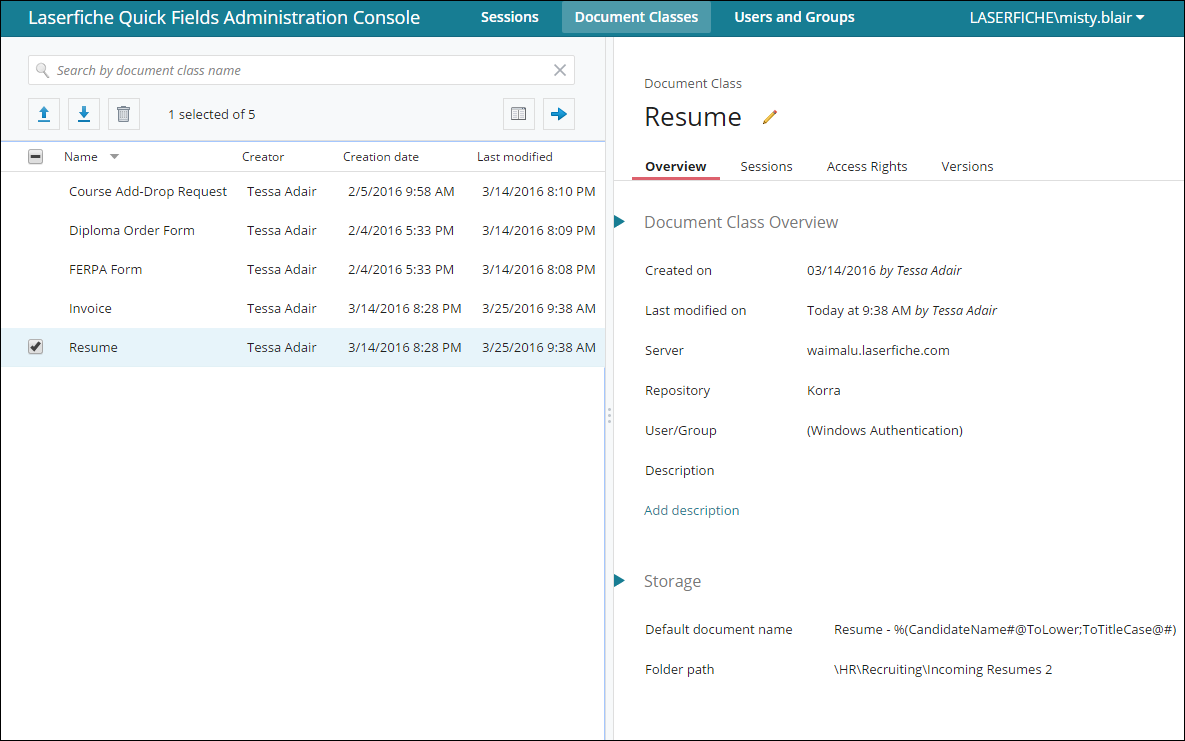
 - A list of document classes on the Quick Fields Server you are connected to will be displayed in the left pane. You can
- Search for document classes in the Search by document class name search box at the top of the page.
- Click the column header to sort by that specific column. For example, clicking Name in the Name column will sort the document classes in alphabetical order by name.
- Hover over a column header to display its filter button
. Press the filter button to display different column filters for that specific column. For example, clicking the filter button in the Creation date column header
 displays options to filter by a date range. You can also filter by multiple columns.
- Clicking on a document class name in the left pane will display its details in the right pane.
- Selecting the checkboxes next to multiple document classes lets you perform actions on multiple document classes at a time.
Import: Imports a previously downloaded document class (in zip format).
- Click the Import button
 .
. - Browse to the previously downloaded document class you want to import and click Open.
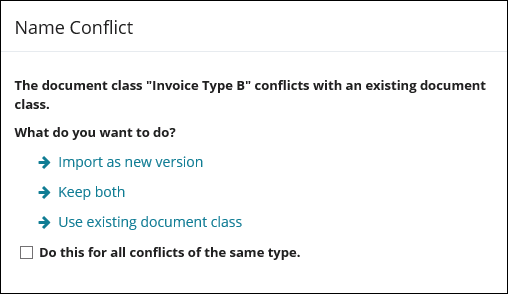
- If there are name conflicts, you will see a
 Name Conflict dialog box. Hover over each option for an explanation of what it does. Choose if you want to:
- Import as new version The document class will be imported as a new version of the existing document class on the Quick Fields Server.
- Keep both: The document class will be imported and automatically renamed. The existing document class on the Quick Fields Server will not be affected.
- Use existing document class: The existing document class on the Quick Fields Server will be used and linked to the session. The new document class will not be imported. When importing multiple document classes, this option will only cancel the import for the document class that encountered the name conflict. All other document classes will be imported normally.
Note: This option only appears when importing a session containing a document class that already exists on the Quick Fields Server.
- Skip:The new document class will not be imported.
Note: This option only appears when importing document classes not associated with a session.
- The import status will be displayed in the Import Document Classes dialog box. Click Close when finished.
- Select the checkboxes next to the document classes you want to download.
- Click the Download button
 .
. - Confirm the download in the Download Document Classes dialog by clicking Download.
- Choose where you want the downloaded zip files saved.
- Select the checkboxes next to the document classes you want to delete.
- Click the Delete button
.
- Click the Configure Columns button
.
- In the
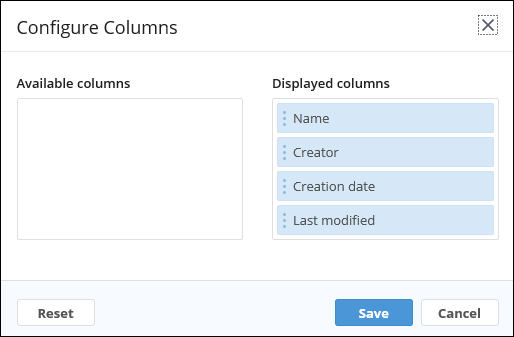
 Configure Columns dialog box, drag columns from Available columns to Displayed columns to display them. Drag each column up or down to reorder the columns displayed. Drag them from Displayed columns to Available columns to hide them.
 - Click Save to save the column display or Reset to reset the columns to the default display.
- Click the right arrow to hide the Details Pane
. Click the left arrow to display the Details Pane
.


