Starting Rules Node
The Starting Rules node of the Workflow Administration Console lets you see information about, enable, and disable starting rules.
This node contains the following three nodes:
Conditions Node
This node, under Starting Rules in the Workflow Administration Console, lets you view information about, enable, and disable conditional starting rules.

To open this node
- In the Workflow Administration Console's Console Pane, expand the Starting Rules node.
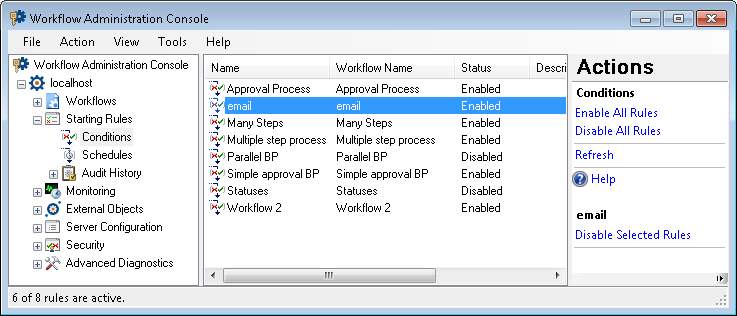
- Select Conditions. The node will list all the condition starting rules on the Workflow Server, the workflow they are associated with, their statuses, and their descriptions.
Tip: You can refresh this list so that it reflects recent changes by clicking the Refresh link below Conditions in the Actions Pane. Alternatively, right-click the Conditions node and select Refresh.
To enable or disable condition starting rules from this node
- In the center Details Pane, select one or more a starting rules from the list. Hold down CTRL to select more than one starting rule at a time.
- Click Enable Selected Rule(s) or Disable Selected Rule(s) in the Actions Pane. Alternatively, right-click the selected rule(s) and select Enable Selected Rule(s) or Disable Selected Rule(s).
- Optional: To enable or disable all condition rules, select Enable All Rules or Disable All Rules under the Conditions heading the Actions Pane. Alternatively, right-click the Conditions node and select Enable All Rules or Disable All Rules.
To delete condition starting rules from this node
- In the center Details Pane, select one or more a starting rules from the list. Hold down CTRL to select more than one starting rule at a time.
- Click Delete under the selected item's name in the Actions Pane. Alternatively, right-click the selected rules and select Delete.
To export the contents of this node in a .csv, .xml, or .txt file
- Select the node in the Console Pane.
- Select View from the main menu.
- Click Export Contents.
- In the Export data dialog box, name the exported file.
- Select CSV File, XML File, or Tab Delimited Text File from the drop-down menu.
- Click Save.
Schedules Node
This node, under Starting Rules in the Workflow Administration Console, lets you view information about, modify, run, enable, and disable schedule starting rules.

To open this node
- In the Workflow Administration Console's Console Pane, expand the Starting Rules node.
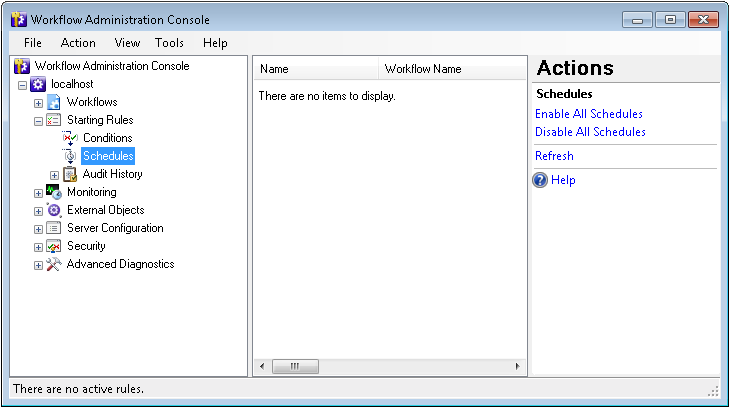
- Select Schedules. The node will list of all the schedule starting rules on the Workflow Server, the workflow they are associated with, a summary of their schedules, their statuses, their descriptions, the last time the rule ran, the next time the rule will run, and the task name for the rule in the Windows Task Scheduler.
Tip: You can refresh this list to reflect recent changes by clicking the Refresh link below Schedules in the Actions Pane. Alternatively, right-click the Schedules node and select Refresh.
To enable or disable schedule starting rules
- In the center Details Pane, select one or more a starting rules from the list. Hold down CTRL to select more than one starting rule at a time.
- Select to Disable Selected Rules or Enable Selected Rules under the selected item's name in the Actions Pane. Alternatively, right-click the selected rule(s) and select to Disable Selected Rules or to Enable Selected Rules.
- Optional: To enable or disable all schedule rules, select Enable All Schedules or Disable All Schedules under the Conditions heading the Actions Pane. Alternatively, right-click the Schedules node and select to Disable All Schedules or to Enable All Schedules.
To run schedule starting rules
- In the center Details Pane, select one or more starting rules. Hold down CTRL to select more than one starting rule at a time.
- In the Actions Pane, under the selected item's name, click Run Selected Workflows. Alternatively, right-click the selected rules and select Run Selected Workflows.
To modify a schedule starting rule
- In the center Details Pane, select a starting rule.
- In the Actions Pane, under the starting rule's name, click Properties. Alternatively, right-click a schedule rule and select Properties.
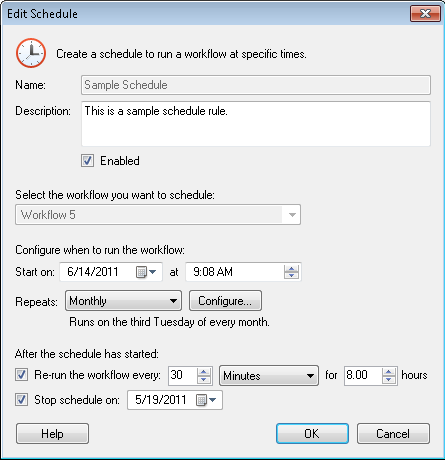
- In the Edit Schedule dialog box, you can change the starting rule's description, status, start date and time, repeat schedule, and stop time. Learn more about schedule starting rules.

To delete schedule starting rules
- In the center Details Pane, select one or more starting rules. Hold down CTRL to select more than one starting rule at a time.
- Click Delete under the selected item's name in the Actions Pane. Alternatively, right-click the selected rule(s) and select Delete.
To export the contents of this node in a .csv, .xml, or .txt file
- Select the node in the Console Pane.
- Select View from the main menu.
- Click Export Contents.
- In the Export data dialog box, name the exported file.
- Select CSV File, XML File, or Tab Delimited Text File from the drop-down menu.
- Click Save.
Audit History Node
This node, under Starting Rules in the Workflow Administration Console, lets you search for starting rules that have been updated, published, enabled, disabled, or deleted within a specified time period.
To search for workflows
- In the Workflow Administration Console's Console Pane, expand the Starting Rules node.
- Select Audit History, and click New Search in the Actions Pane. Alternatively, right-click Audit History and select New Search. (If you have not created an audit report in the past, you can double-click Create a search to start a new search.)
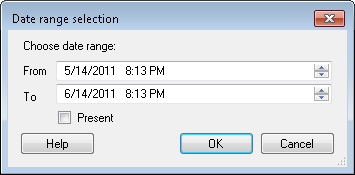
- The Date range selection dialog box will open.
- Type in a date range, or use the scroll box (up-and-down arrows) to specify a date range. To have your search always go up to the current date and time, select Present.
- Click OK.
- In the center Details Pane, a list of each time a starting rule was updated, published, enabled, disabled or deleted will appear. For each event, the audit history will list the:
- Date: The date the action occurred.
- User: The name of the local or domain user who updated the rule.
- Action: The action (updated, published, enabled, disabled, or deleted) that occurred.
- ID: The ID number assigned to the starting rule. ID numbers are based on the chronological order in which starting rules are created. The first starting rule you create is assigned an ID number of one.
- Name: The name of the starting rule. If the starting rule has been deleted, (Deleted) will appear.
- Type: The rule's type (schedule or condition).
- Optional: To refresh an audit report to reflect any recent changes, select an audit report in the Details Pane and click Refresh in the Actions Pane. Alternatively, right-click anywhere in the audit report or on the Audit History node and select Refresh.
- Optional: To delete an audit report, select an audit report in the Console Pane and click Delete in the Actions Pane. Alternatively, right-click on an audit report in the Console Pane and select Delete.


To export the contents of this node in a .csv, .xml, or .txt file
- Select the node in the Console Pane.
- Select View from the main menu.
- Click Export Contents.
- In the Export data dialog box, name the exported file.
- Select CSV File, XML File, or Tab Delimited Text File from the drop-down menu.
- Click Save.