The Quick Fields Agent Service runs unattended scheduled sessions and can be installed on one computer per Quick Fields Agent license, which is part of the Quick Fields license. The Quick Fields Agent Service must be installed on the same computer as Quick Fields.
To manage schedules and view instance history, you should install and work with the Quick Fields Agent Web Administration Console (which is part of the Laserfiche Web Administration Console).
Note: You can change the language for the Quick Fields Agent Service in the General tab of the Settings dialog box.
To install the Quick Fields Agent Service
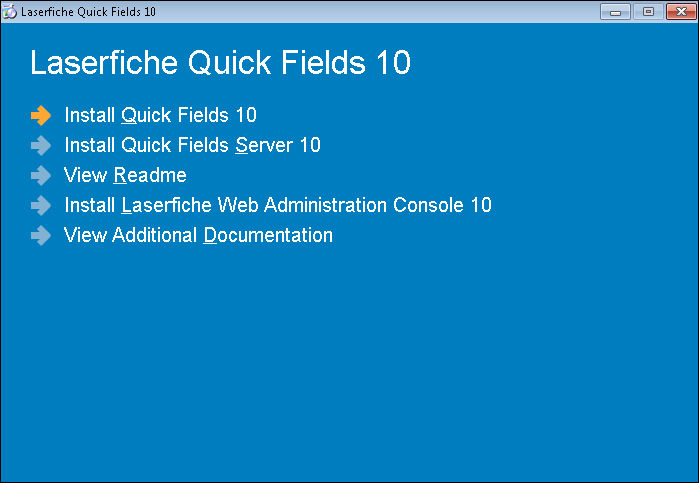
- Insert the Laserfiche Quick Fields Installation disk into your computer. A menu displaying installation options should appear. If it does not appear, double-click Autorun.exe from the root folder of the Quick Fields Installation disc. Alternatively, if you downloaded Quick Fields from the Laserfiche Support Site, double-click Autorun.exe.
- Select the
 Install Quick Fields option.
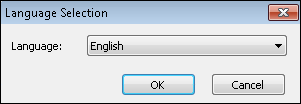
 - In the Language Selection step, select how you want the installation to be displayed. This language setting only affects how the installation is displayed.
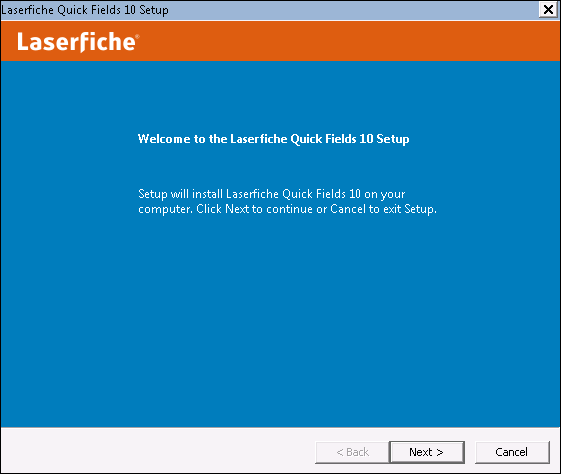
- The Laserfiche Quick Fields setup will open and the Welcome step will appear. Click Next to continue.
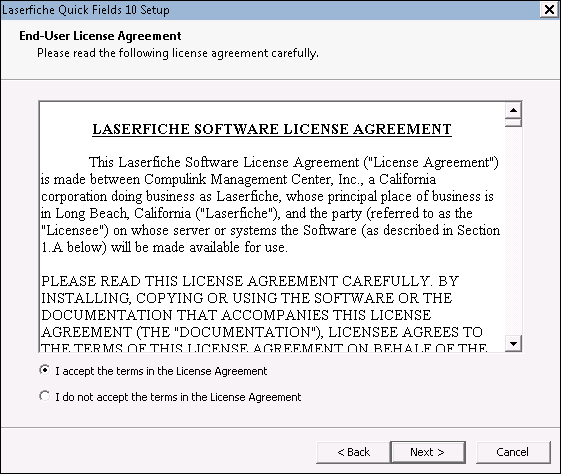
- On the License Agreement step, read the license agreement. Accept it by selecting the I accept the terms in the License Agreement option. Click Next to continue.
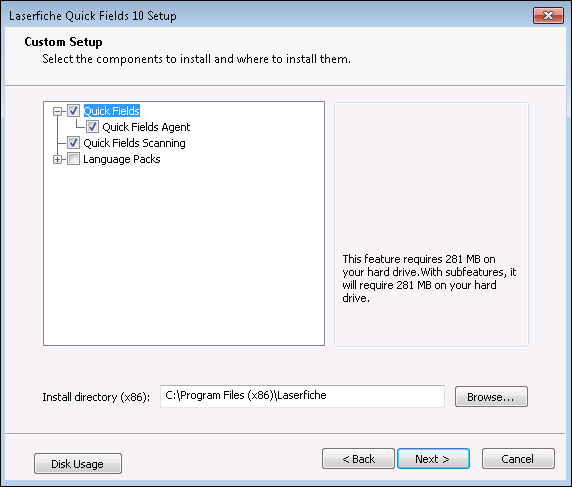
- On the Custom Setup step, ensure Quick Fields Agent is selected. Next to Install directory, select where you want it installed and click Next.
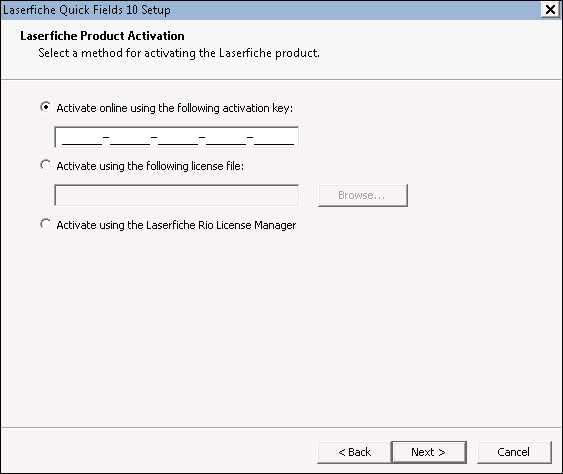
- On the Laserfiche Product Activation step, specify how you want to activate Quick Fields Agent.
- If you have an activation key, select the Activate online using the following activation key option and specify the activation key in the text box. You can use CTRL+V to paste your key into the activation key option.
- If you received a license file, select the Activate using the following license file option and browse to the path where the license file can be found.
- If you are activating by registering with the Laserfiche Rio License Manager, select Activate using the Rio License Manager. In that case, you will need to complete additional steps.
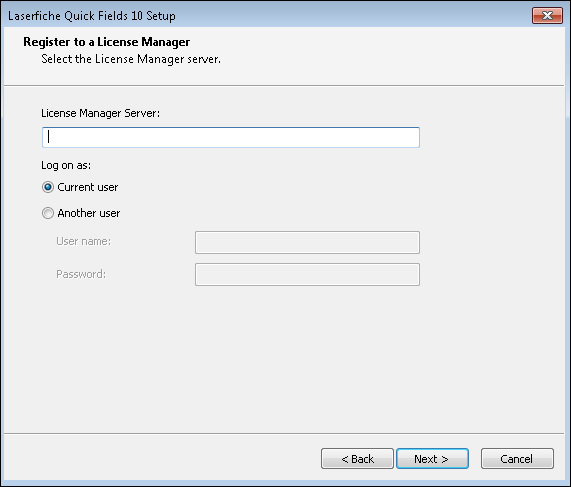
- If you chose to activate using the Laserfiche Rio License Manager, complete the following steps. If not, skip to step 9.
- In the first Register to a License Manager step, in the License Manager Server option, type the name of your Laserfiche Rio License Manager server computer. In the Log on as option, select whether to log in as the current Windows user or as another Windows user. Click Next.
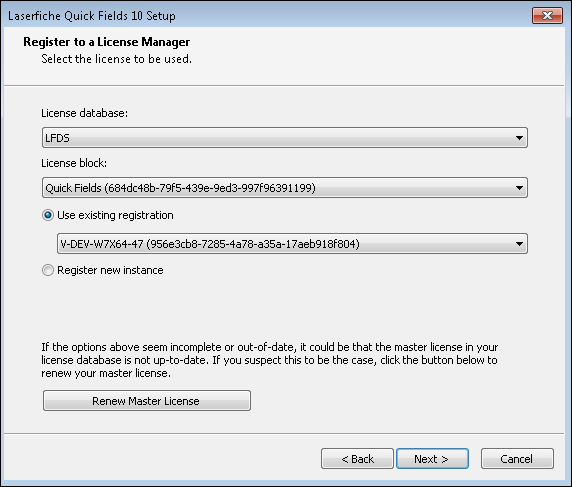
- In the second Register to a License Manager step, in the License database option, select the license database for your Laserfiche Rio installation. In the License block option, select the Quick Fields instance you want to use. In most cases, there will be only one license database and only one license block.
- In the same step, select whether to use an existing registration or register a new Quick Fields instance. If you or your Laserfiche Rio administrator already registered this computer, select Use existing registration and choose the computer from the list. If not, select Register new instance. Click Next.
- In the same step, if the available license information seems incomplete or our of date, you may need to renew your master license to get the most current information. Click Renew Master License to do so.
Note: If you are using Laserfiche Directory Server for license management and you have configured organizations, the Organization path option will also be displayed on this step. Select the organization you want to use in this option. This option will not be displayed if you do not have organizations configured, or if you are not using Laserfiche Directory Server.
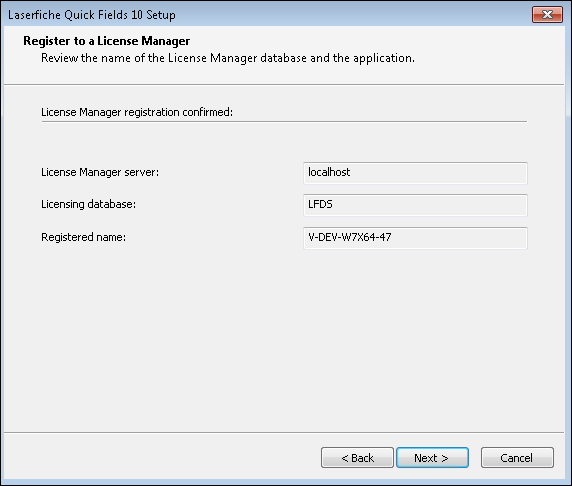
- In the final Register to a License Manager step, ensure the License Manager server, License database, and Registered name are correct. Click Next.
- In the first
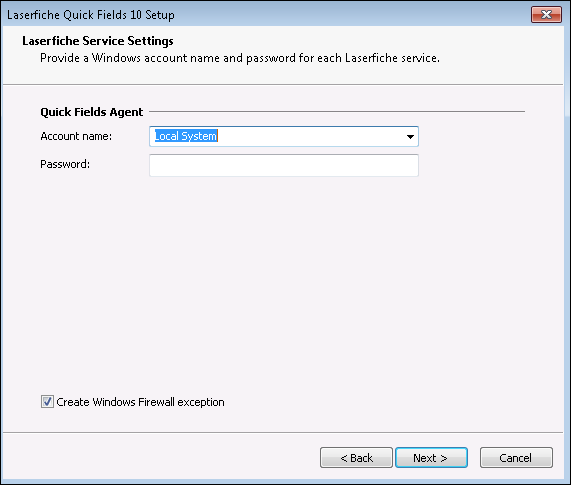
- On the Laserfiche Service Settings step, configure the account the Quick Fields Agent service will run as. If Quick Fields Agent needs to have access to sessions or images on network drives, it should be run as a domain user. If the sessions are configured to log in to Laserfiche using Windows Authentication, the service should also log in as a domain user. If the session and files to scan are local, using a local system is account is sufficient. Also select if you want to create a Windows firewall exception. Click Next to continue.
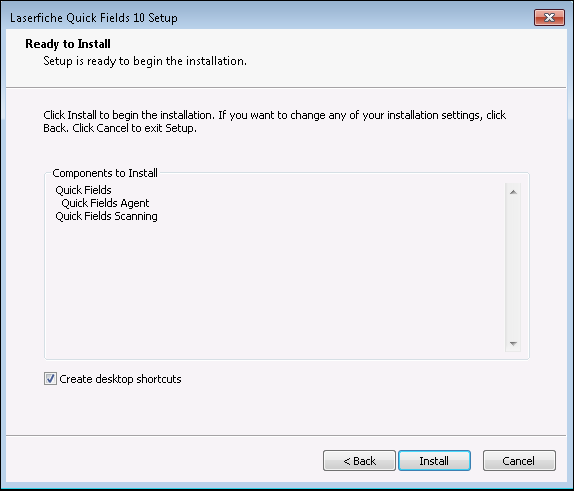
- Select if you want desktop shortcuts created and click Install.
- On the Prerequisites step, click Run to install the necessary components for Quick Fields Agent. Once they are all installed, click Next. You may see a message informing you that some of the selected features will cause IIS to be reset. Click OK.
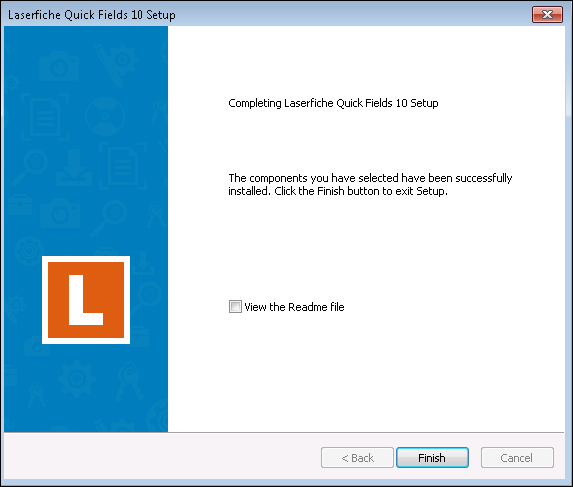
- On the Completing the Laserfiche Quick Fields Setup step, select if you want to view the Readme and click Finish.