Zoom Fields
Zoom fields are designed to speed up the process of verifying or manually populating data in a field. When a field is designated as a zoom field, the Display Pane will zoom to a specific region on a page whenever a user places their cursor in that field.
Note: Zoom Fields are only available for imaged documents.
To create a zoom field
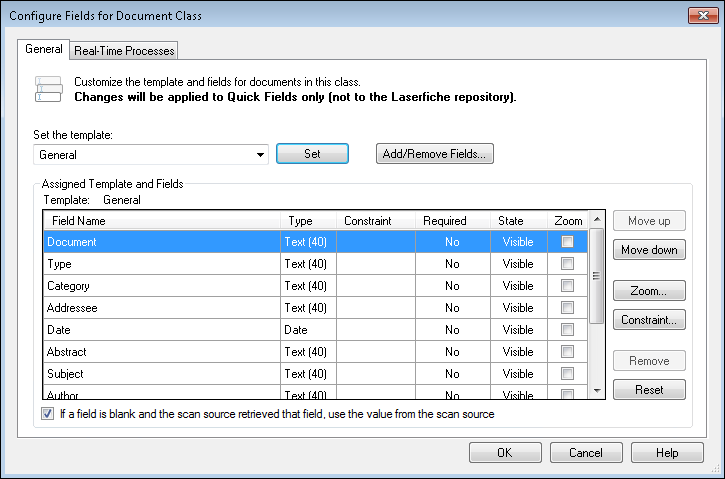
- Right-click a document class and select Configure fields. You can also select a document class, then click Configure fields in the bottom of the Tasks Pane on the right.
- In the
 Configure fields dialog box, select a field and click Zoom.
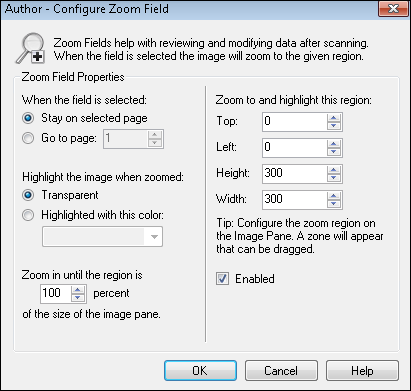
 - In the Configure Zoom Field dialog box, under When the field is selected, you can select Stay on selected page and Quick Fields will stay on the page the operator is currently viewing. Select Go to page and specify a page if you want to be taken to the page that contains the region Quick Fields should zoom to.
Note: If Go to Page is selected but the specified page does not exist in the document, Quick Fields will stay on the current page.
- Under Highlight the image when zoomed, specify whether the zoom region should be highlighted. This feature enables you to visually distinguish the zoom region from the rest of the page.
- Transparent: No highlight will appear.
- Highlighted with this color: Select a pre-defined highlight color from the drop-down menu or select Choose a color for more color options.
- Under Zoom in until the region is ___percent of the size of the image pane, you can define how much of the image pane the zoom field region will occupy. For example, if you choose to zoom in until the region is 100% of image pane, the region will zoom in and cover either the entire width or height of the image pane (whichever is met first). If you choose to zoom in until the region is 75% of the image pane, it will zoom in 75%, leaving space around the region. This can give more context to the region by allowing you to see more of the image.
- Under Zoom to and highlight this region, manually enter coordinates for the region. In most cases, it is easier not to configure specific coordinates and to define the region by dragging and dropping the zone on the image. Ensure the Enabled option is selected if you want the zoom field to zoom.
- Click OK to close the Configure Zoom Field dialog box.
- If necessary, create additional zoom fields.
- Click OK to close the Configure Fields dialog box.
- Zones will appear on the image. If necessary, drag and drop them as you see fit. You can also increase/decrease the size of the zone using its black resize handles.
To modify a zoom field, do one of the following
- With the document class selected, double-click on the zoom field on the image.
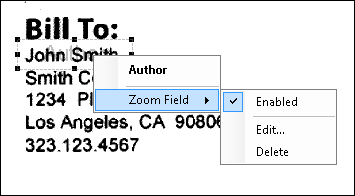
- With the document class selected, right-click on the zoom field on the image, hover over Zoom Field, and select Edit or Delete.
- Right-click anywhere on the image that is not a zoom field, hover over Zoom Fields, hover over the zoom field you want to edit and select Edit or Delete.
Note: You can quickly enable or disable zoom fields without deleting them by toggling the Enabled option on or off in either context menu mentioned above. You can also access this same Enabled option in the Configure Zoom Field dialog box.
To use zoom fields
- Configure zoom fields or open a session that has zoom fields configured.
- Scan documents.
- Select a document using the mouse or keyboard shortcuts.
- In the Tasks Pane, select a field that has been configured as a zoom field.
- The image will zoom to the configured zone. Review or edit the information in the field as needed.