Saved Searches
You can save your searches so that you can quickly re-run them later without having to re-configure them. Searches are saved on a per-user basis, which means that a user will be able to access all searches that they saved, regardless of the computer they use to access the repository, but other users will not be able to access those searches.
You can also save searches as custom quick searches. See Quick Search for more information,
Tip: Saved searches are especially useful when working with advanced search syntax.
You can create save searches in two locations:
- Search Pane
- Quick Search
Saving a Search
Saving a search for future use will store the search criteria, so that you can run the search again in the future without having to re-configure it.
To save a search in the Search Pane in the Windows client
- In the Search Pane, configure the search you want to save.
- Click Save at the top of the Search Pane.
- In the Save Search dialog box, do one of the following:
- To create a new saved search, select Save as a New Search and type the name.
- To replace an existing saved search, select Replace an Existing Search and select the saved search you want to overwrite.
- Click OK to save your search.
To save a search in the Search Pane in the web client
- Select Search Filters in the top bar.
- Select the Save button in the bottom left corner.
- Select Save as a new search to create a new search, and specify a name, or select Replace an existing search to overwrite a saved search.
- Select either Apply to myself to save the search only for yourself, or Apply to the following group to share the saved search with a particular group. You can select the Everyone group to share the search with all users.
Note: You must have the Manage Repository Configuration privilege to share saved searches with a group.
- Select Save to save the search.
Loading Saved Searches
Loading a search will clear the current search criteria and replace it with the contents of the Search Pane when it was saved. You can immediately start searching or add or modify search criteria. You can open any search you previously created, even if you created it on another computer or in another Laserfiche application (such as the Laserfiche web client).
Note: A saved search contains search criteria, not search results. When you run a saved search, you will be presented with a fresh and up-to-date list of search results.
To open a previously saved search in the Windows client
- Click
 (Load) at the top of the Search Pane.
 -
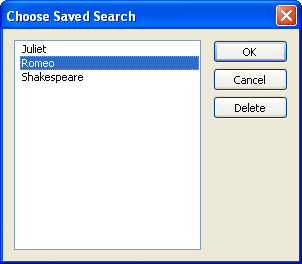
In the
 Choose Saved Search dialog box, select the desired saved search and click OK.
To open a previously saved search in the web client
- Select Search Filters in the top bar.
- Select the Save Searches option in the top right corner.
- Select the search that you want to open. You can review and modify any elements of the search, and click Search to run the search.
Deleting Saved Searches
Saved searches can be permanently deleted.
Note:Saved searches that have been shared with all users in the repository using trustee attributes cannot be deleted by individual users.
To delete a saved search in the Search Pane in the Windows client
- In the Search Pane, click Load
 .
. - In the Choose Saved Search dialog box, select the saved search you want to delete.
- Click Delete. When prompted, confirm the deletion of the saved search.
To delete a saved search in the Search Pane in the web client
- Select Search Filters in the top bar.
- Select the Save Searches option in the top right corner.
- Select Manage saved searches.
- Select the Delete icon (
 ) to delete the search.
 Note: You can delete any personal saved search, but you can only delete searches shared with groups if you have the Manage Repository Configuration privilege.