Quick Fields Scanning Workspaces
A workspace is the main user interface displayed when scanning documents into Quick Fields Scanning. New scan settings can be created as a new workspace, or existing Quick Fields sessions on the Quick Fields Server can be loaded into a workspace. Documents can be scanned, modified, and sent to the Laserfiche repository using Quick Fields Scanning.
Creating a Workspace in Quick Fields Scanning
To create a new workspace, open the Quick Fields Scanning Start Page and select New.
Connecting Quick Fields Scanning 11 to a Quick Fields 11 Server
New Workspace
You can create a new workspace in one of three ways:
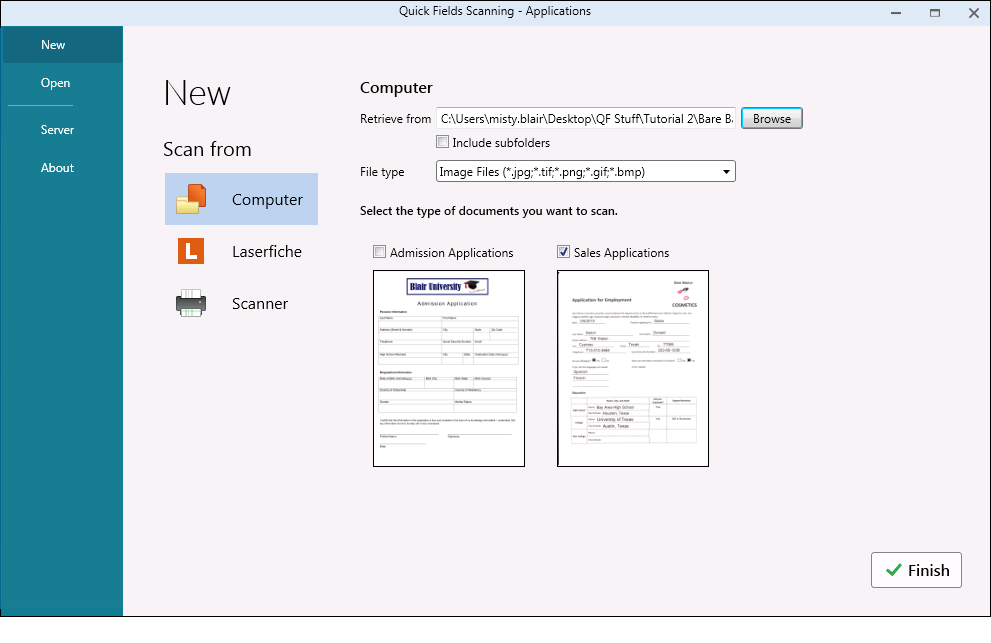
Computer: This option scans documents stored on your computer or network.
- Next to Retrieve from, use the Browse button to navigate to the location of the documents you want to retrieve.
- If there are subfolders inside the folder you define above, select the Include subfolders option to retrieve any files inside those subfolders.
- Next to File type, use the drop-down menu to select the type of files you want to retrieve from the path you defined (e.g., .jpg, .tiff).
Note: If the file type is not listed, configure all other options and click Finish. Once in Quick Fields Scanning, click Scan Settings in the toolbar. Under Only retrieve files with the following extensions, click Manage file type lists to modify available file types. The new file types defined will appear in the drop-down list as Custom Filter.
- Under Select the type of documents you want to scan, select the document class that should be assigned to the documents being scanned. For example, if the documents being scanned are employment applications, select the checkbox for the Employment Application document class.
- Click Finish to open the new workspace.

To learn more about additional settings for scanning from your computer, see the Universal Capture topic.
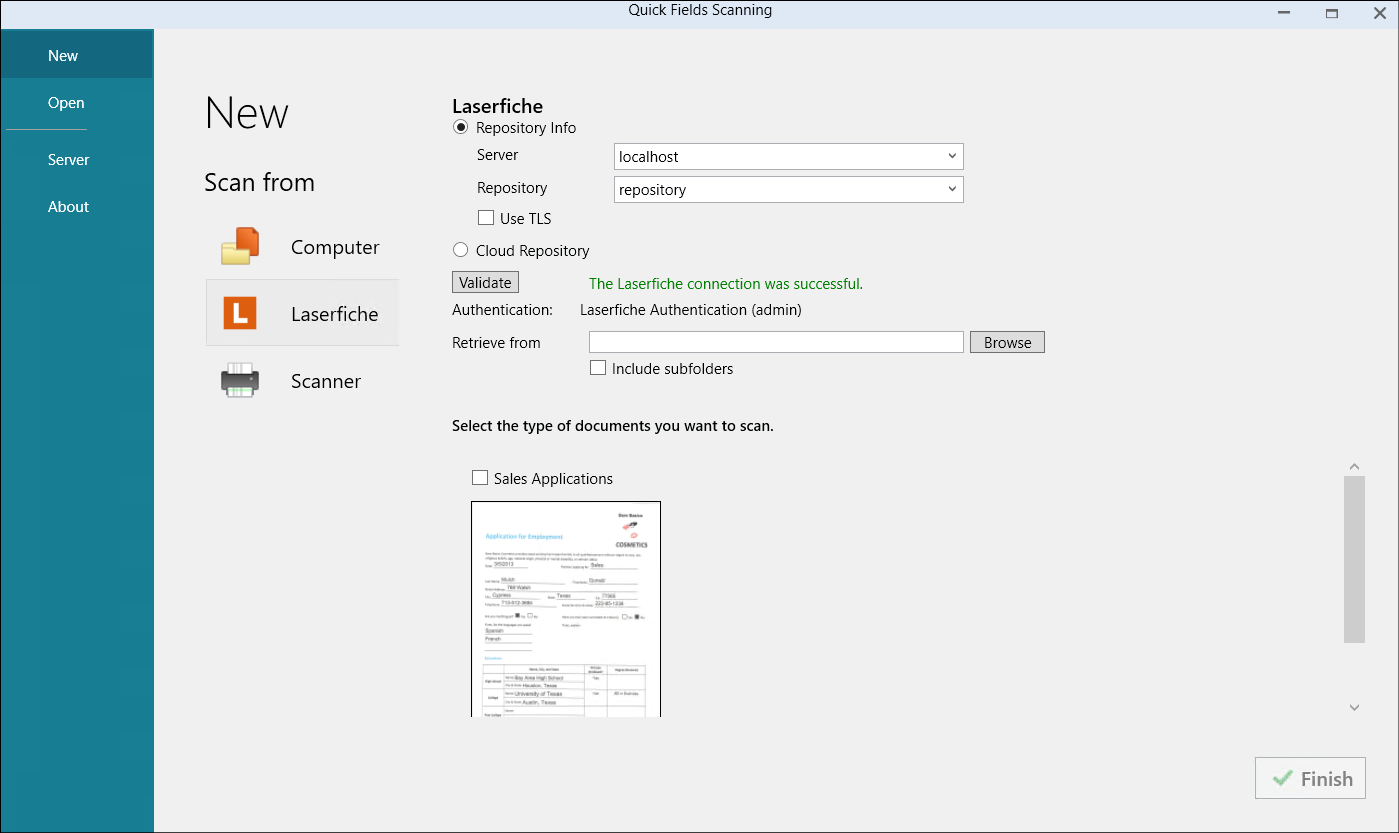
Laserfiche: This option scans documents stored in Laserfiche.
-
First, you need to define a connection to the repository you want to retrieve entries from.
To define a Laserfiche Network repository connection
- Select the Network Repository radio button.
- Next to Server, specify the server where the repository is located.
- Once a server has been specified, the repositories on that server will be listed in the Repository drop-down menu. Select the repository you want to connect to.
- Click Validate and select if you want to sign in using Windows authentication, password authentication, or Laserfiche Directory server authentication.
- Select Windows authentication to log in using the Windows credentials associated with the user running the session.
- Select Laserfiche authentication to enter credentials associated with a Laserfiche account.
- Optionally, select the Laserfiche Directory Server tab to sign in using Laserfiche Directory Server.
- Enter your Laserfiche Directory Server username and password.
- Click Windows Authentication and sign in using your Windows account.
- Sign in using SAML authentication.
Note: Laserfiche Webtools Agent lets Quick Fields and Quick Fields Scanning connect to a Laserfiche repository with Laserfiche Directory Server authentication using a longer session so you will not have to enter credentials continuously to stay connected.
To define a Laserfiche Cloud connection
- Select the Cloud Repository radio button.
- Click Validate to enter your Laserfiche Cloud credentials.
- Enter your Laserfiche Cloud account ID and click Next. You can find the ID in Account Administration under the Plan tab (if you are signed in as an administrator) or in Repository Administration under Summary (if signed in as a user with appropriate access).
- If single sign-on (SSO) has been configured, you can sign in using your identify provider or enter your Laserfiche Cloud username and password and click OK.Note: Windows authentication cannot be used to connect to Laserfiche Cloud.
Note: The Laserfiche Cloud session connection will only be connected for a certain amount time. After this time period, users will have to authenticate the session connection again.
- Next to Retrieve from, use the Browse button to navigate the repository for the location of the documents you want to retrieve.
- If there are subfolders inside the folder you define above, select the Include subfolders option to retrieve any files inside those subfolders.
- Under Select the type of documents you want to scan, select the document class that should be assigned to the documents being scanned. For example, if the documents being scanned are employment applications, select the checkbox for the Employment Application document class.
- Click Finish to open the new workspace.

To learn more about additional settings for scanning from Laserfiche, see the Laserfiche Capture Engine topic.
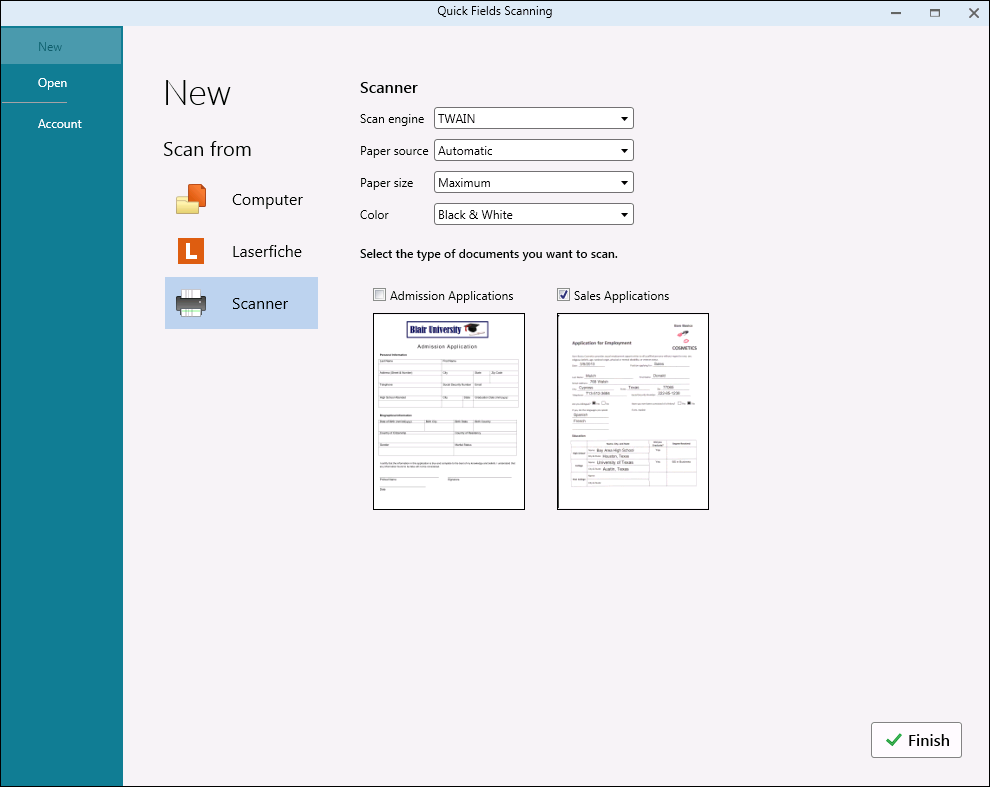
Scanner: This option scans documents from a physical scanner.
- Next to Scan engine, select the physical scanner's scan engine (WIA, TWAIN, or ScanConnect).
- Choose the desired paper source, paper size, and color. The available options depend on the scan engine selected in step 1.
- Click Finish to open the new workspace.

To learn more about additional settings for different scan engines, see the Scan Sources topic.
Creating a Workspace Out of a Session
Sessions created in Quick Fields and published to the Quick Fields Server can be loaded into a workspace in Quick Fields Scanning. This lets administrators create and configure session settings in Quick Fields and make these sessions available to scanner operators in Quick Fields Scanning. Documents scanned into Quick Fields Scanning using an existing session will be identified and processed by the document class identification conditions specified in Quick Fields Scanning, while specific scan settings and Pre-Classification processing will be defined by the session.
Saving a Workspace
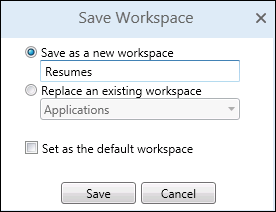
Once a session is opened in a workspace, some of its settings can be modified. For example, you can update the scan source or choose a different session or document class to identify and process the scanned documents. After making changes, you can click the Save button at the top right of Quick Fields Scanning to save it locally as a new workspace.
Selecting the Set as the default workspace option in the Save Workspace dialog box will open this workspace next time Quick Fields Scanning is opened. The default workspace can be changed under Startup in the Options dialog box.

Note: Workspaces cannot be uploaded to the Quick Fields Server. They can only be saved and opened locally.
Opening a Workspace in Quick Fields Scanning
Once a workspace has been created and saved locally, you can easily open and reuse it.
To open a saved workspace
- Open Quick Fields Scanning.
- On the Start Page, click Open, then Workspaces.

- All workspaces that have been saved locally (and when they were last modified) will be displayed. Double-click the one you want to open.
By default, workspaces are saved to C:\ProgramData\Laserfiche\Quick Fields\Workspaces.