Scan Sources
Documents can be scanned to Quick Fields or Quick Fields Scanning directly from a scanner, or can be "scanned" from a Laserfiche repository or from a computer or network drive. Each method has its advantages, depending on your needs. You can use TWAIN or ScanConnect to capture documents directly from a scanner. You can also use it to process documents that are already in digital form. If you have imaged or electronic documents already saved to a drive, you can use Universal Capture to extract information from them, sort them, and store them in Laserfiche. You can also re-process imaged or electronic documents that are already in Laserfiche. For example, if you have documents in Laserfiche that do not have fields populated or that have been sorted according to an out of date filing system, you can use the Laserfiche Capture Engine to automate the work of updating them.
Note: To configure scan settings, you must have the appropriate permissions.
ScanConnect
ScanConnect lets you use ISIS scanning drivers. A collection of ISIS drivers is included with ScanConnect. A list of supported scanners can be found on the Laserfiche Support Site. If your scanner is not listed, manually install any ISIS drivers your scanner's manufacturer has provided.
Note: ScanConnect must be purchased separately from the basic Quick Fields installation.
To select and configure ScanConnect in Quick Fields
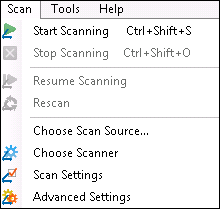
- From the Scan menu, select Choose Scan Source.
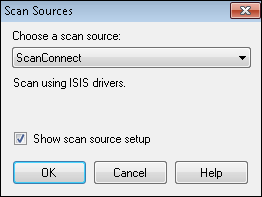
- In the Scan Sources dialog box, choose ScanConnect from the drop-down menu. Select Show scan source setup and click OK.
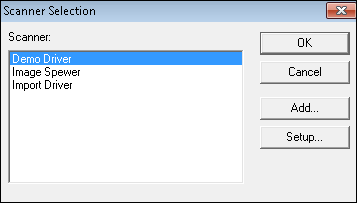
- Choose a scanner from the Scanner Selection dialog box. If your scanner is not listed, install the scanner's ISIS driver. Click OK.
- To configure additional settings, select Scan Settings or Advanced Settings from the Scan menu. The settings available will depend on your particular scanner.
To configure ScanConnect in Quick Fields Scanning
- On the Quick Fields Scanning Start Page, select New, then Scanner.
- Select ScanConnect as the scan engine and configure the basic settings (paper source, paper size, and color).
- Select the checkbox next to the type of documents you want to scan, then click Finish.
- Quick Fields Scanning will open.
- Click Scan Settings from the ribbon.

- The settings available will depend on your particular scanner.
Note: If a session is configured to use ScanConnect in Quick Fields, then published to the Quick Fields Server, a scanner operator can open the session in Quick Fields Scanning and modify the ScanConnect settings.
TWAIN
The TWAIN scan engine allows you to capture images from a scanner using TWAIN drivers. The TWAIN driver appropriate for the given scanner must be installed on your machine to use this scan source. This driver will be provided by your scanner's manufacturer if the scanner supports TWAIN.
To select and configure TWAIN in Quick Fields
- From the Scan menu, select Choose Scan Source.
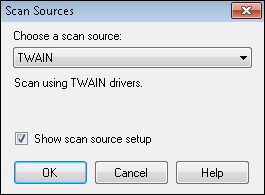
- In the Scan Sources dialog box, choose TWAIN from the drop-down menu. Select Show scan source setup and click OK.
- Choose a scanner from the Scanner Setup dialog box. If your scanner is not listed, install the scanner's TWAIN driver. Click OK.
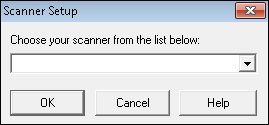
- To configure additional settings, select Scan Settings or Advanced Settings from the Scan menu. The settings available will depend on your particular scanner.

To configure TWAIN in Quick Fields Scanning
- On the Quick Fields Scanning Start Page, select New, then Scanner.
- Select TWAIN as the scan engine and configure the basic settings (paper source, paper size, and color).
- Select the checkbox next to the type of documents you want to scan, then click Finish.
- Quick Fields Scanning will open.
- Click Scan Settings from the ribbon.

- The settings available will depend on your particular scanner.
Note: If a session is configured to use TWAIN in Quick Fields, then published to the Quick Fields Server, a scanner operator can open the session in Quick Fields Scanning and modify the TWAIN settings.
Universal Capture
Universal Capture captures documents already stored on your computer or network drive and can be configured to capture image or electronic files. You can process images you have previously scanned and saved to a computer or network drive; process images you have printed with Snapshot and saved to a computer or network drive; process electronic files saved on a computer or network drive.
To select and configure Universal Capture in Quick Fields
- From the Scan menu, select Choose Scan Source.
- In the Scan Sources dialog box, select Universal Capture from the drop-down menu. Select Show scan source setup and click OK.
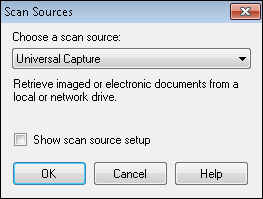
Note: If you close Universal Capture, you can easily access it again by clicking the Configure Scan Source button on the Universal Capture toolbar.
To configure Universal Capture in Quick Fields Scanning
- On the Quick Fields Scanning Start Page, select New, then Computer.
- Configure the basic settings and click Finish.
- Quick Fields Scanning will open.
- Click Scan Settings from the ribbon.

Note: If a session is configured to use Universal Capture in Quick Fields, then published to the Quick Fields Server, a scanner operator can open the session in Quick Fields Scanning and modify the Universal Capture settings.
See Universal Capture Settings to learn more about setting up Universal Capture.
Laserfiche Capture Engine
Laserfiche Capture Engine allows you to retrieve documents from a Laserfiche repository, process them through Quick Fields, and send them to any Laserfiche repository. This allows you to automate processes that would otherwise be complex and time-consuming, such as field population, image processing, data reorganization, or data migration.
To select and configure Laserfiche Capture Engine in Quick Fields
- From the Scan menu, select Choose Scan Source.
- In the Scan Sources dialog box, select Laserfiche Capture Engine from the drop-down menu. Select Show scan source setup and click OK.
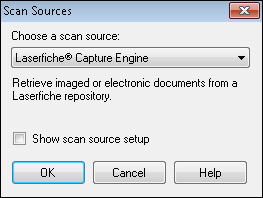
Note: If you close Laserfiche Capture Engine, you can easily access it again by clicking Configure Scan Source on the Universal Capture toolbar.
To configure Laserfiche Capture Engine in Quick Fields Scanning
- On the Quick Fields Scanning Start Page, select New, then Laserfiche.
- Configure the basic settings and click Finish.
- Quick Fields Scanning will open.
- Click Scan Settings from the ribbon.

Note: If a session is configured to use Laserfiche Capture Engine in Quick Fields, then published to the Quick Fields Server, a scanner operator can open the session in Quick Fields Scanning and modify the Laserfiche Capture Engine settings.
See Laserfiche Capture Engine Settings learn more about setting up Laserfiche Capture Engine.
WIA Scan Engine
WIA enables you to capture images using a scanner with WIA drivers. In order to use this scan source, a WIA driver appropriate for the desired scanner must be installed on your machine. This driver will be provided by your scanner's manufacturer.
To select and configure the WIA Scan Engine in Quick Fields
- From the Scan menu, select Choose Scan Source.
- In the Scan Sources dialog box, select WIA Scan Engine from the drop-down menu.
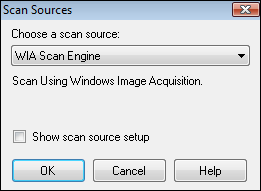
- Select Show scan source setup and click OK.
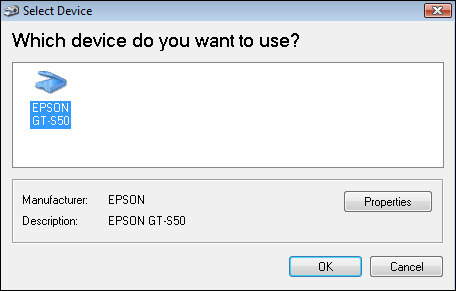
- Choose a scanner from the Select Device dialog box. If your scanner is not listed, install the scanner's WIA driver. Click OK.
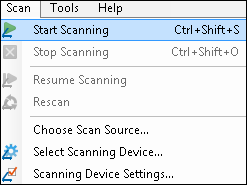
- Configure scanner settings in the WIA Scan Engine toolbar.
- To configure additional settings, select Scanning Device Settings from the Scan menu. The settings available will depend on your particular scanner.
Note: Click Properties to configure specific properties for the scanner you are using.
Note: If you want to use the scanning software provided for your scanner, scanning options will appear after you click the Start scanning button from the toolbar.
To configure the WIA Scan Engine in Quick Fields Scanning
- On the Quick Fields Scanning Start Page, select New, then Scanner.
- Select WIA Scan Engine as the scan engine and configure the basic settings (paper source, paper size, and color).
- Select the checkbox next to the type of documents you want to scan, then click Finish.
- Quick Fields Scanning will open.
- Click Scan Settings from the ribbon.

- The settings available will depend on your particular scanner.
Note:If a session is configured to use WIA in Quick Fields, then published to the Quick Fields Server, a scanner operator can open the session in Quick Fields Scanning and modify the WIA settings.