Universal Capture Settings
Retrieve Files
This Retrieve Files section in the Universal Capture dialog box allows you to define the location of the entries as well as their file type(s).
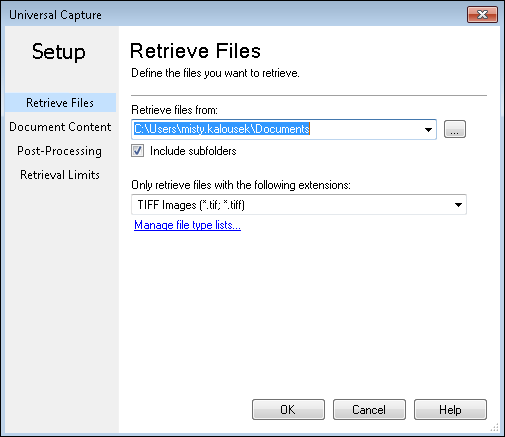
- Retrieve files from: Click the Browse button
 and navigate to the location of the files you want retrieved.
- Include subfolders: If there are subfolders inside the folder you define above, selecting this option will retrieve any files inside those subfolders.
Note: The files inside the subfolders will only be retrieved if they match the defined extension(s) under the Only retrieve files with the following extensions option.
Note: The folder structure of the original location of the files you are retrieving can be replicated in the destination folder. For example, if you retrieve invoices from this location: Invoices/Sales/Date/, this same folder path will be replicated in the new location you define if you move the files after processing them.
- Include subfolders: If there are subfolders inside the folder you define above, selecting this option will retrieve any files inside those subfolders.
- Only retrieve files with the following extensions: Select the type of files you will be retrieving from the path you defined (e.g., .jpg, .tiff). If your file type is not listed or you need to retrieve more than one type of file, click Manage file type lists.
Manage File Types
By default, Universal Capture can retrieve the following file types: .bmp, .jpg, .tif. You can add custom file types, or lists of custom file types, to this selection. Once added, the custom file type lists will appear in the File Type drop-down list on the Universal Capture toolbar in Quick Fields and Quick Fields Scanning.
To add a custom file type list
- Do one of the following:
- Select Configure Scan Source under Scan in the menu bar.
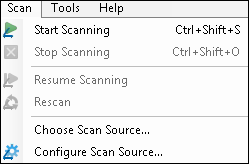
- Click the Configure Scan Source button on the Universal Capture toolbar.

- Select Configure Scan Source under Scan in the menu bar.
- Click Manage file type lists under Retrieve Files in the Universal Capture dialog box.
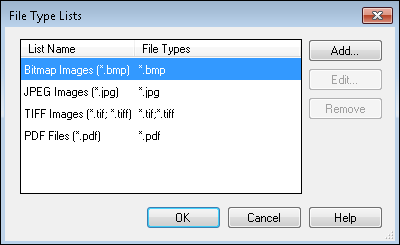
- Click Add.
- In the New File Type List dialog box, under List name, provide a name for the new list of file types. A list name is required.
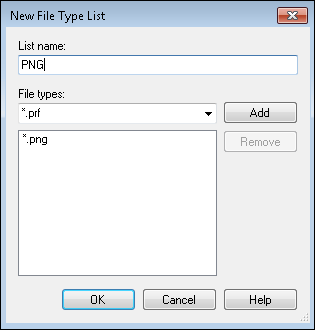
- Under File types, select a file type from the drop-down list or manually enter one.
Note: Ensure the file type conforms to the following syntax: *.filetype. For example, *.avi or *.doc.
Note: Use *.* to retrieve all file types.
- Click Add.
- Continue to add file types as you see fit. Adding more than one file type in this dialog box broadens the file retrieval scope.
Example: Chris creates the following file type list: *.html;*.htm;*.css. He performs Universal Capture once on a directory that contains three .html files, one .htm file, and four .css files. In this scenario, eight files will be captured. Note that semicolons (;) are used to separate file types.
- Click OK to close the New File Type List dialog box.
- Click OK to close the File Type Lists dialog box.
- Click OK to close the Universal Capture dialog box.
- The custom file type list you created is now available from the File Type drop-down menu on the Universal Capture toolbar in Quick Fields and Quick Fields Scanning.
Document Content
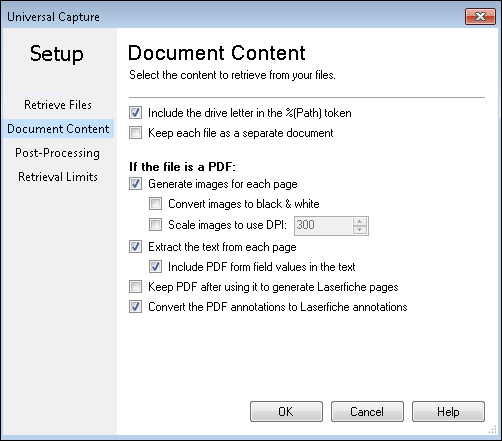
The Document Content section of the Universal Capture dialog box allows you to define the content you want retrieved from your documents.
For each document:
- Include drive letter in the %(Path) token: Specify whether the %(Path) token should include the source location's drive letter.
Example: Mike retrieves images from the following location on his machine: C:\Documents and Settings\Mike\My Documents. If this option is selected, the path token would return C:\Documents and Settings\Mike\My Documents. If this option is not selected, the token would return \Documents and Settings\Mike\My Documents
- Keep each file as a separate document: If this option is selected, each file retrieved will stay separate from other files retrieved. If this option is cleared, retrieved files can be organized into documents according to each document class’s First Page Identification, Last Page Identification or document length setting.
Note: First Page Identification, Last Page Identification, and document length settings can have an effect on documents even if this option is selected. For more information, see How Documents are Identified.
Example: Jack has a folder on his computer filled with separate purchase order files he wants to process with Quick Fields. He wants each purchase order to remain a separate file, so he selects Keep each file as a separate document.
If the file is a PDF:
- Generate images for each page: Generate Laserfiche images for each page of the retrieved PDF.
- Convert images to black & white: Convert the generated image pages to black and white.
- Scale image to use DPI: Customize the image's dots per inch (DPI).
- Extract the text from each page: Extract text from the retrieved PDF documents.
- Include PDF form field values in the text: If you are extracting text from a PDF form, the values in the form's fields will be included in the extracted text.
Note: The text extracted from PDF form fields will be at the bottom of the Text Pane. If you want their text to be displayed in the Text Pane in their actual location, generate images for each page of the PDF form and OCR it (which will take longer).
Note: If Laserfiche images are generated from PDF forms, the form field values in the PDF forms will be burned into the Laserfiche image.
- Include PDF form field values in the text: If you are extracting text from a PDF form, the values in the form's fields will be included in the extracted text.
- Keep PDF after using it to generate Laserfiche pages: The PDF can be used to generate Laserfiche images, extract text, or both. Selecting this option will keep the PDF file after it has been used to create Laserfiche pages.
Note: If Keep each file as a separate document is not selected above, you will not be able to select Keep PDF after using it to generate Laserfiche pages. If the Laserfiche pages in the repository are going to be separated and made into new documents of different lengths, the PDF will not be kept because it cannot be attached to new arbitrary Laserfiche documents. A combination of different file types (doc, pdf, etc) retrieved can be used to create new Laserfiche documents, but the electronic files cannot be kept because of the mixed file types.
Note:Keep PDF after using it to generate Laserfiche pages needs to be selected in order to use Retrieve PDF Form Content.
- Convert PDF annotations to Laserfiche annotations: Any PDF annotations on the retrieved PDFs will be converted into Laserfiche annotations.
Post-Processing
This Post-Processing section of the Universal Capture dialog box allows you to define what will happen to the original files once they have been processed in Quick Fields.
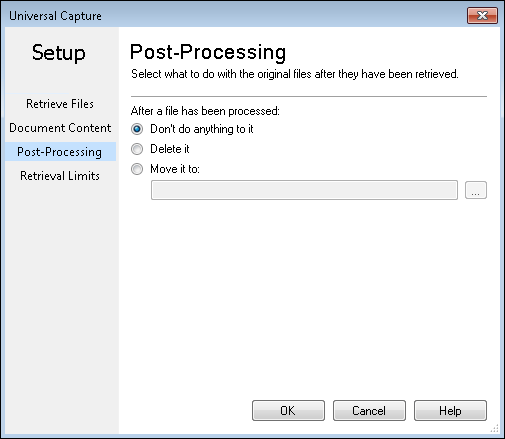
- You can select to do nothing with the original files, delete them, or move them. If you want to move them, select the Browse button
 next to Move it to and define a destination (on your computer or network) to move the files to.
Retrieval Limits
This Retrieval Limits section of the Universal Capture dialog box allows you to specify when Quick Fields should stop retrieving files and how many files should be queued up at one time to be processed.
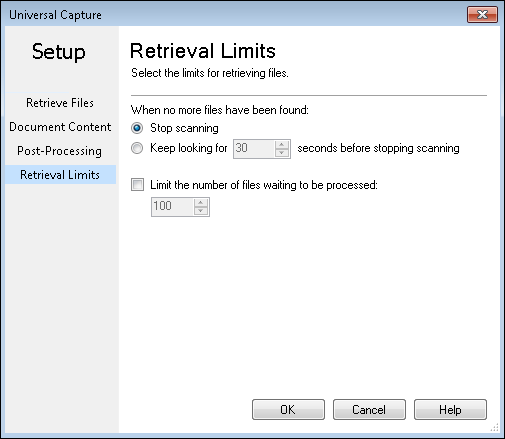
- Select Stop scanning if you want Quick Fields to stop scanning when no more files of a specific type are found.
- Select Keep looking for __ seconds before stopping scanning to define a specified amount of time to pass before Quick Fields ceases scanning.
- Limit the number of files waiting to be processed: This option controls how many files can be in the processing queue at a time. After clicking Scan, Universal Capture copies the files from the source folder to a temporary folder (a queue) for processing. Once it hits the limit defined in this option, this process of copying files is temporarily paused until the queue decreases, which helps save disk space. Once the queue decreases, Universal Capture will resume copying the files to the queue. During all these operations, Quick Fields never stops scanning.
Note: The Limit the number of files waiting to be processed option is not available in Quick Fields Scanning.
Example: If you have a scheduled Universal Capture session that is supposed to OCR documents, you can configure Quick Fields to limit the number of files copied to the processing queue to 100. Quick Fields will continuously OCR documents while files are being copied to the queue. Once the queue hits 100, the process of copying files will be temporarily paused until the number of documents in the queue decreases.