Browsing for Entries
Some activities allow you to browse to a folder or document in your repository for the activity to use. Other activities let you browse for an entry used by another activity.
When you browse for an entry, by selecting the Browse button  or clicking the Select link, one of the following dialog boxes will appear, depending on the type of entry the activity can interact with:
Browsing for an Entry from Another Activity
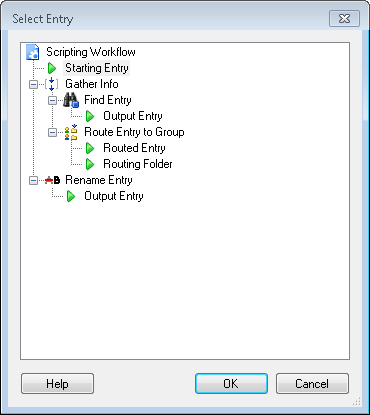
This dialog box allows you to select which entry or entries from the current workflow definition that the activity will run on.
To select an entry
- From the Select Entry dialog box, expand the activity that returns or creates the entry or entries you want to use.
-
Select the entry and click OK. The selected entry will appear in the activity's properties pane.
Note: You can only select entries from activities that appear above the activity you are currently configuring in the Designer Pane.

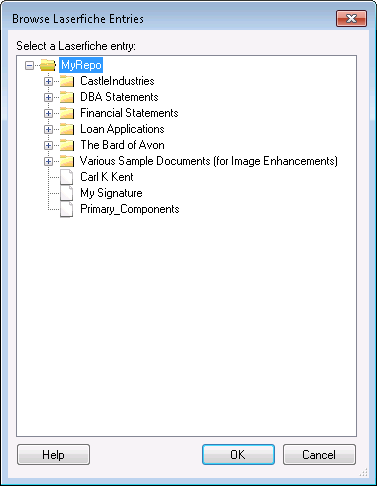
Some activities allow you to specify a folder or document in your repository for the activity to use. You can navigate to and select a folder or document with the Browse Laserfiche Entries dialog box.
To use the Browse Laserfiche Entries dialog box
- Click the Browse button
 to open the dialog box.
 - In the Browse Laserfiche Entries dialog box, navigate to the folder or document you want to use.
- Click a plus button next to a folder to expand that folder. Expanding a folder shows the folders and documents inside that folder.
- Click a minus button next to a folder to collapse that folder, hiding its contents.
- Double-click a folder to expand or collapse the folder. (If the folder is collapsed, double-clicking the folder expands it. If the folder is expanded, double-clicking the folder collapses it.)
- Select the folder or document you want to use.
- Click OK.
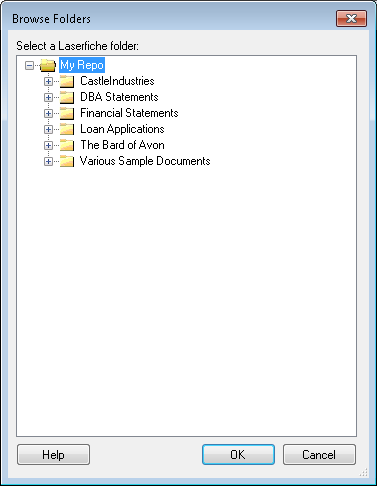
Some activities allow you to specify a folder or document in your repository for the activity to use. You can navigate to and select folders or document with the Browse Folders dialog box.
To use the Browse Folders dialog box
- Click the Browse button
 to open the dialog box.
 - In the
 Browse Folders dialog box, navigate to the folder you want to use.
 - Click a plus button next to a folder to expand that folder. Expanding a folder shows the folders inside that folder.
- Click a minus button next to a folder to collapse that folder, hiding its contents.
- Double-click a folder to expand or collapse the folder. (If the folder is collapsed, double-clicking the folder expands it. If the folder is expanded, double-clicking the folder collapses it.)
- Select the folder you want to use.
- Click OK.

