Laserfiche Server Login
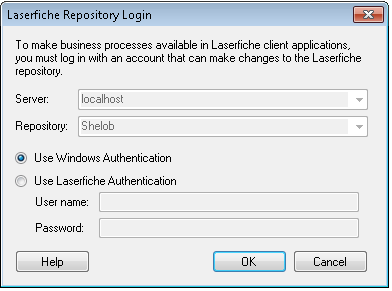
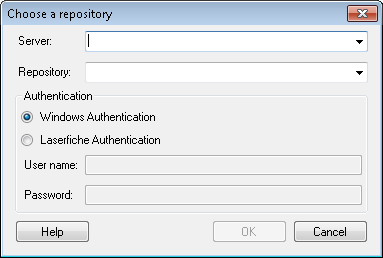
When working with a business process (publishing, editing starting rules, managing instances, etc), you will be prompted to login to a Laserfiche repository. This security check ensures you have permissions sufficient for making changes in the selected Laserfiche repository. Depending on the action you are performing, either the ![]() Choose a Laserfiche Repository dialog box or the
Choose a Laserfiche Repository dialog box or the ![]() Laserfiche Repository Login dialog box will open.
Laserfiche Repository Login dialog box will open.
The Choose a Laserfiche Repository dialog box allows you to choose the repository you want to login to. Whereas, if you are editing a business process that has already been assigned a repository (via its connection profile) you must login to the repository specified in the Laserfiche Repository Login dialog box.
Choose a Laserfiche Repository
The Choose a Laserfiche Repository dialog box allows you to choose the repository you want to login to.
- Server: Type in the address of the server that hosts the repository you want to configure.
- Repository: Select the name of the repository that contains the entry you want to modify.
- Select your authentication type; if you select Use Laserfiche Authentication, type in your user name and password.
Note: You must log in as a user with a full license.
- Click OK to use the configured information and close the dialog box.
Laserfiche Repository Login
If you are editing a business process that has already been assigned a repository (via its connection profile), you must login to the specified repository.
- Server: The name of the Laserfiche Server that hosts the repository.
- Repository: The name of the repository that you must have permissions to.
- Select your authentication type; if you select Use Laserfiche Authentication, type in your user name and password.
Note: You must log in as a user with a full license.
- Click OK to use the configured information and close the dialog box.

