Applying a Theme to a Form
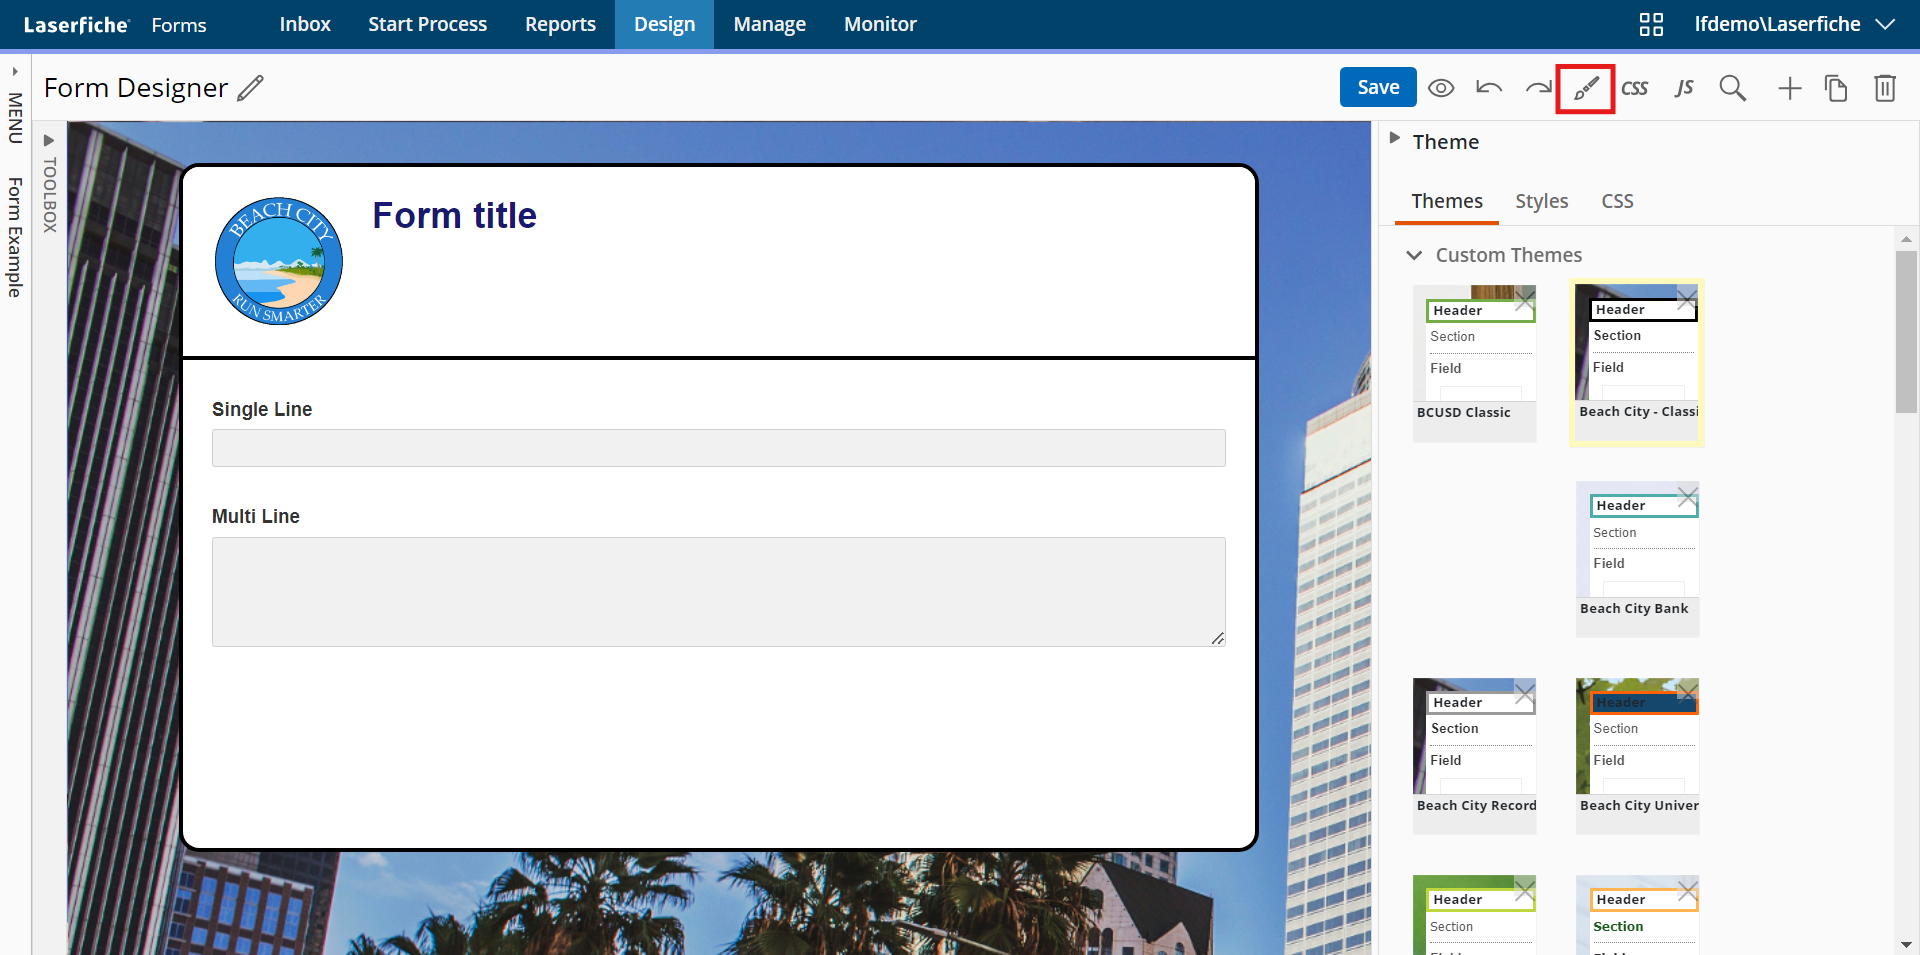
The Themes page lets you configure how your form looks by selecting or editing one of many predefined themes.

To apply a theme
- Select the form from the drop-down menu on the left that you want to apply a theme to.
- Click the desired theme from the list of custom or default themes. Your selection will be applied to the form and be automatically saved.
- Click Preview to see what the form will look like to the person filling it out.
To customize an available theme
- Click the Customize tab.
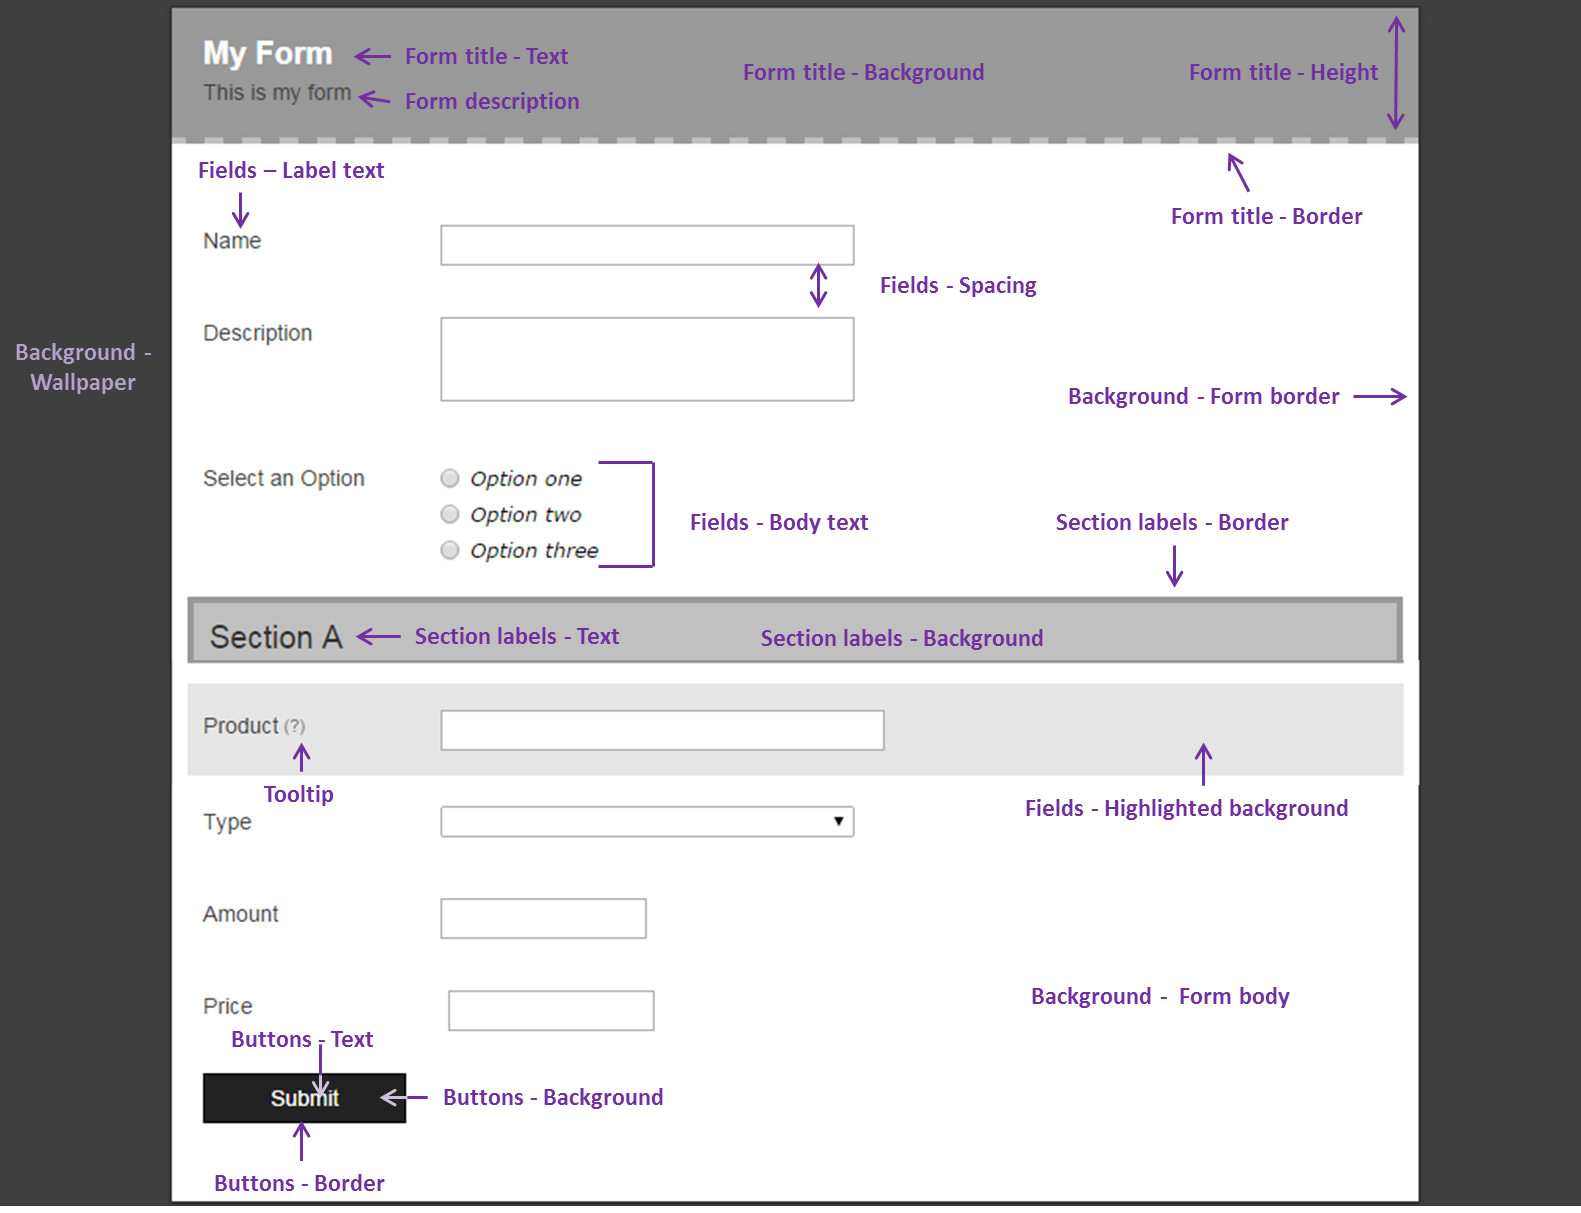
- Click a section to expand its options. You can customize the page logo, colors, fonts, borders, and more.
- To add a logo to the top of your form, click the Logo section. Under Image, click Add logo. Select a photo from your Image Gallery, upload a photo by dragging it into the Upload tab, upload a photo by browsing for it from the Upload tab, or provide an image URL on the URL tab. Click OK. You can further configure the logo by specifying its alignment (left or right) and by specifying its width in pixels.
- Backgrounds: Choose from a variety of colors and patterns for backgrounds, or specify an HTML color code or image URL for a background. Backgrounds can be tiled across the entire area, tiled vertically (along the left side the area), tiled horizontally (along the top of the area), or not tiled at all.
- Borders: Choose from a variety of colors and patterns for borders, or specify an HTML color code for a border. You can also specify border thickness and whether the borders will have shadows and/or rounded corners. Borders can go along the top, bottom, right, and/or left of the area specified.
- Text: Choose from a variety of fonts, colors, sizes, and styles. You can also specify an HTML color code for text.
- Spacing: The space between fields and the height of the form title area can be customized.
- Buttons: The "Submit," "Approve," and "Reject" buttons can each have their text, border, and backgrounds customized. Button backgrounds and borders can only be solid colors.
Tip: If you want a logo to appear for your form's entire header, hiding the form's title completely, select a logo here and size it appropriately. Then, enter in the form's title field.
See all the elements you can configure.

- If you would like to save your customized theme to the list of custom themes, click the Add to custom themes button above your form, enter a name for the theme, and click Save.
Important: The themes specified on this page will take precedence over any conflicting CSS rules on the CSS or JavaScript pages.
Related Topics