Configuring a Decision Table Rule in Workflow
This configuration of the Run Rule activity allows you to reference the decision table logic to make a decision in your workflow and then use the results of the decision elsewhere in the process. When the decision table produces more than one result, you can use a For Each Row activity to iterate over each result. The following instructions use the sample decision table from the Output Order Hit Policy page.
To configure a decision table rule:
- Drag the Run Rule activity from the toolbox pane and drop it in the Designer pane.
- In the properties pane, type a name and description of the activity.

- In the Rule property box, select Decision Table Rule.
- Select the rule and version. The version corresponds to the "Major" version number for the rule.
- Under Input Values, specify the token and/or hard-coded values you want to use for each input field.
Example: In the following image, the input name Age represents the input field on the Output Order decision table. When the activity runs, the value of the %(Age) token is entered for the input.
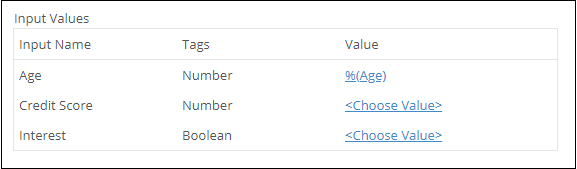
Note: When you select <Choose Value>, you see a text box, token picker, and three dots. The text box contains the input value. Note that when you enter a string value in the text box, you do not have to place double quotes around the string. The token picker lets you select a token. The three dots lets you select an item from a decision table's predefine list, if the decision table has one.
- Under Output Values, specify the name and tag of the single-value token that contains the result of the rule.
Example: In the following image, the output name Decision represents the output field Decision on the Output Order decision table. The token name Decision is used to represent the token that contains the result of the decision. This token looks like %(RunRule_Decision).
