Find Entries
This activity finds Laserfiche entries (documents or folders) and make those entries available to other activities in your workflow definition. Learn about tokens this activity produces
Note: If you want to return only an individual document, use the Find Entry activity instead.
To set up this activity:
- Drag the activity from the toolbox pane and drop it in the Designer pane.
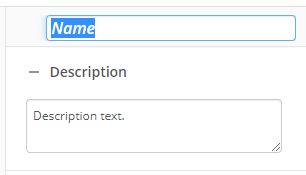
- In the properties pane, type a name and description of the activity.
- In the Connection Profile property box, select the repository you want the activity to use.
- In the Entries to Find property box, specify where the activity looks for entries.
- Under Find the entries in the, select to find entries in a specified folder or find entries in the same folder as a specified entry.
Example: The Financial Statements folder, inside the Accounting folder, contains several statements. If you select to find the entries in the folder Financial Statements (specified by either its ID or path), then all of the statements in that folder will be returned. If you select to find the entries in the same folder as the entry Financial Statements (specified by either its ID or path), then all the entries inside the Accounting folder will be returned.
- Specify how you want to find the entries:
- with ID: Type an entry ID, or click the Browse button (ellipsis)
 to browse to an entry. All documents, folders, and shortcuts stored in a Laserfiche repository are assigned a Laserfiche Entry ID number. If you choose to find entries based on an ID number, the entry with the specified ID does not need to stay at the same path for this activity to find it. Click the Token button (right arrow)
  to add a token.
Note: If the ID refers to a document or shortcut (instead of a folder), the activity will return all the entries in same folder as the document or shortcut.
- at: Type a location path, or click the Browse button (ellipsis)
 to browse to a folder. If you choose this option, the entry you specify a location for must stay at the same path for the activity to run correctly. Click the Token button (right arrow)
  to add a token.
Note: If you browse to or specify a path to a document or shortcut (instead of a folder), the activity will return all the entries in same folder as the document or shortcut.
- with ID: Type an entry ID, or click the Browse button (ellipsis)
- Optional: Select If the entry is a shortcut, use the document or folder that it references to retrieve entries in the folder where the actual entry is located. If you don't select this option, the activity will return the documents in the folder where the shortcut is.
- In the Filter Entries property box, determine which entries will be returned:
- Documents: Includes documents in the entries returned.
- Folders: Includes folders in the entries returned.
- Document Shortcuts: Includes document shortcuts in the entries returned.
- Include the referenced documents instead of the shortcuts: Returns the actual documents instead of their shortcuts.
Example: If a Finances folder contains a shortcut to the document Budget Proposal 2010, selecting Include the referenced documents instead of the shortcuts will return the Budget Proposal 2010 document instead of a shortcut to the document.
- Folder Shortcuts: Includes folder shortcuts in the entries returned.
- Include the referenced folders instead of the shortcuts: Returns the actual folders instead of their shortcuts.
- In the Additional Properties property box, click Select properties to retrieve...
- Select the checkbox next to each desired
 property.
- Click OK.
- In the Fields property box, click Select fields to retrieve....
- In the Choose Field dialog box, select the fields that you want to retrieve a value from.
- Optional: To find a particular field, narrow the list of fields using the following options:
- Name: Type the field name.
- Template: Display fields associated with a specific template.
- Only show selected fields: View only the fields you have selected.
- Optional: Select or clear all fields by choosing Select / Clear all at the bottom of the dialog box.
- Click OK.
- In the Sort Found Entries By property box, configure the order the found entries will return in. You can sort by any Fields you retrieve.
- In the drop-down, select the criteria by which you want to sort the found entries. To order the entries, select the up or down arrow
 to the right of each box.
You may want to disable activities if you only want to test specific sections of your workflow. To disable activities:
- Select an activity in the designer pane to highlight it.
- In the Description property box, clear Enable.
