Installing the Laserfiche for Outlook Add-in
Requirements
- Outlook 365 desktop application, classic and new, Version 2404 (Build 17530.15000) or later, or Outlook on the web using modern browsers.
- User mailbox in Exchange Online.
Description
By using the Laserfiche Outlook Add-in for Microsoft 365, you can save emails and attachments directly to Laserfiche Cloud and self-hosted repositories. Saved emails will also be tagged with the category "Saved to Laserfiche" directly within the Outlook inbox. Available for use with Office 365 accounts, the Laserfiche Outlook Add-in can archive correspondence along with their metadata to start Laserfiche workflows or processes.
Two options available
Outlook add-in is offered as 2 options: Laserfiche for Outlook and Laserfiche for new Outlook. The Laserfiche for new Outlook Add-in features the ability to automatically save copies of emails and their attachments to the Laserfiche repository when used with new Outlook or Outlook on the web.
Warning: The Laserfiche for new Outlook Add-in is not compatible with classic Outlook.
Configuration
Overview
There are two primary requirements for users to access Laserfiche from Outlook. First, Outlook needs to have an authenticated connection to Laserfiche. This involves adding the Laserfiche Outlook Add-in to Laserfiche as an authenticated app through the Laserfiche Cloud Developer Console. Second, the Laserfiche for Outlook Add-in must be installed in the Microsoft 365 Admin Center and provisioned for the users that will have access to it.
- Step 1 - Create the Laserfiche Outlook Add-in application in the Laserfiche Cloud Developer Console.
- Step 2 - Provision the Laserfiche Outlook Add-in via the Microsoft 365 Admin Center.
Important considerations
Before installing the add-in, consider your user base and what applications they are using. How many are using classic Outlook, how many have switched to new Outlook or use Outlook on the web. What Active Directory security groups can be used to restrict deployment for the Laserfiche for new Outlook Add-in to only those who have new Outlook. What regional center is closest to your user base, and is having a U.S. based landing page an issue or not.
After completing Step 1 - Create the Laserfiche Outlook Add-in application in the Laserfiche Cloud Account Developer Console, proceed to Step 2 - Provision the Laserfiche Outlook Add-in and follow the instructions for the scenario that meets the needs of your organization and user base.
Step 1 - Create the Laserfiche Outlook Add-in application in the Laserfiche Cloud Developer Console
The Laserfiche Outlook Add-in application must have a secure connection to the Laserfiche, and be granted access to the Laserfiche Account, by creating it as an application in the Laserfiche Developer Console. The following provides the basic steps required, and links to the Developer Console documentation for additional reference.
- Right-click the following link and select Save-as to download the Laserfiche for Outlook App Manifest which will be used to create the application in the Developer Console.
- Sign in to your Laserfiche account. From the app picker, select Developer Console.
Note: To sign in to the developer console, you must have the Developer Console Administrator access right. Learn how to configure access rights.
- Follow the Create an Application from a Manifest instructions using the Laserfiche for Outlook App Manifest file downloaded in the steps above.
Note: Do not change the value of clientId or redirectUris, or the sign-in flow will fail.
Step 2 - Provision the Laserfiche Outlook Add-in via the Microsoft 365 Admin Center
The Laserfiche for Outlook Add-in now must be added to the Microsoft 365 Admin Center, and be provisioned for the users who will make use of the connection to Laserfiche. Laserfiche has prepared several scenarios that can be implemented depending on the region, business needs, and distribution of users across each version of Outlook. Use these scenarios for planning your deployment and method of selecting users. Below are short descriptions of the scenarios to help you start considering the deployment process. After the initial installation steps, follow the detailed scenario steps for your deployment needs.
The deployment scenarios:
- Scenario 1: Standard deployment to the U.S. Region from the Microsoft Marketplace to all users. The simplest, most compatible deployment, for all Outlook versions, but without the automatic Save on send functionality or category tagging of saved email.
Note: Using the Standard deployment will open the U.S. region landing page before redirecting to a region-specific login page. To avoid this, you will need to use a custom manifest. See the other scenarios for regional specific options.
- Scenario 2: Regional Deployment for all users using the Laserfiche for Outlook Add-in regional manifest file. Provides a flow that does not redirect through any U.S. regional servers when installed for the specific region, for all Outlook versions, but without the automatic Save on send functionality or category tagging of saved email.
- Scenario 3: Regional Deployment only for users of new Outlook and Outlook on the web using the Laserfiche for new Outlook Add-in regional manifest file. Provides a flow that does not redirect through any U.S. regional servers when installed for the specific region, and includes the automatic Save on send feature and category tagging of saved email for all users. See warning below.
- Scenario 4: Regional deployment for a mixed group of all Outlook versions, using both Laserfiche for Outlook Add-in and Laserfiche for new Outlook Add-in regional manifest files. Users will be able to install either add-in from the Get More add-ins button on the home ribbon. This allows users to choose the correct version of the add-in based on their needs, while defaulting to the option that will work for everyone. Users who need the Save on send feature must use new Outlook or Outlook on the web and select the Laserfiche for new Outlook Add-in. See warning below.
- Scenario 5: Regional deployment for a mixed group of all Outlook versions, using both Laserfiche for Outlook Add-in and Laserfiche for new Outlook Add-in regional manifest files. The administrators specify which version will be used by each user or group. This option specifies installation of the classic Outlook Add-on or the new Outlook Add-in based on a list of users or groups. It does not allow users to add or remove the add-in themselves.
Warning: The Laserfiche for new Outlook Add-in is not compatible with classic Outlook.
Initial add-in installation steps:
See Microsoft's documentation for instructions regarding deploying an add-in through the Microsoft 365 Admin Center.

- Go to the Microsoft 365 Admin Center and from the left navigation bar, select ... Show all, and then select Settings > Integrated apps.
- Select the Add-ins link near the top of the Integrated apps page.
- Select Deploy Add-in at the top of the page.
- Select Next on the Deploy a new add-in wizard.
Specific scenario installation and deployment steps:
Scenario 1: Standard deployment to the U.S. Region from the Microsoft Marketplace to all users.
- In the Deploy a new add-in wizard, select Choose from the Store and search for "Laserfiche for Outlook" in the Microsoft Marketplace. Select "Laserfiche for Outlook" and make available to all users.
Scenario 2: Regional Deployment for all users using the Laserfiche for Outlook Add-in regional manifest file.
- Obtain the manifest (.xml) files by navigating to the region specific manifest generation page. Choose the region (United States, Canadian, or European Data Center) closest to most of your users.
- Click Generate manifest to download a zip file containing both the Laserfiche for Outlook Add-in and Laserfiche for new Outlook Add-in manifest files.
- Decompress the zipped files.
- In the Deploy a new add-in wizard, select Upload custom apps.
- In the Choose how to upload app section, select the Choose file button.
- Navigate to the Laserfiche for Outlook Add-in manifest file.
Note: Do not use the Laserfiche for new Outlook Add-in manifest for this scenario.
- Select Upload.
- On the next page, select Everyone to specify that the add-in will be deployed to everyone, or select the Specific users/groups who will receive the add-in.
- Select the Deployment Method desired:
- Fixed (Default) The add-in will be automatically deployed to the assigned users and they will not be able to remove it from their ribbon.
- Available Users may install the add-in by clicking the Get More add-ins button on the home ribbon in Outlook, and going to Admin-managed.
- Optional The add-in will be automatically deployed to the assigned users but they can choose to remove it from their ribbon.
Note: This deployment does not include automatically saving sent messages to Laserfiche, and does not support automatically applying category tags in shared Outlook mailboxes. To deploy with these features, see the deployment scenarios that utilize the Laserfiche for new Outlook Add-in manifest below.
Warning: If Laserfiche for new Outlook Add-in is installed, and a classic Outlook user attempts to send an email, the following error will be displayed:
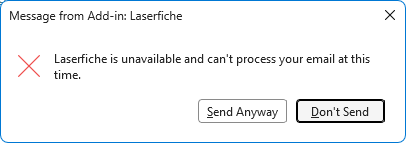
Click Send Anyway to send the message. This error will be displayed every time a message is sent. -
Select Deploy.

Scenario 3: Regional Deployment only for users of new Outlook and Outlook on the web using the Laserfiche for new Outlook Add-in regional manifest file, which includes the Save on send feature.
- Obtain the manifest (.xml) files by navigating to the region specific manifest generation page. Choose the region (United States, Canadian, or European Data Center) closest to most of your users.
- Click Generate manifest to download a zip file containing both the Laserfiche for Outlook Add-in and Laserfiche for new Outlook Add-in manifest files.
- Decompress the zipped files.
- In the Deploy a new add-in wizard, select Upload custom apps.
- In the Choose how to upload app section, select the Choose file button.
- Navigate to the Laserfiche for new Outlook Add-in manifest file.
- Select Upload.
- On the next page, select Everyone to specify that the add-in will be deployed to everyone, or select the Specific users/groups who will receive the add-in.
- Select the Deployment Method desired:
- Fixed (Default) The add-in will be automatically deployed to the assigned users and they will not be able to remove it from their ribbon.
- Available Users may install the add-in by clicking the Get More add-ins button on the home ribbon in Outlook, and going to Admin-managed.
- Optional The add-in will be automatically deployed to the assigned users but they can choose to remove it from their ribbon.
Note: This deployment includes automatically saving sent messages to Laserfiche, category tagging, and supports shared Outlook mailboxes/folders. For category tagging and shared Outlook mailboxes/folders, see the additional configuration steps below.
Warning: If Laserfiche for new Outlook Add-in is installed, and a classic Outlook user attempts to send an email, the following error will be displayed:
Click Send Anyway to send the message. This error will be displayed every time a message is sent. -
Select Deploy.
Scenario 4: Regional deployment for a mixed group of all Outlook versions, using both Laserfiche for Outlook Add-in and Laserfiche for new Outlook Add-in regional manifest files. Users can select their add-in.
- Obtain the manifest (.xml) files by navigating to the region specific manifest generation page. Choose the region (United States, Canadian, or European Data Center) closest to most of your users.
- Click Generate manifest to download a zip file containing both the Laserfiche for Outlook Add-in and Laserfiche for new Outlook Add-in manifest files.
- Decompress the zipped files.
- In the Deploy a new add-in wizard, select Upload custom apps.
- In the Choose how to upload app section, select the Choose file button.
- Navigate to the Laserfiche for Outlook Add-in manifest file.
- Select Upload.
- On the next page, select Everyone to specify that the add-in will be deployed to everyone, or select the Specific users/groups who will receive the add-in.
- Select the Deployment Method:
- Optional The add-in will be automatically deployed to the assigned users but they can choose to remove it from their ribbon.
- Select Deploy.
- Re-open the Deploy a new add-in wizard.
- Repeat all steps, choosing the Laserfiche for new Outlook Add-in manifest file for upload.
- Select the Deployment Method:
- Available Users may install the add-in by clicking the Get More add-ins button on the home ribbon in Outlook, and going to Admin-managed.
Note: This will make the add-in available to all users to install, including classic Outlook users.
Warning: If Laserfiche for new Outlook Add-in is installed, and a classic Outlook user attempts to send an email, the following error will be displayed:
Click Send Anyway to send the message. This error will be displayed every time a message is sent.
- Available Users may install the add-in by clicking the Get More add-ins button on the home ribbon in Outlook, and going to Admin-managed.
- Select Deploy.
Scenario 5: Regional deployment for a mixed group of all Outlook versions, using both Laserfiche for Outlook Add-in and Laserfiche for new Outlook Add-in regional manifest files. Administrators specify which add-in is installed for users.
- Obtain the manifest (.xml) files by navigating to the region specific manifest generation page. Choose the region (United States, Canadian, or European Data Center) closest to most of your users.
- Click Generate manifest to download a zip file containing both the Laserfiche for Outlook Add-in and Laserfiche for new Outlook Add-in manifest files.
- Decompress the zipped files.
- In the Deploy a new add-in wizard, select Upload custom apps.
- In the Choose how to upload app section, select the Choose file button.
- Navigate to the Laserfiche for Outlook Add-in manifest file.
- Select Upload.
- On the next page, select the group containing all classic Outlook users.
- Select the Deployment Method:
- Fixed (Default) The add-in will be automatically deployed to the assigned users and they will not be able to remove it from their ribbon.
- Select Deploy.
- Re-open the Deploy a new add-in wizard.
- Repeat all steps, choosing the Laserfiche for new Outlook Add-in manifest file for upload.
- Select Upload.
- On the next page, select the group containing all new Outlook and Outlook on the web users.
- Select the Deployment Method:
- Fixed (Default) The add-in will be automatically deployed to the assigned users and they will not be able to remove it from their ribbon.
Warning: If Laserfiche for new Outlook Add-in is installed, and a classic Outlook user attempts to send an email, the following error will be displayed:
Click Send Anyway to send the message. This error will be displayed every time a message is sent.
- Fixed (Default) The add-in will be automatically deployed to the assigned users and they will not be able to remove it from their ribbon.
- Select Deploy.
Additional configuration for Shared Mailboxes, Shared Folders, and Save on send
Grant Microsoft tenant-wide admin consent
When an email is saved to Laserfiche, the add-in automatically applies the Outlook category tag "Saved to Laserfiche" so that users can easily identify and locate archived emails. To tag an email with the category "Saved to Laserfiche", the app will require permissions in Microsoft Graph API.
Graph API permissions are necessary to apply the category when using Save on send functionality, or when manually saving an email from either a shared mailbox or a shared folder.
To enable category tagging in either of these cases, the Entra administrator of your organization needs to grant consent to allow the Laserfiche for Outlook app to add the category "Saved to Laserfiche" to the email via Microsoft Graph API.
Note: Graph API permissions adds the category tagging functionality to the save on send feature, but this feature is enabled separately and is not compatible with classic Outlook. See Step 2 - Provision the Laserfiche Outlook Add-in via the Microsoft 365 Admin Center for more information.
- Replace the placeholder <Entra tenant ID> with the tenant ID of your organization in the following URI:
https://login.microsoftonline.com/<Entra tenant ID>/adminconsent?client_id=3a208052-b7b7-4566-b6e8-830cd36634b8&scope=user.read%20offline_access%20openid%20profile%20Mail.ReadWrite.Shared&redirect_uri=https://app.laserfiche.com/officeapps/outlook/v1/
Note: To find your Microsoft Entra tenant ID, see this Microsoft Entra topic.
- Copy the modified URI to your browser.
- Follow the Microsoft steps to sign in with your admin account and grant permissions. If successful, you will see the redirect page.

- To verify or revoke permissions,
- Within the Entra admin center, browse to Entra Enterprise applications, and view the app Laserfiche for Outlook client ID
3a208052-b7b7-4566-b6e8-830cd36634b8. - Go to Security / Permissions, then Admin consent.

- Within the Entra admin center, browse to Entra Enterprise applications, and view the app Laserfiche for Outlook client ID
Create an Outlook category named "Saved to Laserfiche" in the shared mailbox
This step is required to ensure smooth use of the Laserfiche Outlook Add-in with a shared Outlook mailbox or folder.
- To display a Outlook category tag labeled "Saved to Laserfiche" on an email after it is saved to your Laserfiche repository, you must first create the category "Saved to Laserfiche" in the shared mailbox and assign it your preferred color. If this category is not created, the Laserfiche Outlook Add-in will apply a gray tag to the email saved to your repository.
Troubleshooting
Note: Any configuration changes with the add-ins can take up to 72 hours to be available to users, as Outlook caches add-in configuration information.
Issue: User receives error "Message from Add-in: Laserfiche. Laserfiche is unavailable and can't process your email at this time.
Resolution:
- Remove Laserfiche for new Outlook and redeploy targeting an Active Directory group for users on new Outlook or Outlook on the web.
- See deployment scenarios 4 and 5 for additional information.
Issue: If a user does not see their add-in in their Outlook ribbon
Resolution:
- Verify that the user is using the Outlook 365 desktop client or Outlook on the Web.
- Verify that the user's mailbox is in Exchange Online.
- Verify that the add-in has been deployed to the correct user or user group.
Issue: Laserfiche Outlook Add-in is not visible in a shared Outlook mailbox or folder.
Resolution:
- Update the add-in to version 1.0.1 or later.
Issue: In a shared folder, the category tag "Saved to Laserfiche" is not applied to the email after it is saved to the Laserfiche repository.
Resolution:
- Verify that users' shared folder permissions include:
- Read: Full details
- Write: Edit all
- Other: Folder visible
Issue: "Saved to Laserfiche" category tag color is gray in a shared folder.
Resolution:
- Verify that the category "Saved to Laserfiche" exists in the owner's mailbox under Categories and that a color is assigned to the category.
Note: The color category tag only appears in the owner's mailbox. Users who have access to the shared folder will only see a gray category tag applied by the Laserfiche Outlook Add-in.