Adding Users
Create user accounts that will be able to access Laserfiche Cloud services.
Creating Users in Laserfiche
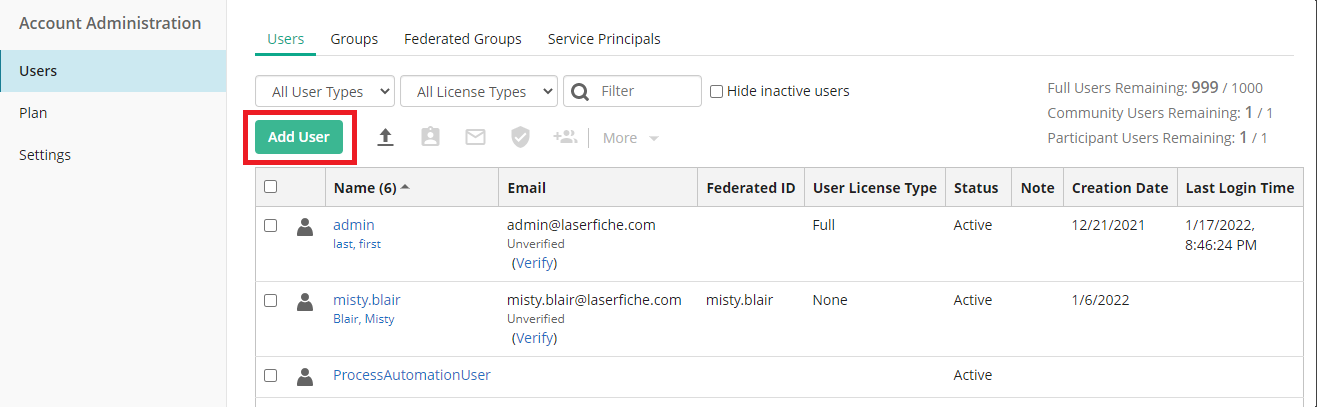
- In the left pane, under Account Administration, click the Users tab.
- Click the Add User button as shown in the image below.
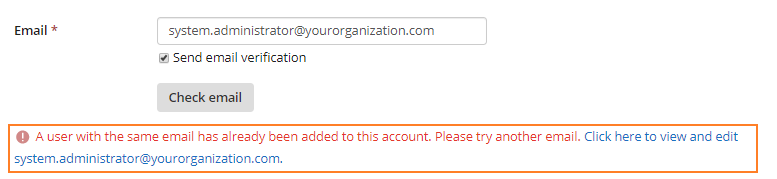
- In the Email field, enter the user's email address. By default, the Send email verification check-box is checked. Once this user is created, a verification email is automatically sent to the user to activate their Laserfiche Cloud account.
- Click the Check Email button to verify this email address is available. If this email address belongs to an existing user, an error message will appear, as seen in the image below.
- In the User Details section, enter a user's information. A username can contain the following characters and is limited to a maximum length of 47:
- a-z (case preserving but case-insensitive)
- 0-9
- ' (single quote)
- _ (underscore)
- - (hyphen)
- . (period)
- In the Password section, choose between one of these two options:
- Send a password setup email: Selecting this option will gray out the Password and Confirm password fields. An email is sent to the user, prompting them to set the password for their Laserfiche Cloud account.
- Set initial password: Selecting this option requires filling out the Password and Confirm password fields. To prompt the user to set their password upon signing-in, click the check-box for User must change password on next sign-in.
- Optional: Turn on Multi-factor Authentication (MFA) to require that the user specify a second piece of information in addition to their password when signing in. By default, the Send multi-factor authentication code by email is checked.

- In the Security and Access section, choose the User License Type for this user.
Note: To learn more about License types, navigate to User License Types.
- In the Access Rights section:
- Presets: Use this drop-down menu to choose one of the following options:
- Full Rights: Selecting this option allows the user full access rights to Laserfiche Account Administration, Public Portal, and Process Automation. In addition to this, the user will have rights to grant themselves full access in the Laserfiche Repository.
- Inherit All: Selecting this option means the user's access rights will be inherited from the user's group membership.
- Remove All Rights: Selecting this option means the user will not have any access rights to the Laserfiche Repository and Process Automation. User will not have any access rights to Laserfiche Account Administration and Public Portal unless inherited by the user's group membership.
- Customize access by selecting from the security options available for the account.
 Account
Standard user accounts granted one of these rights can access the Laserfiche Account Administration site. Administrator accounts can always access the Account Administration site.
- Account Administration allows the user account full access to the Laserfiche Cloud Account Administration site.
- Billing Administration allows the user account to view the Plan tab and Billing tab (if applicable) in the Laserfiche Cloud Account Administration site.
- Trustee Administration allows the user account to view the Users tab in the Laserfiche Cloud Account Administration site.
- Audit Administration allows the user account to access Audit Trail.
- View User Group Membership allows the user account the ability to
RepositoryRights in this section control access to the Audit Trail, Documents, and RepositoryAdministration applications.
- Access to Repository allows the account to sign in to the Laserfiche Repository and view documents.
- Set Laserfiche Privileges allows the account to manage privileges for the Laserfiche Repository through Repository Administration.
- Access to Repository Management allows the account to access Repository Administration.
- Audit Reporting allows the account to generate and view audit reports on the Laserfiche Repository.
- Laserfiche Web Configuration Manager allows the account to configure the default toolbar buttons for the entire repository. These defaults will be used instead of the generic repository defaults for any user who has not customized their toolbar. This role also allows the account to lock down toolbar configuration for other users.
Public Portal- Public Portal Administrator allows the account to access the Public Portal Designer.
Process Automation- Access to Process Automation allows the account to sign in to Process Automation.
- Process Administrator allows the account full access to Process Automation, including full administrative rights.
- Process Asset Administrator allows the account to administer files, holidays, profiles, repository contents, and work schedules in Process Automation.
- Process Developer allows the account to create and modify workflows, rules, starting events, and entities.
- Process Manager allows the account to create teams, view and start business processes, and modify rules.
- Survey Form Developer allows the account to create surveys.
Developer Console- Developer Console Administrator allows the account to manage the OAuth applications linked to your Laserfiche Cloud account.
- Presets: Use this drop-down menu to choose one of the following options:
- Click Create, to save and finish creating this user. Click Save and create another, to finish creating this user and start creating another user.
Note: The verification link contained within the verification email will expire in 24 hours.
Note: If you have created Groups, click the Group field. Choose a Group name from the drop-down menu. This will add this user to a group. To learn more about creating groups and adding users to groups, navigate to Creating Groups.
Note: Multi-factor authentication (MFA) is not supported when signing in through the Microsoft Office Integration prior to version 10.4.2.
Note: At least one account should have Set Laserfiche Privileges in order to assign privileges within Laserfiche Repository Administration.
Important: All users are required to agree to the terms of service when signing in for the first time. This can affect user accounts that are only used for services like Import Agent, Quick Fields Agent, Workflow web service, custom SDK programs that run as a non-interactive service, etc. Services using a user account that has never been used to sign in interactively will be unable to sign in. Please visit a Laserfiche Cloud application website to sign in with the appropriate user account to view and accept the terms of service.