Publishing, Sharing a Process, and More
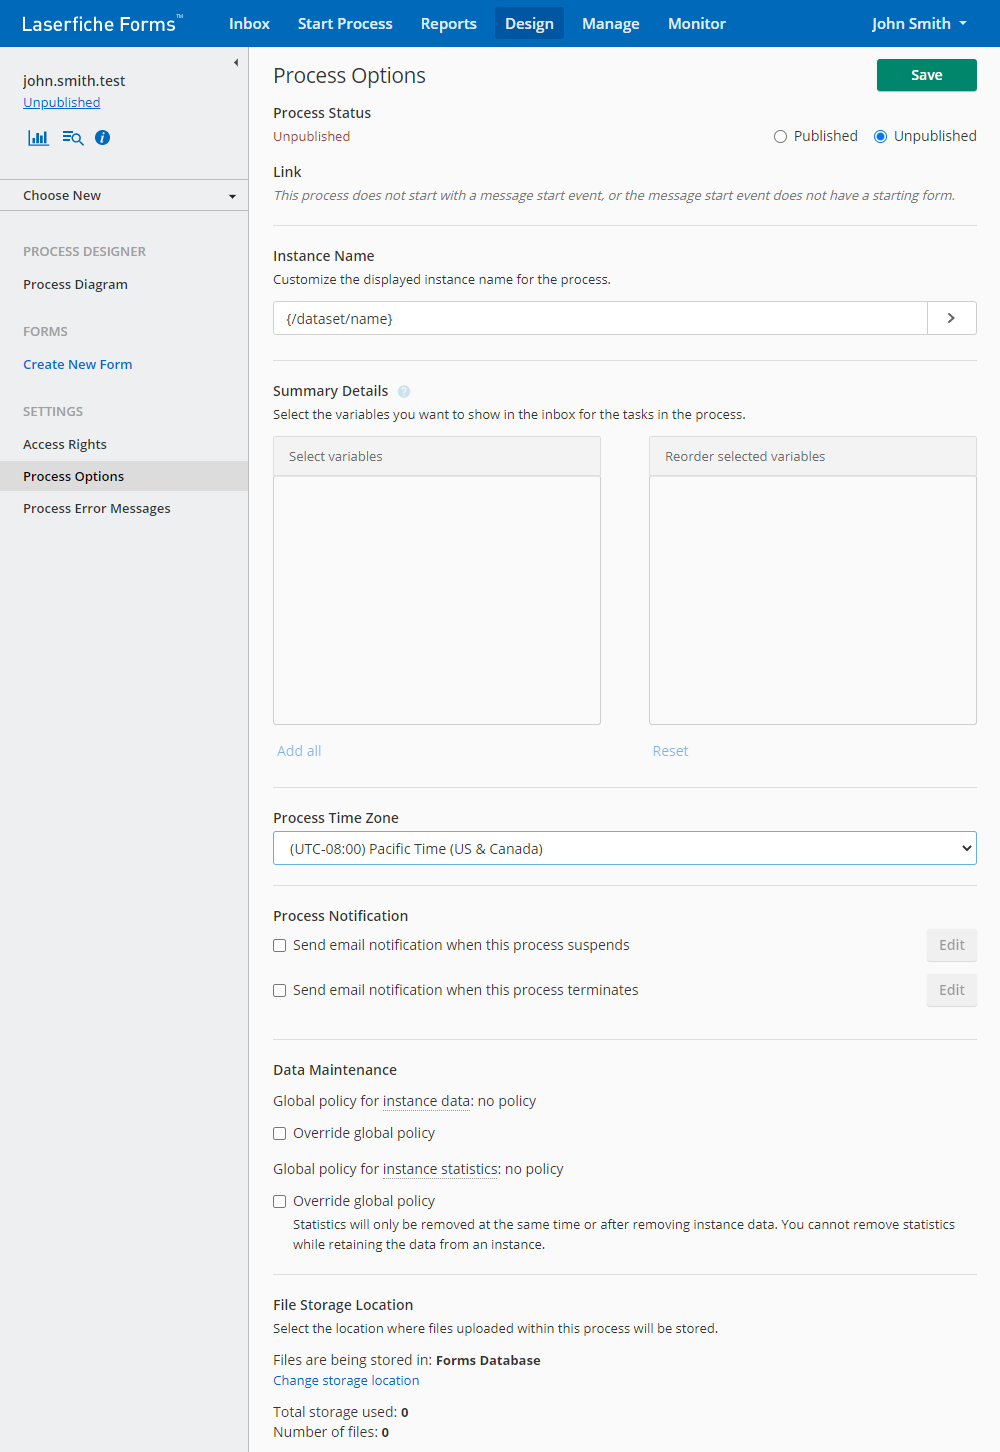
Use Process Options to configure settings for a selected process. These settings include the link to the starting form, the time zone of the process, and more. To open Process Options:
- Click Process Options in the left pane for a selected process in the Design page, or
- Click Options for a process in the Manage page.
After you make changes, click Save in the top right.

Process Status
A business process can have one of two statuses, Published or Unpublished. When a process is published, it appears in the Start Process page. By default, a process is unpublished, meaning only users with the Process Admin or Business Manager role for the process can start it. Users with the Submitter role cannot see or start hidden processes and cannot see or complete tasks assigned to them as part of hidden processes. Hiding a process is useful for testing processes before making it widely available.
Link
When a process begins with a message start event, and the event has a starting form, you can use this link to send users to the starting form for the selected process. Use the text box to make the last part of the link more descriptive. Then click Share to copy, email, or embed the link.
Instance Name
After the process runs, it creates an instance of the process. Use this text box to generate a name for each process instance. You can use variables to generate a unique name for each instance.
Details
All of the variables in a form are displayed in the first box in this section. You can add them to the second box to include the variables in the inbox for the task details in the process.
Process Time Zone
This drop-down lets you select the time zone for the process.
Process Notification
You can configure an email notification that notifies users when the process is suspended or terminated. Select one or both options in this section. A dialog will then allow you to specify the recipients, subject, and content of the email, and allow an error log to be attached.
Note: Once notifications have been enabled and saved, further modifications to the email template will be ignored.
Data Maintenance
As a process designer, you may want to override the global maintenance policy set by the system administrator for instance data and statistics. For example, you may decide that a completed process contains information that should be retained for longer than the global policy, say for three years instead of three months.
In Process Options, you can select the global policies you want to override by specifying a new duration or retaining the data indefinitely. If you do not see one of the policies in Process Options, it means the system administrator applied an administrative lock to the policy, so that process designers cannot override the policy at the process or field level.
Note: The instance data are the values submitted with the forms, while the instance statistics are the information about the processes, like who each step was assigned to or how long the processes took. By retaining instance statistics, you can generate analytics and reports about the completed processes.
File Storage Location
Select the location where files uploaded within this process will be stored. By default, all files are stored in the Forms Database. Once storage volumes have been configured click Change storage location, and select the volume to be used for uploaded file storage from the available list. If you do not see the desired volume in the list, check with your administrator to have the volume configured for use. Once selected, click Change to start the migration. You can check the migration status on the Volume Management page.
Note: If there are existing files for this process, they will migrate to the new location. Once files are moved out of the database, the Forms Database will no longer be able to be selected for storage. You can still select a different volume for storage, but not the database.
Note: With the release of Forms 10.4.5, you can migrate files from one volume to another.