Managing Metadata During Revision
During Revision, you can change the template and fields associated with a document.
To change the template and fields of a document during Revision
- Select the document in the Document Revision Pane.
- Select Configure fields from the Action menu or the bottom of the Tasks Pane.
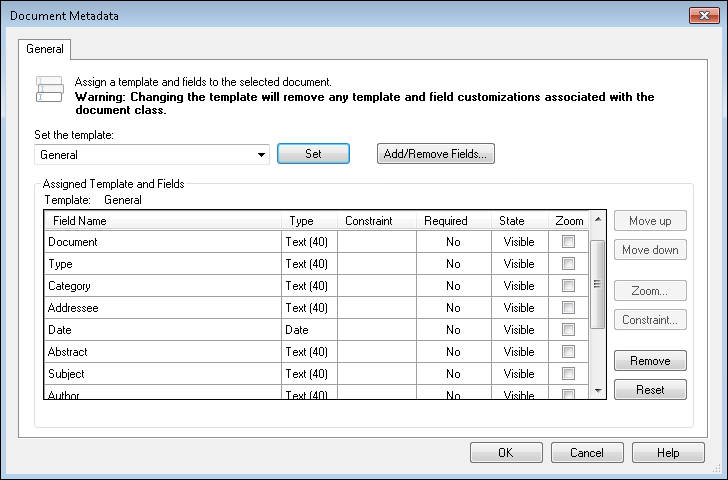
- The
 Document Metadata dialog box will open, and you can assign a new template and fields to the selected document.
Changing the Template
Under Set the template is a drop-down list of all the templates available to you in the Laserfiche repository associated with the document class.
To change the template
- Select a template from the list.
- Click Set. If a different template was previously assigned to that document, a dialog box may appear asking you to choose which of the existing fields you'd like to keep after reassigning the template.
- Make a selection and click OK. If you choose a particular setting and select Do not show me again, that will become the default setting and the dialog box will no longer appear.
Adding Fields
Under Add/Remove Fields is a drop-down list of all the fields available to you in the Laserfiche repository associated with that document class.
To add a field
- Select Add/Remove Fields.
- In the Choose Fields dialog box, select the fields you want to add and click OK.
Note: Multi-value field groups are supported in Quick Fields 10.1 and later. Multi-value field group names are supported in Quick Fields 10.3 and later.
Tip: If a document image has text associated with it, you can draw a rectangle around the desired text on the image in the Display Pane and copy and paste it elsewhere to help define the document (field value, document name, etc.).
