Using Condition Editors
You may want to identify documents or ensure certain processes in Quick Fields run only if specific conditions are met. You can assign:
- Identification conditions in the First Page Identification and Last Page Identification stages of the Quick Fields session.
- Conditions that must be met for certain processes inside a Conditional process to run.
Creating a condition
In a condition editor, conditions are assigned through a series of nested menu options that start broad and become more specific. Click any underlined text in the condition editor for more options.
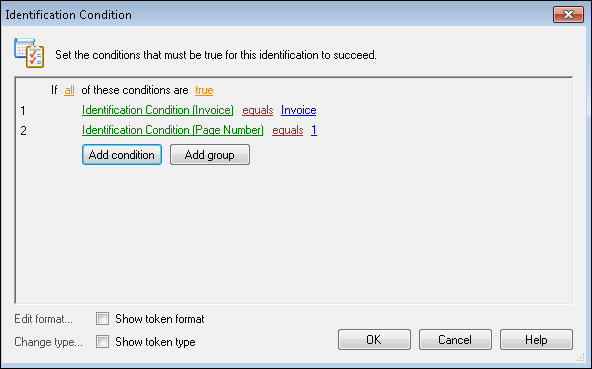
- Group Text: Click all or any to toggle between the two. Toggle to all if all of the conditions must be met. Toggle to any if any of the conditions can be met. Once you have selected any or all, click true or false to toggle between the two. Toggle to true if the conditions should be true. Toggle to false if the conditions should be false.

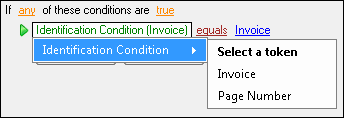
- Condition Token Text: Click these links to specify the token the condition will concern.
- Operator Text: Click these links to specify the logic of the condition: the relationship between the token specified in the condition token text and the value entered to the right. The operators available in this list depend on the condition token text.
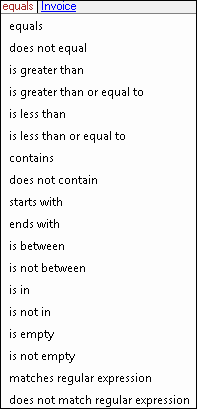
Example: Jason's condition concerns the entries with the "Total" field. He only wants his Quick Fields process to run when the token value for that field is "greater than" a $1,000. Jason clicks the operator text and selects is greater than
Note: By selecting matches regular expression or does not match regular expression you can use pattern matching to specify a relationship.
- Condition Value Text: Finish the condition by specifying a value. Depending on the operator you select in the operator text, you may see <empty>, a text box, or a text box and <empty>. Click <empty> (if necessary) and type a value in the text boxes. Click the token button (right arrow) to use tokens. After you enter a value, you can click the value again to modify it.

Note: If you have selected to use a regular expression, type in a regular expression or click the pattern matching button to build a regular expression that will extract the desired information from the input. Learn more about the regular expressions I can use.
You can create as many conditions as you want by clicking Add condition.
Ordering conditions logically
There are two reasons you may want to pay attention to the order of your conditions:
- Logical Groups: Ordering conditions into groups determines how conditions will be evaluated logically and allows you to create nested and nuanced conditions. To create a new group of conditions, click Add Group.
.Example: KPC has two different types of invoice forms that are very similar. The only difference is the word "Invoice" and the words "Invoice Number: XXXX" are in different locations. In Pre-Classification Processing, they add a Zone OCR process that will check both possible locations for the word "Invoice" and the other two possible locations for the words "Invoice Number: XXXX." KPC wants the invoices identified as such if either of the following condition groups are true. They configure the group to any to accomplish an "either" logic. Then, they create two groups of conditions that use the all group text because all the conditions in either condition group need to be met in order for the invoice to be identified correctly. Group one specifies that the condition group is true if a zone on the right side of the form equals "Invoice" AND another zone on the right side of the page, the invoice number, is not empty. Group two specifies that the condition group is true if a zone on the left side of the form equals "Invoice" AND another zone on the left side of the page, the invoice number, is not empty. If either of these condition groups meet all the criteria contained within each group, the invoice will be identified correctly.
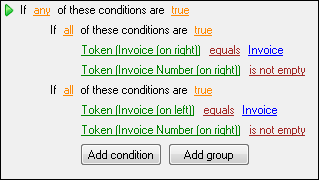
How to order conditions
- To organize conditions into groups, click Add group. Ordering conditions into groups determines how conditions will be evaluated logically and allows you to create nested and nuanced conditions.
- To reorganize conditions and groups, drag and drop the item by clicking and dragging the item's green arrow.
- To delete a condition, right-click the condition and select Delete.
- Right-click a condition or group to cut, copy, paste, move, insert, add, and delete conditions. Inserting a condition creates the condition before the selected condition and adding a condition creates the condition after the selected condition.
Using tokens in conditions
Tokens are available on both sides of conditions.
- You can use tokens on the left side of conditions by clicking the condition token text, pointing to Token, pointing to the process that produced the token, and selecting a token. (Global tokens will also be available in this menu.)
- Multi-value tokens on the left side will be treated like a multi-value field. Each value will be considered when evaluating the condition, and if any of the values meet the condition, the condition will be satisfied.
Example: Taylor places the multi-value Author token on the left side of a condition and specifies that the token must equal Bob. When the process runs, the token has three values: Susan, Bob, and John. The condition is satisfied because one of the token's values is Bob.
Tokens on the right side of a condition
- You can use tokens on the right side of conditions by clicking the <empty> text and clicking the token button (right arrow) .
- Multi-value tokens on the right side of a condition are treated the same as they are in most other text boxes in Quick Fields; the first value of the token will be used unless an index is specified.
Token Types
When using tokens to define conditions, it's important to tell Quick Fields the type of tokens that will be evaluated (on the left side) in order for them to be evaluated as expected. For example, if you have a String token type with the text "10", and you define a condition to be "greater than 5", it will not be evaluated as expected because the token on the left side is defined as a String token, which means, alphabetically,"5" is greater than "10". Changing the token type to Number will evaluate the condition as expected.
You can see the type of token that is being evaluated next to the Condition Token Text by selecting the condition, then select the Show token type checkbox at the bottom of the condition editor.
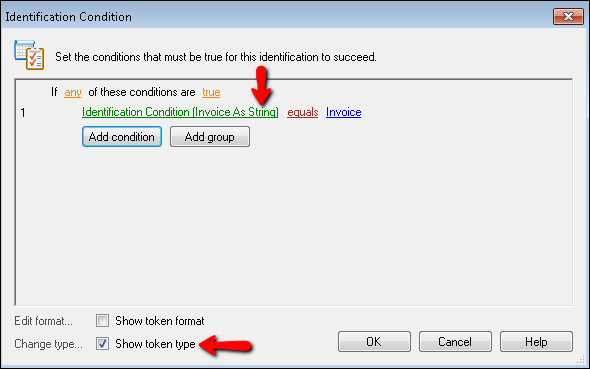
To change the token type
- Make sure you have the condition selected and select Change type.
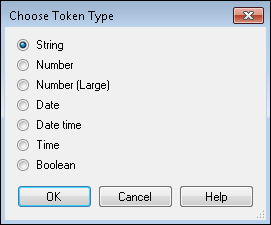
- Select the token type from the Choose Token Type dialog box. Your selection will be reflected on the right side of the condition. For example, if you select Date, the right side of the condition will be formatted to accept dates.
