Creating a Session: Quick Wizard
A session contains configuration information that specifies how Quick Fields should handle documents. You can create a session using a number of different methods, one of which is using the quick wizard.
The quick wizard is designed for users who are familiar with creating sessions. It guides you through the process of selecting (but not configuring) a scan source and specifying the login credentials that your session's first document class should use. Session settings that are not defined in the wizard (e.g., sample page configuration, when documents should be sent to the repository, metadata options) should be manually configured by the user once the session is created.
Tip: If you need more help creating a session than the quick wizard provides, use the standard or full wizard.
To use the quick wizard
- Open the wizard using one of the following methods.
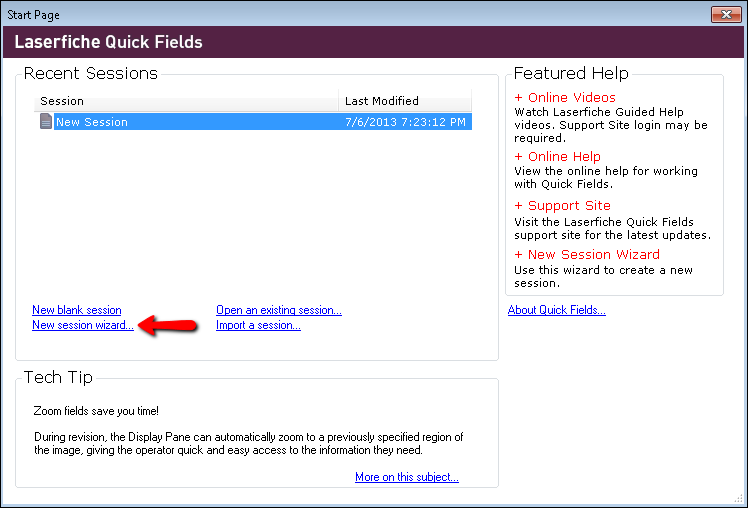
- On the Quick Fields Start Page, click New session wizard.
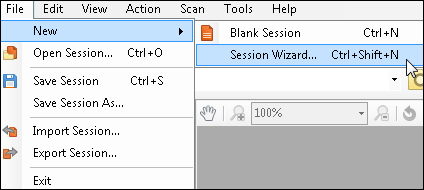
- If you have a session open and want to create a new session, click File, point to New, and select Session Wizard.
- On the Quick Fields Start Page, click New session wizard.
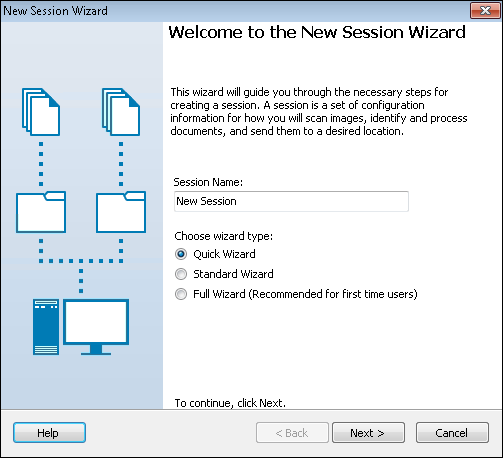
- In the New Session Wizard dialog box, name the session, select Quick Wizard, and click Next.
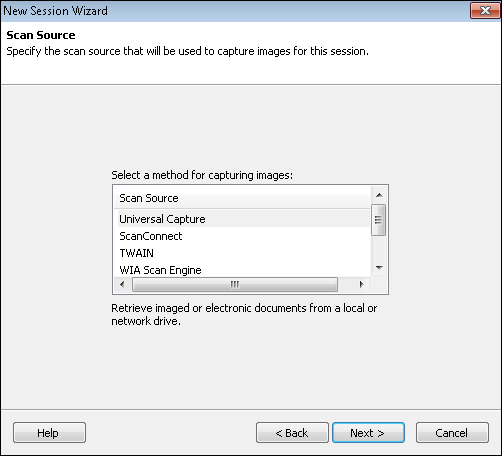
- In the Scan Source step, select Universal Capture, ScanConnect, TWAIN, WIA Scan Engine, or Laserfiche Capture Engine, then click Next.
- In the Laserfiche Repository step, specify the login credentials that your session's first document class should use to access the repository.
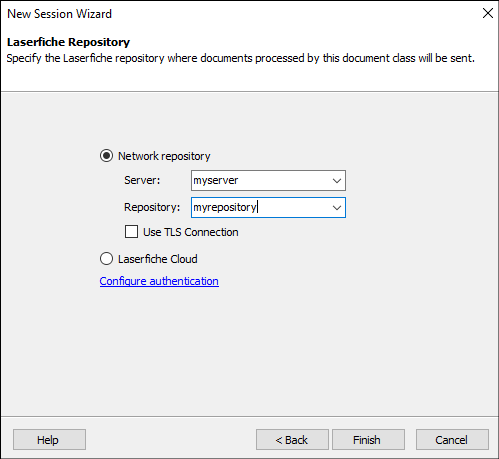
- For Server, enter the name of your Laserfiche Server.
- For Repository, select the repository you want the document class to be associated with.
Select Use TLS connection to use an encrypted connection.
Click Configure authentication and specify how the document class should log in to the repository.
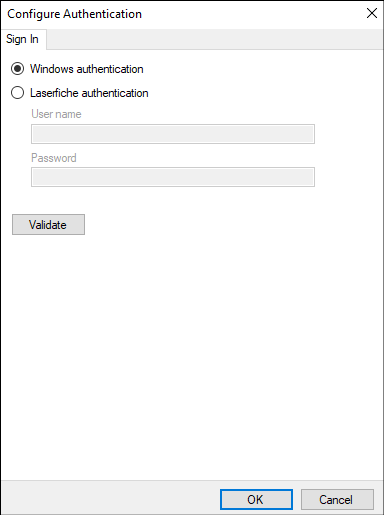
Select Windows Authentication to log in using the Windows credentials associated with the user running the session.
Select Laserfiche Authentication to enter credentials associated with a Laserfiche account.
Note: The user specified must have rights to perform all of the actions the session calls for. For example, if the user cannot create documents in the repository, the session will not be able to store processed documents.
To ensure the login credentials provided are valid, click Validate. If the information is valid, the wizard will display Success! Click OK. You cannot proceed until you provide valid credentials.
- Click Finish to complete the wizard and open the session.