Creating a Session: Full Wizard
A session contains configuration information that specifies how Quick Fields should handle documents. You can create a session using a number of different methods, one of which is using the full wizard.
The full wizard is designed for users who are new to Quick Fields. It guides you through the process of configuring virtually every session setting, such as selecting and configuring a scan source, creating a document class (including the configuration of sample pages), session permissions, selecting how unidentified documents should be handled, and specifying when processed documents should be sent to the repository.
Tip: After using the full wizard while you become accustomed to the settings in Quick Fields, you may want to use a different method to speed up the session creation process.
To use the full wizard
- Open the wizard using one of the following methods.
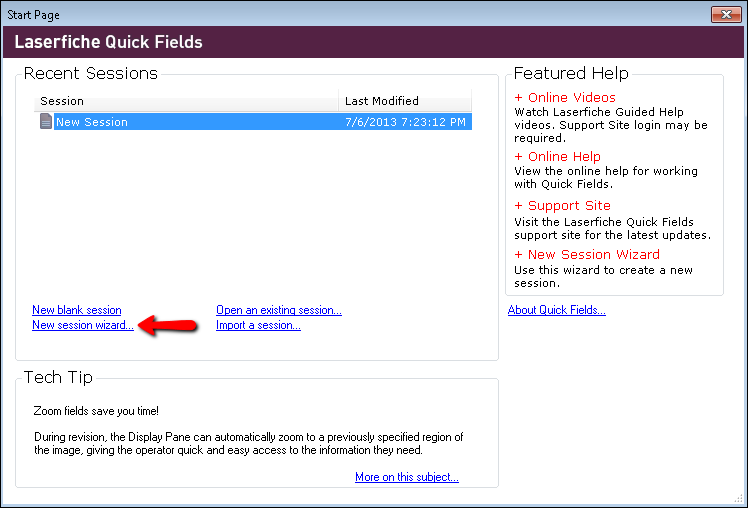
- On the Quick Fields Start Page, click New session wizard.
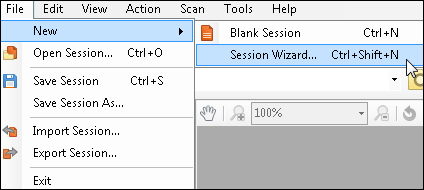
- If you have a session open and want to create a new session, click File, point to New, and select Session Wizard.
- On the Quick Fields Start Page, click New session wizard.
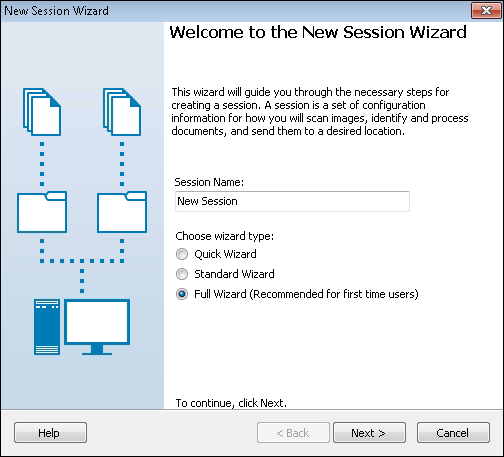
- In the New Session Wizard dialog box, name the session, select Full Wizard, and click Next.
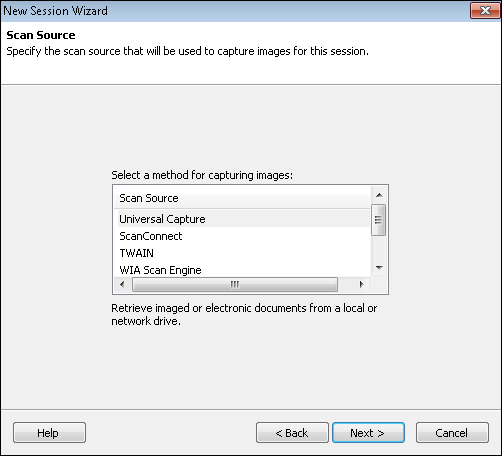
- In the Scan Source step, select Universal Capture, ScanConnect, TWAIN, WIA Scan Engine, or Laserfiche Capture Engine, then click Next.
-
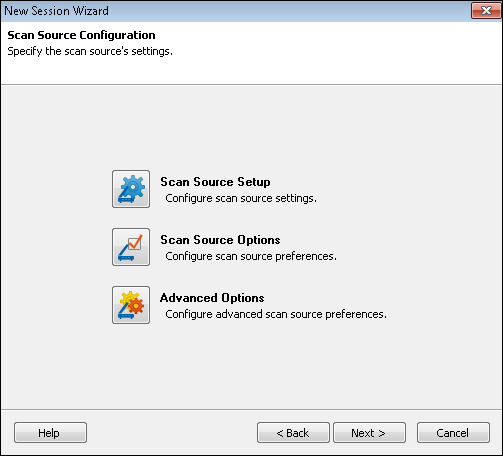
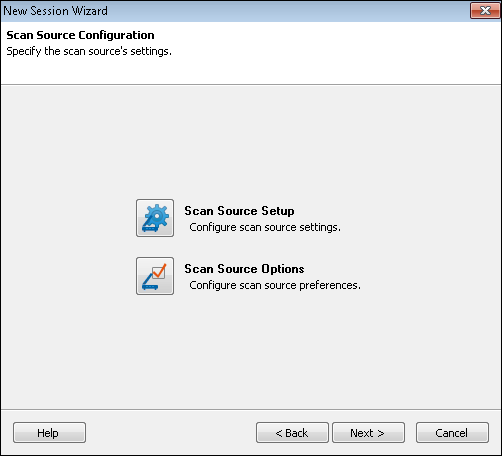
In the Scan Source Configuration step, you will configure a scan source. This step will differ depending on the scan source you chose in the previous step.
-
Laserfiche Capture Engine, Universal Capture, or ScanConnect
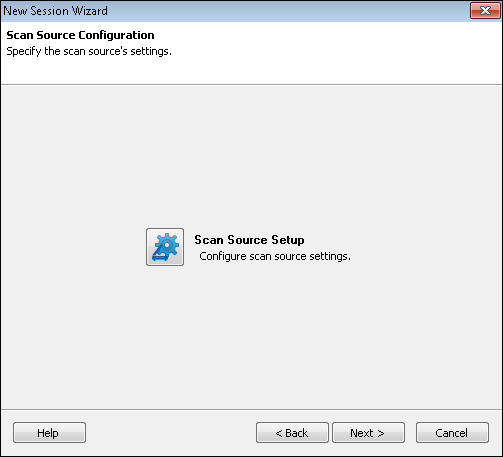
- TWAIN
- WIA Scan Engine
Tip: For more information on configuring a scan source, see the help topic associated with the scan source you selected: Universal Capture, ScanConnect, TWAIN, WIA Scan Engine, or Laserfiche Capture Engine.
-
Laserfiche Capture Engine, Universal Capture, or ScanConnect
-
Click Next.
- In the Laserfiche Repository step, specify the login credentials that your session's first document class should use to access the repository.
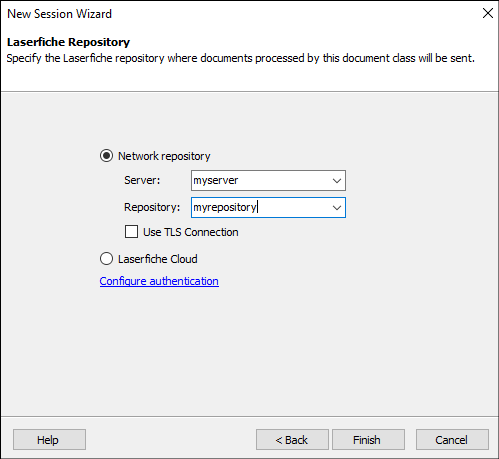
- For Server, enter the name of your Laserfiche Server.
- For Repository, select the repository you want the document class to be associated with.
- Select Use TLS connection to use an encrypted connection.
- Click Configure authentication and specify how the document class should log in to the repository.
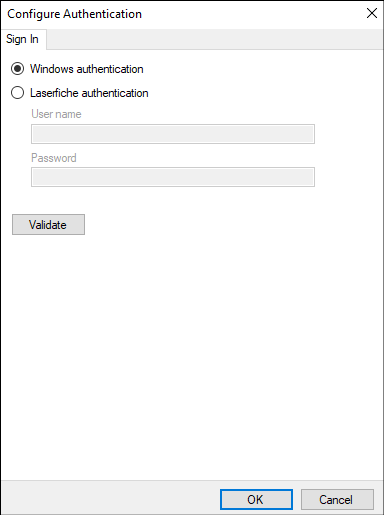
- Select Windows Authentication to log in using the Windows credentials associated with the user running the session.
- Select Laserfiche Authentication to enter credentials associated with a Laserfiche account.
Note: The user specified must have rights to perform all of the actions the session calls for. For example, if the user cannot create documents in the repository, the session will not be able to store processed documents.
To ensure the login credentials provided are valid, click Validate. If the information is valid, the wizard will display Success! Click OK. You cannot proceed until you provide valid credentials.
- Click Next.
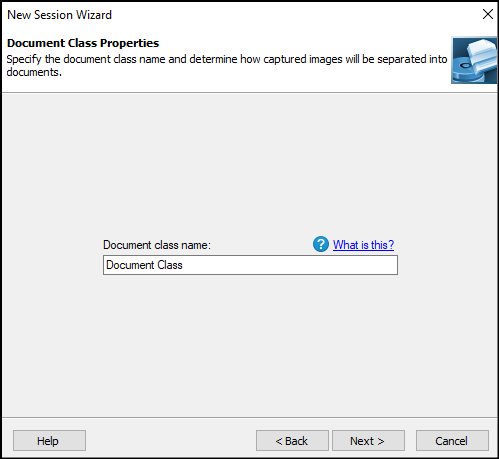
- In the Document Class Properties step, you will create your session's first document class. First, give the document class a name.
- For When is a document complete?, specify how Quick Fields will know when a document is complete.
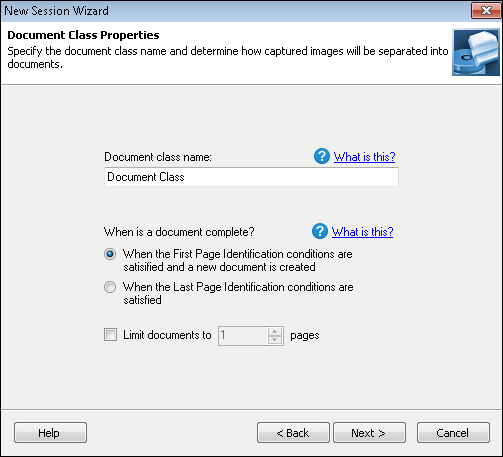
- Select When the First Page Identification conditions are satisfied and a new document is created to use First Page Identification processes. First Page Identification processes can be added once the session has been created.
- Select When the Last Page Identification conditions are satisfied to use Last Page Identification processes. Last Page Identification processes can be added once the session has been created.
- Select Limit documents to __ pages to enter the exact number of pages each document should have (i.e., how many pages should be scanned before the document class considers the following page a new document).
Example: If you enter 5, the document class will assume the first five pages that are scanned belong to Document 1, pages 6-10 belong to Document 2, pages 11-15 belong to Document 3, etc.
- For When is a document complete?, specify how Quick Fields will know when a document is complete.
- Click Next .
- In the Sample Pages step, you will scan or import sample pages that will be used by your session's first document class.
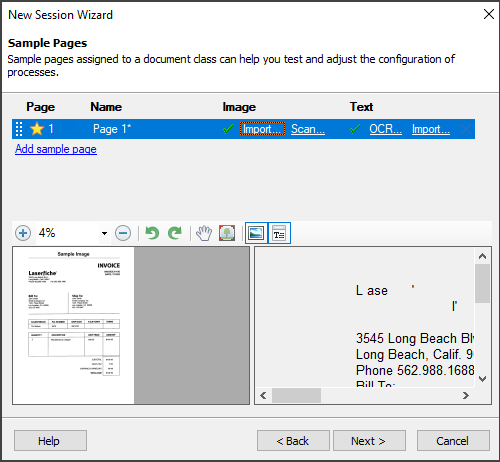
Note: Though you are not required to add your own sample page, keep in mind they can help you optimize your session without having to scan a large number of test images. If you do not add a custom sample page, the default page will be used.
- Click Add a sample page. Give the sample page a name and press Enter.
- Click Import under Image to browse to and select an image on your machine or a network drive.
- Click Scan under Image to scan an image.
- Click OCR under Text to OCR the imported or scanned image.
- Click Import under Text to import a text file.
Under Page, double-click the page number and specify which page the sample image should represent. You can also drag the grip icon to the left of the page number and move it to the desired page location.
Example: Ed selects a sample image and configures it to represent page 2. When configuring his session, Ed decides to apply an image enhancement to this page. When he selects the enhancement, Quick Fields shows Ed the sample image that represents page 2. This allows Ed to configure and test the enhancement using the correct page.
Optional: You can use the Preview toolbar to zoom in/out, rotate the image, pan, view the image in a maximized window, and view the samples page's image or text. You can also set a page as the default page by clicking the star next to it to turn it yellow. To delete a sample page, like the ones that comes with Quick Fields, click the X next to the page you want to delete.
Note: The first sample page configured for each document class will be available as a sample page in Pre-Classification Processing.
Tip: To zoom in to a certain part of the image, click on the image and draw a box around an area. To set the zoom to fit the screen, double click the image.
Repeat the steps above for each additional sample page you want to add.
Tip: You should only add more than one sample image if you plan on applying processes or image enhancements to different pages in your documents.
Note: Quick Fields comes with a default sample page. You can replace this page with your own by selecting it and performing one of the actions in step 1.
- Click Add a sample page. Give the sample page a name and press Enter.
Click Next.
- In the Document Metadata step, you will specify the template and volume that should be associated with your session's first document class.
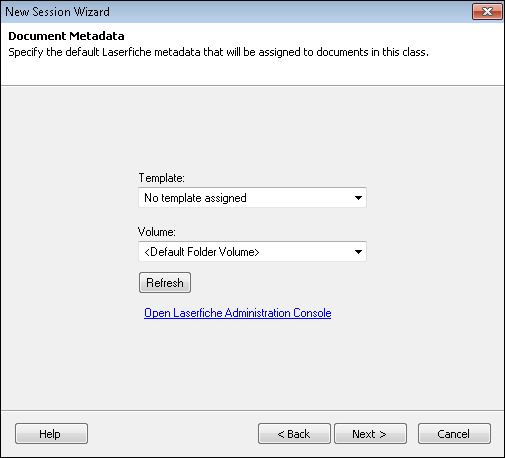
- For Template, select a template to be added to processed documents. If you do not want to assign a template, select No template assigned from the drop-down list.
- For Volume, select a volume for processed documents. Optionally, select Default Folder Volume to configure the session to store documents in the default volume assigned to the folder in question (the folder can be assigned on the following screen).
Note: If you select Default Folder Volume, the folder in question must have a default volume or the session will be unable to store documents.
Tip: If the template or volume you want to use is not available, click Refresh to update the items in the drop-down boxes.
- Click Next .
- In the Document Location step, you will specify the name and destination location for documents processed by your session's first document class.
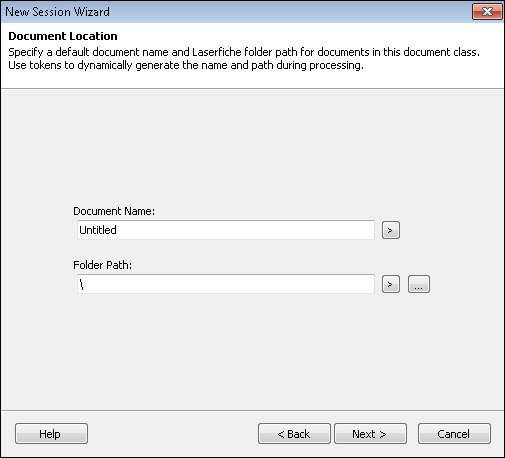
- For Document Name, specify a default name for processed documents. Enter static text, click
 to use tokens, or use a combination of the two.
Tip: Documents that share the same name will be automatically renamed when they are stored (e.g., MyDocument, MyDocument(2), MyDocument(3)). To avoid this issue, use tokens to create unique names.
For Folder Path, specify where processed documents should be stored. Click the browse button
 to select a location in your repository. Enter static text, click the token button (right arrow)
  to use tokens, or use a combination of the two.
- For Document Name, specify a default name for processed documents. Enter static text, click
- Click Next .
- In the Additional Session Settings step, you can configure miscellaneous settings associated with your session. These settings include what actions scanner operators should have the ability to perform, how unidentified documents should be handled, when processed documents should be sent to the repository, and more.
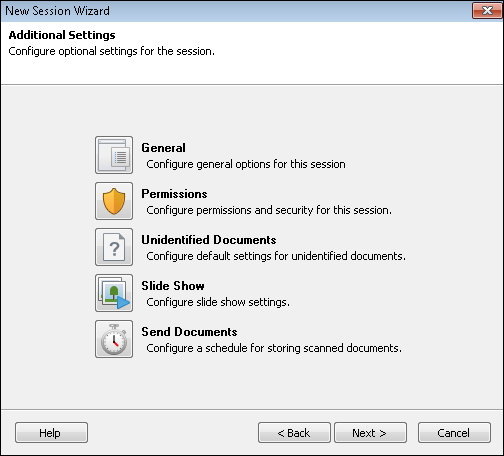
Note: Each option on this screen has a default setting. If you do not configure an option, the default will be used. If this is your first time creating a session, we suggest you explore the available options.
- Click Next
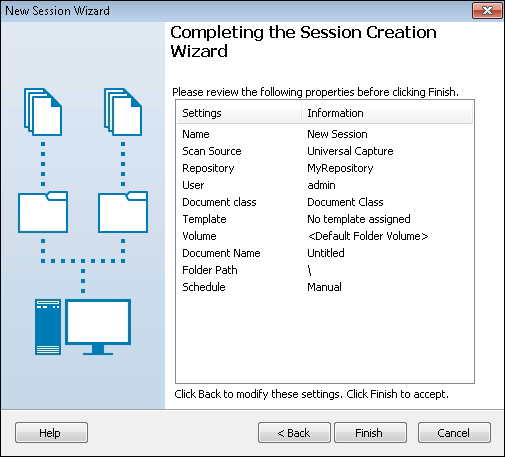
- In the Completing the Session Wizard step, review your selections. To modify a selection, click Back. Click Finish to complete the wizard and open the session.
