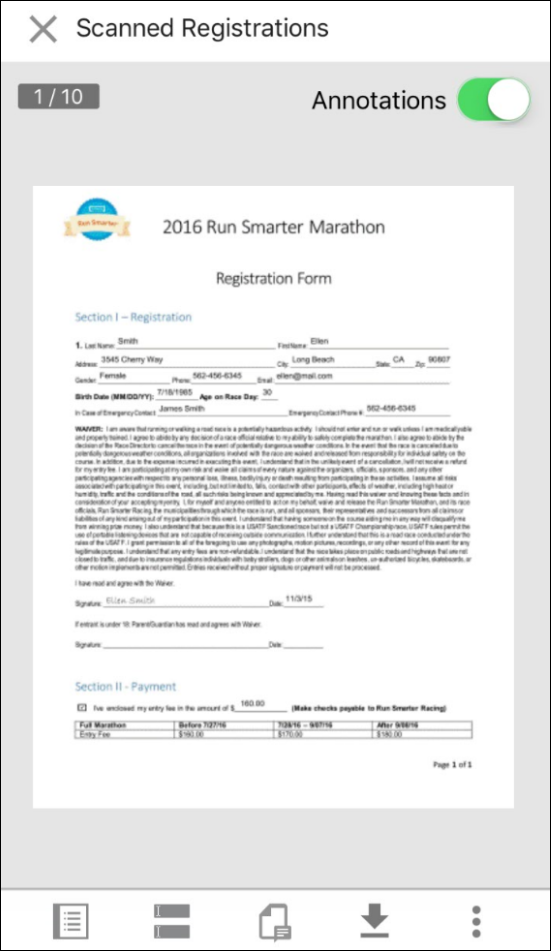
Once you have located a Laserfiche imaged document, press it to open it. If using a phone, the document will open and fit the width of the screen.
When viewing the document in full screen mode, press the metadata button, annotation button, or business process button to view that information to the right of the image.

To zoom in
- Touch screen and spread your fingers to zoom in.
- Double-press, with one finger, on the specific portion of the document you want to zoom in to.
To zoom out
- Touch screen and pinch inward to zoom out of a document.
Note:
- Swipe left to go the next page, and swipe right to go to the previous page.
- To go to a specific page, press the page number box
 , then select the thumbnail for the page you want to view.
Options for interacting with the document
- Press the Metadata button
to view and edit the document's metadata.
- Press the Fields button
to edit the document's fields.
- Press the Annotation button
to view and add annotations to the document.
- Press the Save Offline Copy button
to save a copy of the document offline.
- Press the More Options button
for a variety of options for interacting with the document:
- Press Processes to start a business process on a document.
- Press Rename to give the document a new name.
- Press Edit Laserfiche Pages to rotate, reorder, or delete the page.
- Rotate: Press the rotate button
 to rotate the image 90 degrees clockwise. You must rotate each page individually.
 - Reorder: Press the two arrows
 to reorder the pages in the new document. In the Move current page to dialog box, specify which page the image will become. Type a number in the text box or press the plus and minus buttons. Press OK.
 - Delete: Press the delete button
 to delete the page currently shown.
 Note: If your organization uses Advanced Audit Trail, you may be prompted to choose a reason for deleting pages.
- Rotate: Press the rotate button
- Press Switch View to switch from the image view to the text view and vice versa.
- Press Jump to Page to quickly jump to a page within the open document.
- Press Open In to open the document in another application.
- Press the Shareto share the document with another app or email a link to it.
- Press Print to print the document.
- Press the Close button
to close the document and return to the document's folder.
Note: If your repository is configured to display watermarks on imaged documents, they will also be displayed when viewing the documents in the Laserfiche app. The Laserfiche app supports tag, group, and web client watermarks. For more information on watermarks, see the Administration Console or Laserfiche User Guide help files.
To open an imaged document in another application
- Open the document.
- If configured by an administrator, you may need to select if you want the document compressed before sharing it with another application. You can choose High Compression (lowest resolution), Medium Compression (medium resolution), or Original Quality (no compression).
- Select the application you want to open the document with.