In the Laserfiche Windows client, the toolbar in the folder browser allows you to perform basic operations, such as switching between the Folder Pane and Search Pane, item administration, and basic processing (i.e., printing, scanning, OCRing, etc.). ![]() Show me.
Show me.
If any operation cannot be performed on a selected document, the button will be grayed out and disabled. Additionally, underneath the toolbar is a location bar, which displays the path to whatever folder is currently selected in the Folder Pane. If you know the path of the item or folder you want to view, you can type it into the location bar.
Default Toolbar Buttons
By default, the following toolbar buttons will be displayed:
| Name | Icon | Description |
|---|---|---|
| Folder Pane |

|
The Folder Pane button opens or closes the Folder Pane. Or, use the keyboard shortcut: CTRL + B. |
| Advanced Search |

|
The Advanced Search button opens are closes the Search Pane. Or, use the keyboard shortcut: F3. Note: Closing the Search Pane will not delete or clear your search. |
| Document Preview |

|
The Document Preview button opens the Document Preview Pane. Or, use the keyboard shortcut CTRL + SHIFT + P. |
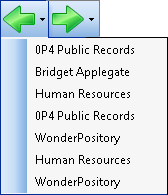
| Go Back/Go Forward |

|
These buttons send you either forward or backward to your last location in the folder tree. |
| Cut |

|
The Cut button cuts the currently selected item. Cut items can be moved to a different location by pasting them there. |
| Copy |

|
The Copy button copies the currently selected item. An exact copy of an item can be created by pasting the copied item. |
| Paste |

|
The Paste button pastes the last item that was copied or cut. |

|
||
| Scan |

|
|
|
Download |
Use the Download button to export an electronic file to be opened in its native application or saved in a location outside of the repository. |
|
| OCR |

|
The Generate Text button opens a dialog box that allows you to perform text recognition (optical character recognition, or OCR) on images and retrieve text from electronic files. |
| Delete |

|
Use the Delete tool to delete a selected document, folder, or shortcut. |
| View Metadata | The View Metadata tool can be used to view or change an entry's metadata such as fields, templates, tags, links, and versions. | |
| New Folder |

|
Creates a new folder in the currently open filing location. |
| View Style |

|
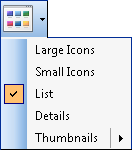
Click the button to cycle through views, or click the drop-down to select how you want to view your repository. |
Additional Toolbar Buttons
By customizing your toolbar, you can add the following buttons:
| Icon | Description |
|---|---|

|
The Open button opens the document, folder or shortcut currently selected. |

|
The New Folder button creates a new folder in the currently opened folder. The new folder will appear in the Contents Pane. |

|
The New Document button creates a new document. |
| The Rename button enables editing of the name of the currently selected document, folder or shortcut. | |

|
The Delete button deletes the currently selected document, folder, or shortcut. |

|
The Properties button allows you to view information about the document, folder, or shortcut currently selected. |

|
The Import button opens the Import Files dialog box, allowing you to select files to import. You cannot import shortcuts to other files into Laserfiche. |

|
The Download button exports selected items to your computer or a network folder as images, text, electronic files, or a briefcase. You may also export a list of the items displayed in the Contents Pane. |

|
The Print button opens the Print dialog box where you can set print options and print the currently selected document. |

|
The Scan button opens the Laserfiche Scanning window, allowing you to scan items into the currently selected folder. |
| The Recent Documents button allows you to quickly open one of the last 11 documents opened. | |

|
The New Browser Window button opens a new folder browser. The new folder browser will appear as a new window. |

|
The Attach Repository button opens the Attach Repository dialog box, allowing you to specify a previously unavailable network or local repository that can be viewed from Laserfiche. |
| The Detach Repository button removes the selected repository from the folder tree. | |
| The Sign Out button logs you out of the currently selected repository. | |
| TheSign Out of All Repositories button logs you out of all repositories and takes you to the Start Page. | |

|
The Close Window button closes the folder browser. |
| The Exit button exits Laserfiche. | |

|
The Paste Shortcut button pastes a shortcut of a copied entry to another location in the repository. |
| The Paste Folders Only button reproduces a folder, and its subfolders, to another location in the repository. The subfolders will be copied without their contents. The Create Folder right is required. | |
| The Select All button selects all visible entries in the Contents Pane. | |
| The Invert Selection button performs the opposite operation on the visible entries in the Contents Pane. | |
| The Toggle Status Bar button hides or displays the status bar at the bottom of the folder browser. | |

|
The ViewStyle button allows you to select Large Icons, Small Icons, List, Details, or Thumbnails for how to display items in the Contents Pane. |

|
The Choose Columns button allows you to select information you want displayed as columns. |

|
The Go Back button browses backward through the history of folders you have previously viewed in the current folder browser (most recent folder first). |

|
The Go Forward button browses forward through the history of folders previously viewed in the current folder browser. |

|
The Up One Level button navigates up one folder level. This button will be disabled when viewing the root folder of the repository. |

|
The Refresh button refreshes the folder browser to reflect any changes made since you opened the current folder. |

|
The View Fields button displays the Fields tab of the Metadata dialog box, allowing you to view |

|
The Migrate Entries button migrates one or more documents to a different volume. |

|
The Rotate button rotates the currently selected image(s) 90°, 180°, or 270° clockwise. |
| The Delete Electronic Files button deletes the electronic file associated with the electronic document. It does not delete the electronic document. | |
| The Set Default Volume button allows you to set a default volume for folders currently selected. | |

|
The Email Document button opens the Selected Attachments dialog box, which allows you to send the currently selected document as an email attachment. |
| The Link Documents button links documents together. | |

|
The Check Out Documents button checks out electronic documents for editing. Other users will have read only access to documents that are checked out. |

|
The Check In Documents button checks in electronic documents previously checked out for editing. |

|
The Undo Check Out button prevents your changes to the electronic file from being stored in Laserfiche. However, changes to image and text pages within the electronic document will not be undone. |

|
The Check Out Details button allows you to view information about a document that is checked out. You can view the document path, location, date checked out, who it was checked out by, and comments added to the document when it was checked out. |

|
The View Tags button displays tags assigned to a document or folder. |

|
The View Document Links button displays other documents the selected document is linked to. It also allows links to the document to be created or removed. |

|
The Administration Console button launches the Laserfiche Administration Console. |

|
The Options button opens the Options dialog box allowing you to customize different aspects of Laserfiche. |
| The Access Rights button opens the Access Rights tab of the Entry Access dialog box and allows a privileged user to view the access rights that all users and groups have to a document or folder. It also allows the modification of those rights. | |

|
The Create Record Series button allows users to create a new record series in a new Record Series Properties dialog box. |

|
The View Record Properties button allows users to view and modify records management properties on an existing record or record folder, including cutoff instructions, retention schedules, and filing date. |

|
The Record Management button allows users to perform a variety of records management actions that affect the record life cycle, such as closing or cutting off the folder, setting an event date, and performing final disposition. |

|
The Hold Status button allows users to place or remove a hold on an entry, as well as view all hold actions that affect the current entry. |

|
The Review Vital Record button allows users to specify a record(s) has been reviewed as well as the review date. |
| The Print File Plan button allows users to print the records management file plan and retention schedule information for the repository, record series, or record folder. | |
| The Download File Plan button allows users to export a summary of the records management file plan and retention schedule for the repository, record series, or record folder. | |
| The Cascade Windows button allows you to cascade all Laserfiche windows that have not been minimized. | |

|
The Tile Windows button allows you to tile all Laserfiche windows that have not been minimized. |
| The Open Windows button lists the Laserfiche windows currently open. By selecting the window you want to view and clicking Activate, you can quickly view the desired window. | |
| The Administration Guide button launches the Laserfiche Administration Guide website. | |
| The User Guide button launches the Laserfiche User Guide website. | |

|
The Laserfiche Web Site button launches the Laserfiche Web site. |
| The About Laserfiche button displays information about your version of the Laserfiche Windows client. |
You can turn off the location bar by selection Options from the Tools menu. Open the Toolbars node, and select Customize Toolbar. Under the Toolbars tab, clear the checkbox next to Navigation, and then click Close. Click OK to close the Options dialog box and return to the folder browser.
