Settings
The Settings node in the Quick Fields Agent Administration Console allows you to view and modify global settings that apply to Quick Fields Agent and all schedules.
To modify settings
- Right-click the Settings node.
- Select Modify Settings.
- The Settings dialog box opens to the General tab.
or
- Double-click a specific setting.
- The Settings dialog box opens to the tab that contains that setting.
General
Use the General tab in the Settings dialog box to configure settings for how Quick Fields Agent logs will be retained. By default, the log files are saved to:
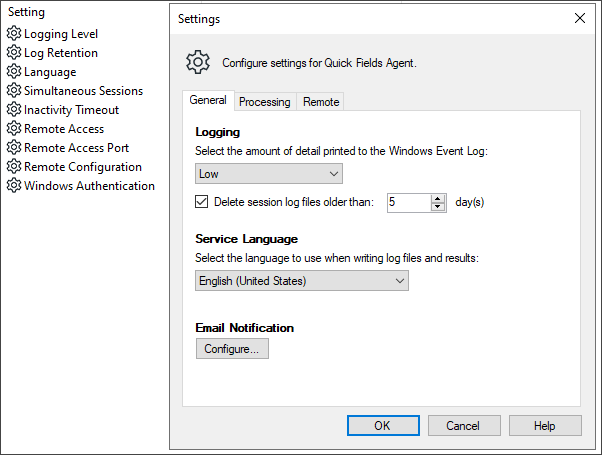
Logging
You can control how much detail Quick Fields Agent writes to the Windows Event Log on the computer where it is installed.
Logging levels
The logging levels are cumulative. Each level includes all information from less detailed levels.
- Critical: Errors that prevent Quick Fields Agent from running.
- Low: Unexpected errors that may not prevent Quick Fields Agent from running.
- Medium: Warnings about events or configurations that may differ from expectations.
- High: Informational messages about session execution and service maintenance.
- Diagnostic: Minor errors that are usually handled automatically but may assist technical support.
- Diagnostic (Verbose): Highly detailed messages that may occur frequently and are primarily intended for troubleshooting.
Log Retention
You can configure whether Quick Fields Agent deletes session log files after a specified number of days. These logs appear in the History node, Session Analysis dialog box, and Event Viewer. By default, log files older than five days are deleted.
To change the log retention settings
- Delete logs after a set time:Select Delete session log files older thanand specify the number of days to retain logs.
Service Language
Quick Fields Agent logs are generated in English.
Email Notification
Quick Fields Agent can send email notifications containing session information, including:
- Documents processed
- Retrieval times
- Errors and warnings (with details)
- The user who ran the session
Note: Email notifications apply globally to all sessions and cannot be configured per session.
To configure email notifications:,
- Click Configure to open the Email Server Properties dialog box.
- Select Enabled to turn on email notifications. Clear this checkbox to save settings without sending emails.
- Configure the following sections:
- SMTP Settings: Email server, port, SSL usage, and authentication method.
- Email Settings:Sender address, recipient list, and default subject.
- Validation: Enter a test email address and click Test to verify the configuration.
- Scheduling Options:
- When a session ends to send notifications after session completion.
- When scheduled to send notification on specific days and times.
- When finished, click OK.
Processing
Use the Processing tab to configure how scheduled sessions are executed and how system resources are used.
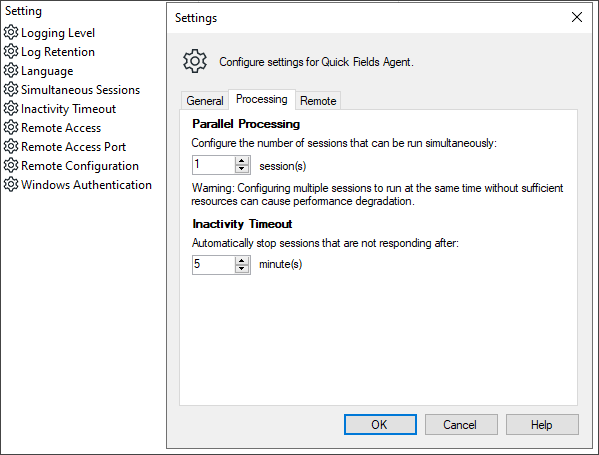
Parallel Processing
You can specify how many sessions may run simultaneously. For each Quick Fields installation, a maximum of two sessions per CPU can run concurrently.
To change parallel processing settings
-
Select 1 to run one session at a time.
-
Select 2 (or a higher number if available) to allow multiple sessions to run simultaneously.
Resource Use and Parallel Processing
While Quick Fields Agent can be configured to run multiple sessions simultaneously, performance depends on available system resources and the nature of the sessions.
For example, running a session that performs continuous OCR processing alongside a session that intermittently sorts and files a small number of documents may work well concurrently. However, running two sessions that both perform resource-intensive processing on large volumes of documents at the same time may reduce overall performance.
Test your sessions to determine the optimal parallel processing configuration.
Inactivity Timeout
You can specify how many minutes a session may remain unresponsive before Quick Fields Agent automatically stops it. This setting helps prevent a stalled session from delaying other queued sessions. However, some complex operations (such as custom Lookup queries or advanced Laserfiche Capture Engine filters) may appear idle while still processing.
When testing sessions, estimate how long these operations typically take and adjust the inactivity timeout accordingly.
To change the inactivity timeout settings
- Specify the desired number of minutes.
Remote
Use the Remote tab to control remote access and configuration of the Quick Fields Agent Service. This lets you configure scheduled sessions from the Quick Fields Agent Administration Console on a different computer than the one where the service is installed. This remote option is enabled by default.
Note: To modify these settings, you must use the Quick Fields Agent Administration Console on the same computer where the service is installed.
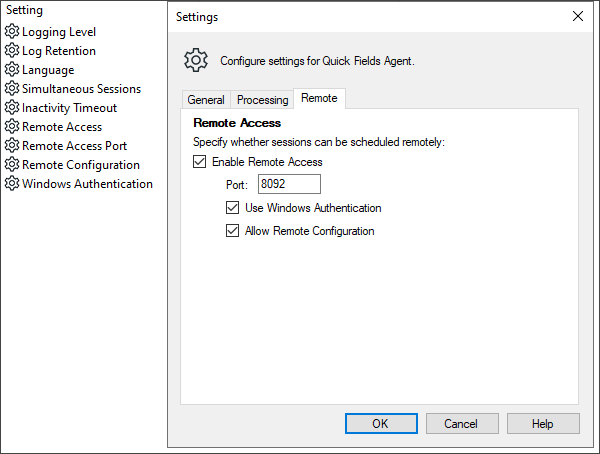
Remote Access
By default, Enable Remote Access is selected, allowing the service to be accessed from another computer.
- Clear this option to prevent remote connections.
Port
The default communication port is 8092.
- If a firewall is in place, ensure this port is open.
- You may specify a different port, provided it is not used by another service.
Windows Authentication
Select Windows Authentication to connect to the Quick Fields Agent Service using the credentials of the currently logged-in Windows user on the remote computer.
Remote Configuration
The Allow Remote Configuration option controls whether Quick Fields Agent settings can be modified remotely (this does not affect schedule configuration).
- Enabled: Allows full modification of Quick Fields Agent settings from a remote computer.
- Disabled: Prevents remote modification of settings, while still allowing remote schedule management.