Line Removal
The ![]() Line Removal
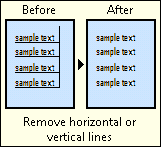
Line Removal ![]() image enhancement will remove horizontal or vertical lines that run through text and can interfere with optical character recognition. It will work on color as well as black and white images, but will be more efficient on black and white. When configuring line removal, you can specify the orientation of the line(s) to be removed, the minimum length, the maximum thickness, the maximum gap between the pixels, the area where excess pixels should be removed, and character reconstruction. Character reconstruction repairs characters that were affected by the line removal process. It is performed after the line has been removed.
image enhancement will remove horizontal or vertical lines that run through text and can interfere with optical character recognition. It will work on color as well as black and white images, but will be more efficient on black and white. When configuring line removal, you can specify the orientation of the line(s) to be removed, the minimum length, the maximum thickness, the maximum gap between the pixels, the area where excess pixels should be removed, and character reconstruction. Character reconstruction repairs characters that were affected by the line removal process. It is performed after the line has been removed. ![]() See an example.
See an example.

Note: If the image is cluttered and the lines are small and look more like dots, it may be better to use Despeckle.
To use Line Removal
- In the Session Configuration Pane, select the stage of processing where you want to use Line Removal.
- In the Tasks Pane, select Line Removal.
- You can optionally enter a name for the process under Process Name.
- Move through each step of the wizard at the bottom of the pane. You can also click Skip Wizard to display and configure the properties all at once.
- Page Range: When configuring an image enhancement in Page Processing or Post-Processing, you will be prompted to specify a page range. In other stages, default settings will automatically be applied.
- Line Orientation: Specify whether to remove horizontal or vertical lines.
- Minimum Line Size: Define the smallest line that should be removed by specifying the minimum number of pixels printed in a row (vertically or horizontally, depending on your selection in Step 5). Lines equal to or longer than the specified size will be removed.
- Maximum Line Thickness: Define the maximum thickness (in pixels) a line can reach and still be removed.
- Maximum Line Gap: Specify the maximum gap (in pixels) that can exist within a single line. This option compensates for lines that have been fragmented due to a poor quality image. Segments separated by more space than the size specified will be considered separate lines and will not be removed.
- Excess Line Cleanup: The area surrounding a poor quality line often contains stray marks. This option defines a region (in pixels) around the line from which stray marks will be removed.
- Character Reconstruction: Characters that intersect lines may be damaged during line removal. The Character Reconstruction option repairs any damaged characters. Specify the scope of character reconstruction. The numbers represent the maximum gap, in pixels, of a character disruption to be reconstructed.
- Optional: To preview how this enhancement will affect scanned images and OCRed or extracted text, test processes. For the best results, add a custom sample page before testing. Adjust and test until you are satisfied with the results.
Example: Selecting Short (75) removes all lines 75 pixels or longer in length.
Example: Selecting Thin (10) removes all lines that are 10 pixels thick or less.
Example: Selecting Medium (2) removes all stray marks located within two pixels from a line.
Tip: If damaged characters are not sufficiently repaired during processing or testing, select a higher value. If characters are improperly repaired, select a lower value.