Managing a Session
Once you have created a Quick Fields session, you can save or export it for future use. You can have different Quick Fields sessions for different purposes. When you want to use the session again, you can open or import it and update it.
Opening a Session
A session contains configuration information that specifies how Quick Fields should handle documents. To capture and process documents, open a previously created session.
Note: After opening a session, you may be prompted to update it.
Note: When browsing for a session to open, select a .qfx file to open a Quick Fields session. Alternatively, select a .qfs file to convert then open a Quick Fields 6/7 session.
Note: Sessions created in a previous version of Quick Fields (prior to Quick Fields 11 Update 3) cannot be opened in Quick Fields 11 Update 3 or later.
There are different ways to open a session.
Quick Fields Start Page
- Under Open Existing Session, click From computer, browse to a session, and click Open.
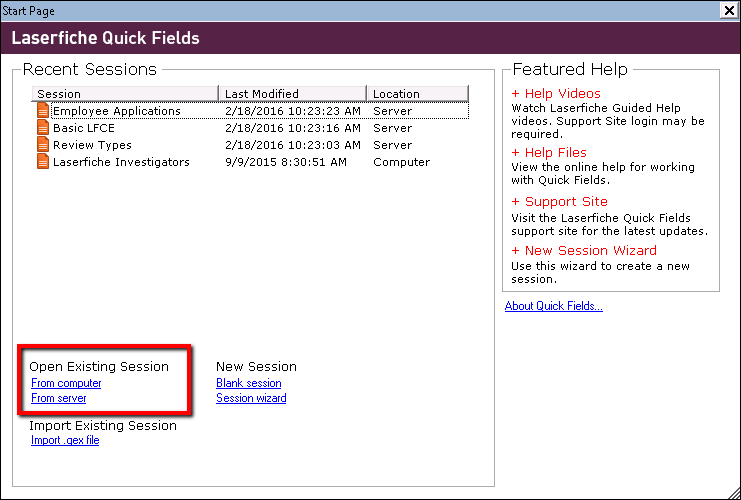
- Under Open Existing Session, click From server. In the Open from server dialog box, select the session and click Open. The Metadata Updater will automatically run. If you have a long list of sessions, start typing the session name in the Search by session name box at the top and the list will be filtered to match what you type. Hovering over a session will display its description (if any). If the session you want to open is located on a different Quick Fields Server, click Change server in the top right and enter the name of the new Quick Fields Server. You can also access the Configure Server dialog box from the Tools menu within Quick Fields.
http://ServerMachineName/QuickFieldsapi
- ServerMachineName: Name of the machine where the Quick Fields Server is installed.


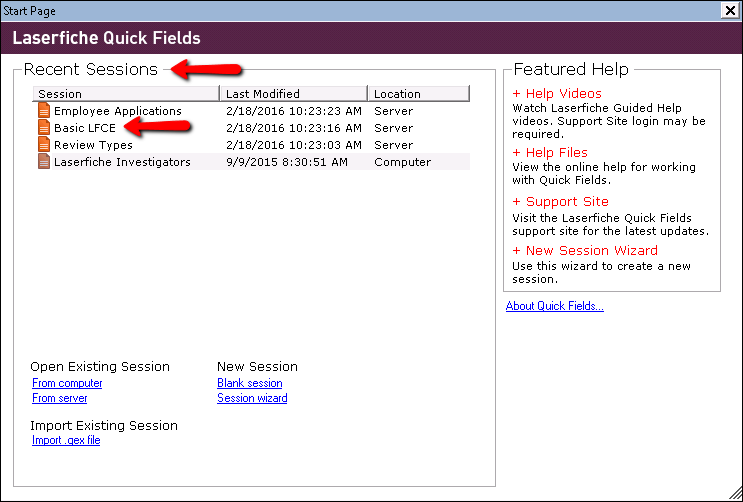
- Under Recent Sessions, click a session.
Inside Quick Fields
- If you have a session open and want to open a different session, select File, Open. Click From Computer to browse to a session stored on your computer or local network. Click From Server to open a session stored on the Quick Fields Server.
Note: You may be prompted to save your current session before you can open a new session.
-
If you want to open a session you recently had open, select File, Open Recent, and choose from one of the last 10 sessions you recently had open. The sessions displayed will be those opened from your computer, network, or the Quick Fields Server.
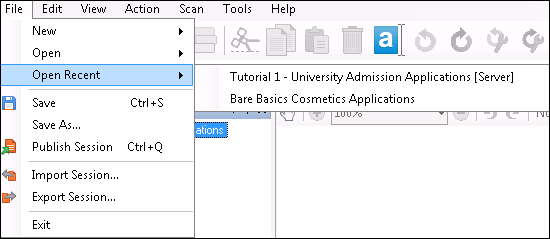
Note: [Server] will be displayed next to sessions that were recently opened from the Quick Fields Server.
Outside Quick Fields
- Double-click a session file (.qfx) in Windows explorer. You may be prompted to choose whether to open the session as an administrator or operator, and required to enter a password.
- Open a session in a Quick Fields Scanning workspace.
Saving a Session
After creating a session you can save it.
Note: When you save a session, only its configuration information will be saved to the .qfx file. If you move this file to a different machine, personal settings and sample pages will not be retained. To retain this data when moving from one machine to another, export the session.
To save a session
- With a session open, select one of the following options under File in the menu bar:
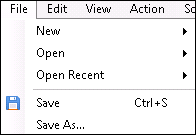
- Save: Saves the session using the name, location, and format currently assigned to the session. If the session has never been saved, you will be prompted to define this information.
- Save As: Enables you to save the session using a different name, location, and/or format than what is currently assigned. Does not modify the existing session as it creates a new file. This option is only available for sessions that have been previously saved.
Importing a Session
After exporting a session, you can import it. This enables you to move the session to a different machine. An exported session contains:
- Configuration information that specifies how Quick Fields should handle documents.
- Personal settings, such as your toolbar layout, pane layout, and shortcut settings.
- Sample pages.
Note: After importing a session, you may be prompted to update it.
Different ways to import a session
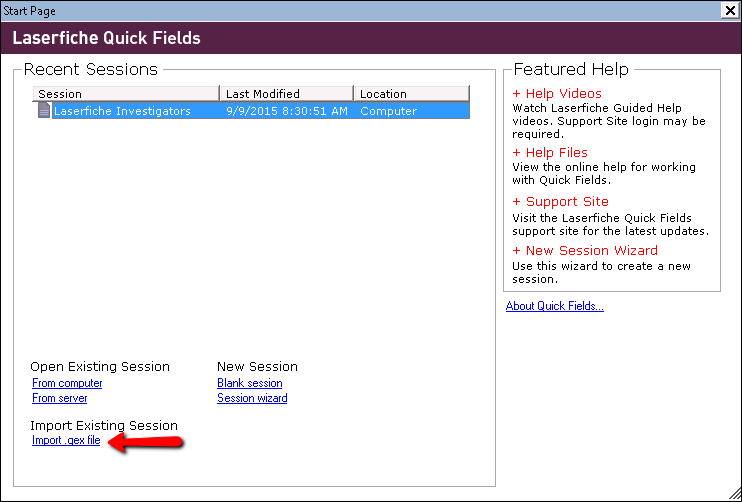
- On the Quick Fields Start Page, click Import .qex file. Browse to a .qex file and click Open.
- If you have a session open and want to import a different session, select File, Import Session. Browse to a .qex file and click Open.
Publishing a Session
Publishing a session lets you upload the session and its associated document classes to a Quick Fields Server. Once published, the session will be available to open in Quick Fields Scanning. The session and document classes can also be managed separately using the Quick Fields Administration Console.
To publish a session
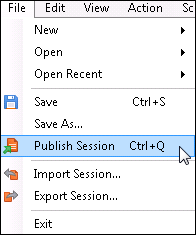
- With a session open, select Publish Session under File in the menu bar.
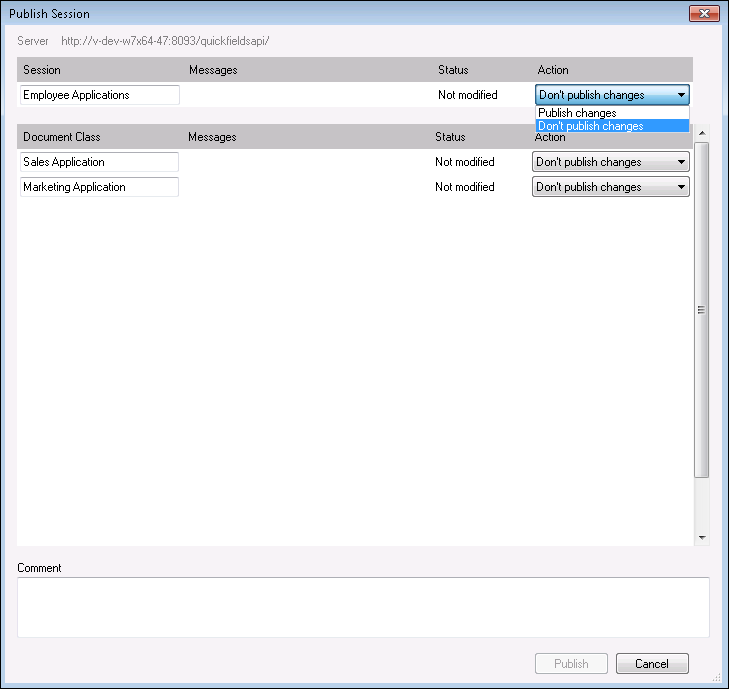
- From the Publish Session dialog box, you can publish the session and document classes separately. For example, if you do not have rights to edit the session, but you do have rights to edit the document class, you can publish changes to the document class without publishing the session its associated with. The Quick Fields server you are currently publishing to will be displayed at the top.
Session
- Session: Optionally modify the session name.
- Messages: Any warnings or errors pertaining to the session will be displayed here. For example, a warning will appear if there is a name conflict or if the current user does not have the appropriate rights to publish the session. If there is a name conflict, continuing to press Publish will overwrite the existing session.
- Status: Displays the status of the session.
- Added: This is a new session that will be added to the Quick Fields Server when published.
- Not modified: The session has not been modified in Quick Fields.
- Modified: The session has been modified in Quick Fields.
- Action: If you want to publish changes to the session, select Publish changes in the Action drop-down menu. If you do not want to publish the session changes, select Don't publish changes.
Document Class
- Document Class: Optionally modify the document class name.
- Messages: Any warnings or errors pertaining to the document class will be displayed here. For example, a warning will appear if there is a name conflict or if the current user does not have the appropriate rights to publish the document class.
- Status: Displays the status of the document class.
- Blank:The document class has not been modified in Quick Fields. If published, no changes will be made to the document class on the Quick Fields Server.
- Modified: The document class has been modified in Quick Fields. Any changes will be published to the Quick Fields Server.
- Added: A document class has been added to the session in Quick Fields. A new document class will be added to the Quick Fields Server, it will be linked to the session, and will be able to be managed from the Quick Fields Administration Console.
- Removed:A document class has been removed from the session in Quick Fields. The document class will be unlinked from the session on the Quick Fields Server, but it will still exist independently and will be able to be managed from the Quick Fields Administration Console.
- Action: If you want to publish changes to the document class, select Publish changes in the Action drop-down menu. If you do not want to publish the document class changes, select Don't publish changes.
- Add any related comments in the Comments box and click Publish.
- Upon successful publish, you will receive a message letting you know the items published successfully.
Note: Some errors will only occur after attempting to publish. For example, "Access was denied to the session after the session was opened from server."
Note: If changes are made to a field or template definition in the Laserfiche Administration Console, those changes must be republished to the Quick Fields Server in order for them to be available in Quick Fields Scanning.
Exporting a Session
Exporting a session enables you to move it to a different machine. This process creates a .qex file that contains:
- Configuration information that specifies how Quick Fields should handle documents.
- Personal settings, such as your toolbar layout, pane layout, and shortcut settings.
- Sample pages.
Note: When you save a session in the Quick Fields format, only its configuration information will be saved to the .qfx file. If you move this file to a different machine, personal settings and sample pages will not be retained.
To export a session
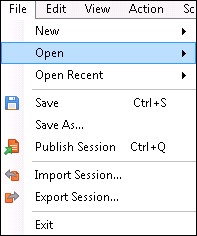
- With a session open, select Export Session under File in the menu bar.
- Browse to the location where you want to export the session.
- Click Save.
Updating a Session
Sessions are associated with connection information and metadata (e.g., templates, fields, tags). If this information changes outside of Quick Fields, the session may not perform correctly.
Using the Metadata Updater Utility
The Metadata Updater utility scans your session for outdated information and performs one of the following actions:
- Automatically updates the session. For example, Mary creates a session that refers to a template named Human Resources. Bob changes the name of this template in the Laserfiche Administration Console to HR. The next time Mary opens Quick Fields, the Metadata Updater will automatically update the session to account for the template's name change.
- Prompts you to update the session. For example, a session accesses the repository using the Laserfiche use name Scanner and the password 12345. Using the Administration Console, an administrator changes the password for this account to 54321. The next time the session is opened, the Metadata Updater will identify the conflict and prompt the user to update the information.
By default, the Metadata Updater runs once a day per session and is launched when a session is opened. You can configure these settings, plus various others, by selecting Options from the Tools menu. In the Options dialog box, select General under Metadata Updater.
Note: The Metadata Updater will automatically run when a session is opened from the Quick Fields Server in Quick Fields Scanning, regardless of the settings under Tools, Options, Metadata Updater, General.
Note: The steps below assume the utility's default settings are enabled and the session in question has not been opened today.
To run the Metadata Updater utility
- Open a session. One way to perform this step is to select From computer or From server under Open Existing Session on the Start Page.

- The Metadata Updater will begin scanning the session for conflicts.
- If one or more conflicts are found that cannot be automatically updated, the utility will prompt you to manually update the session. Update the data in question and click Resolve. Continue to resolve conflicts as necessary.
Note: When updating connection information, click Validate, then Resolve.
Note: A log is created each time the Metadata Updater is performed (regardless of whether the session is updated). To access it, click Save Log or browse to the location specified under Tools, Options, Metadata Updater, General.
- If no conflicts are found, or if one or more conflicts are found that can be automatically updated, Quick Fields will open the session.
Note: Changes made by the Metadata Updater are not permanent until you manually save the session.
- If one or more conflicts are found that cannot be automatically updated, the utility will prompt you to manually update the session. Update the data in question and click Resolve. Continue to resolve conflicts as necessary.
Manually Updating Connection Information
You can also update a document class's connection to the repository from the Connection Information section in the General tab of the Document Class Options dialog box.