Text Identification
![]() Text Identification
Text Identification ![]() sorts documents into classes based on whether page text matches a specified pattern or patterns. It can be used in the First Page and Last Page Identification stages.
sorts documents into classes based on whether page text matches a specified pattern or patterns. It can be used in the First Page and Last Page Identification stages.
Note: To generate text for use in Text Identification, configure OmniPage OCR or Text Extraction in Pre-Classification Processing.
To configure Text Identification
- In the Session Configuration Pane, select the First Page Identification stage.
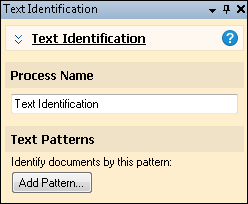
- In the Tasks Pane, select Text Identification.
- You can optionally enter a name for the process under Process Name.
- Move through each step of the wizard at the bottom of the pane. You can also click Skip Wizard to display and configure the properties all at once.
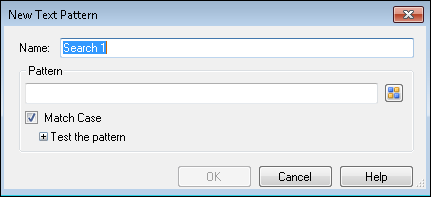
- Click Add Pattern. The
 New Text Pattern dialog box will appear.
 - Specify a name for the pattern.
- Specify a pattern to match. For a list of common expressions, click the pattern button. For more information, see the Regular Expression Reference.
- To make the pattern match case sensitive, select Match Case. To make it case insensitive, clear it.
- To test the pattern, click the plus sign next to Test the pattern to expand the Test Value box. Specify a value that you expect to fit the pattern and the expected value will be displayed under Result value as you type.
- Click OK.
- Optional: To add another pattern, click Add Pattern again. Text will need to match all patterns in the process for the document to be identified as belonging to the document class.
- Optional: To preview how this enhancement will affect scanned images and OCRed or extracted text, test processes. For the best results, add a custom sample page before testing. Adjust and test until you are satisfied with the results.