Types of Tokens
Standard Tokens
A token is a placeholder value that is automatically replaced with actual values when a document is scanned or stored in a Laserfiche repository. You can use tokens to name documents, populate field data, or define a document's location. Standard tokens are those that Quick Fields can determine from the computer or session settings. These include such information as the date and time according to the computer settings, the count number of the document among all documents scanned by that session, or the source path of the document if you are processing documents that have already been stored on a network drive or in Laserfiche. The tokens automatically available to you will vary depending on the scan source you are using.
Example: Joe has ten documents to scan. He wants each document to be automatically named in the following format: Scan Date - Name of the User that Scanned the Document. To apply this naming convention, Joe configures his scanning session to use a default document name. The default name he defines uses the Date and Username tokens via the following syntax: %(Date) - %(Username). After Joe scans and stores his ten documents, they will each be automatically named similar to the following: 04/08/2010 - Joe.
The following list details the standard tokens available in Quick Fields.
| Name | Syntax | Description |
|---|---|---|
| Date | %(Date) | Date a document is scanned. |
| Time | %(Time) | Time a document is scanned. |
| Date Time | %(Date Time) | Date and time a document is scanned (e.g., 3/19/2008 8:01:34 PM) |
| Username | %(Username) | *Name of the user that scanned a document. |
| ID | %(ID) | *Laserfiche Entry ID assigned to a newly scanned document once it's stored in Laserfiche. |
| Document ID | %(Document ID) | *Laserfiche Document ID already associated with a Laserfiche document scanned by Laserfiche Capture Engine. |
| Parent | %(Parent) |
*The value of the same field assigned to the document's parent folder. |
| Name | %(Name) | The original name of a document scanned by Universal Capture or Laserfiche Capture Engine. |
| Path | %(Path) |
The original path of a document or shortcut or scanned by Universal Capture or Laserfiche Capture Engine(e.g., C:\Documents and Settings\John Doe\My Documents). |
| Source Path | %(Source Path) | The path of the original document whose shortcut is scanned by Laserfiche Capture Engine. |
| Creation Date | %(Creation Date) |
The Windows creation date for a document scanned by Universal Capture. |
| Modification Date | %(Modification Date) |
The Windows modification date for a document scanned by Universal Capture. |
| Count | %(Count) | Each scanned document is assigned a number according to the chronological order in which it was scanned. The Count token represents this number. You can reset the count. |
| Page | %(Page) | The current page number in a document (generally used with stamps). |
| Page Count | %(Page Count) | The total number of pages in a document. |
| Machine Name | %(Machine Name) | The name of the machine running Quick Fields. |
| Extension | %(Extension) | The extension of the document being scanned (e.g., doc, pdf). |
| Image File Size | %(Image File Size) | The size of the image in kilobytes. |
*Value is assigned after the document is stored in a Laserfiche repository.
Process Tokens
Processes that extract information from a document or other source, such as OmniPage Zone OCR, Barcode, and Lookup, generate tokens that can be used to name documents, populate field data, define a document's location, or identify documents as belonging to a particular document class. To use a token generated by a process, you must first configure the process. When configuring a process that uses a region selection, such as OmniPage Zone OCR or Barcode, you will have the opportunity to rename the region. The specified name will also be the name of the token that represents the data extracted from that region. It is good practice to choose a name that will help you remember what the token represents.
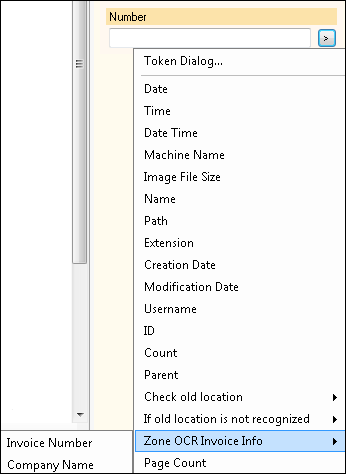
Once a process that extracts information is configured, you can use the tokens generated by the process to configure document properties. When you click the token button (right arrow), the name of the process you configured (such as "Zone OCR Invoice Info") will appear in the menu. When you select it, another menu will open showing all the tokens associated with that process. Select one of these tokens to insert it in a field, document name, or folder path. When the documents are scanned, the tokens will be replaced with the values extracted by the process.
Note: If you don't remember a token's source, or want to modify it in some way, such as changing its name or expanding the region it extracts information from, you can jump from a token in Document Properties to its source by right-clicking in the field where the token is stored and selecting Select the item that creates this token.
Field Tokens
A token is a placeholder value that is automatically replaced with actual values when a document is scanned or stored in a Laserfiche repository. In general, you can use a token in other processes, to name documents, populate field data, or define a document's location. A Field Token represents the value in a particular Laserfiche field and is useful when the value is generated dynamically during processing and you want to use that same value in another location. Field tokens can be used in any Post-Processing process as long as the When a document is sent to the repository option is selected. They cannot be used in any other stage of processing because the value of the field is not known until document revision has been completed.
The token syntax for Field tokens is %(Fields.Fieldname) For example, the syntax for a token representing a field named Subject is %(Fields.Subject). This information is provided for reference; Quick Fields will produce the token syntax for you when you select a Field token.
Example: During Page Processing, Ashley configures a Zone OCR process to retrieve employee names from the same area of each document and store them as tokens to later be placed into the Employee Name fields assigned to the documents. She uses the Fixed Annotation process ![]() during Post-Processing to add a sticky note to each document that says "Please consider" and she wants the field value generated during Page Processing to be placed after this phrase. She uses a field token for the Employee Name field. She could have used the value from the Zone OCR process, but since Zone OCR is not always 100% accurate, she wanted to wait until after Revision and use a field token instead. The sticky note text will look like Please consider %(Fields.Employee Name). Upon storage, the value in the field will replace the token in the sticky note. When the documents are stored in Laserfiche, the sticky note text will look similar to Please consider Bob Smith.
during Post-Processing to add a sticky note to each document that says "Please consider" and she wants the field value generated during Page Processing to be placed after this phrase. She uses a field token for the Employee Name field. She could have used the value from the Zone OCR process, but since Zone OCR is not always 100% accurate, she wanted to wait until after Revision and use a field token instead. The sticky note text will look like Please consider %(Fields.Employee Name). Upon storage, the value in the field will replace the token in the sticky note. When the documents are stored in Laserfiche, the sticky note text will look similar to Please consider Bob Smith.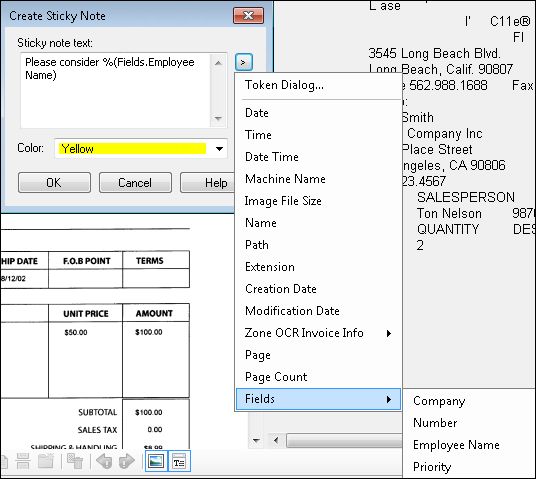
Example: Alex is scanning invoices from different departments that need to be stored in each department's specific folder in the repository. Alex uses a Zone OCR process to extract the department name from each invoice and place the value in the Department field. ![]() That Department field value is then used in the folder path to store the invoices in the appropriate folder in the repository.
That Department field value is then used in the folder path to store the invoices in the appropriate folder in the repository.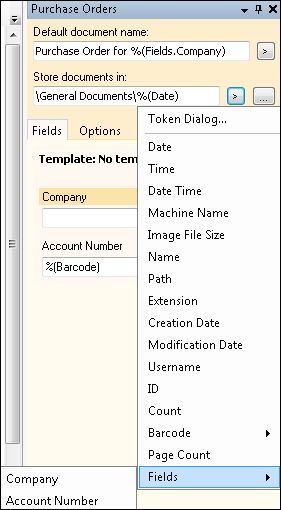
Laserfiche Capture Engine Tokens
When the Laserfiche Capture Engine is set as the scan source for a session, information from the associated Laserfiche repository can be used as tokens in Quick Fields. For example, information from Laserfiche fields could be used to automatically rename or create new folders for documents.
Example: The Bitsy Brownie Bakery is using Quick Fields to automatically reorganize documents in Laserfiche. Currently, the documents are organized in folders according to when they were scanned. They want to reorganize them into folders according to the name of the customer—which is already stored in a field associated with each document. They configure Quick Fields to use Laserfiche Capture Engine and place the token representing the value stored in that field in the folder path for the document class. When the documents are stored, the new folders will be created in the designated location and the documents stored in them.
If Laserfiche Capture Engine is configured to Keep each entry as a separate document (to reflect document structure) and to retrieve documents by a particular template or field, the relevant Capture Engine tokens will be accessible from the token menu under Capture Engine.
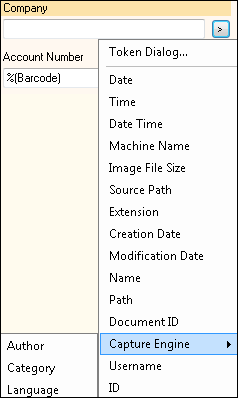
If Laserfiche Capture Engine is not configured in this way, the Capture Engine tokens will not be accessible from the token button menu, because a repository could potentially contain so many fields that it would be difficult to display them all in Quick Fields. If you are using Laserfiche Capture Engine but not retrieving documents by template or field, you can still use Capture Engine tokens by entering them manually. The syntax for a Capture Engine token is %(Field.Fieldname). Note that this is subtly different from a Quick Fields field token (Quick Fields token syntax is plural: %(Fields.Fieldname)
When field values are applied in Quick Fields and retrieved from your scan source, the values in Quick Fields will take precedence and be assigned to the processed documents. However, if the field value applied in Quick Fields is blank, you have the option to replace that blank value with the value from a matching field retrieved from Laserfiche Capture Engine.
To use field values retrieved from Laserfiche Capture Engine in place of blank Quick Fields values
- Select the name of the document class.
- At the bottom of the Tasks Pane, select Configure fields.
- In the General tab of the Configure Fields dialog box, select or clear the If a field is blank and the scan source retrieved that field, use the value from the scan source checkbox. For more information, see Customizing Templates and Fields.
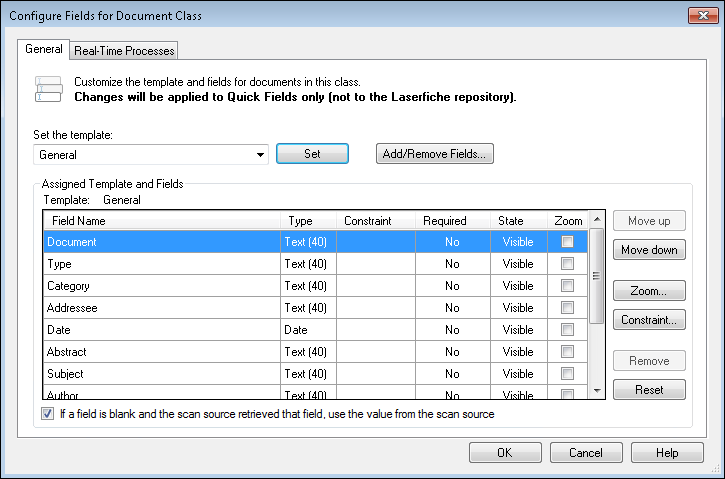
Note: If If a field is blank and the scan source retrieved that field, use the value from the scan source is selected, the existing value will be overwritten if a different token is placed in the field.