Configure Fields
In the Configure Fields dialog box, templates and fields can be customized for each document class in Quick Fields without changing the settings in the Laserfiche repository. Fields can be added or removed from a template, hidden, or constrained so that information may only be entered into them in a particular format.
Note: To configure fields, you must have the appropriate permissions in Laserfiche.
Note: Customizations made in Quick Fields only apply in Quick Fields for that session. For instance, if you hide a field in a Quick Fields session it will still be visible in the Laserfiche repository.
To open the Configure Fields dialog box
- Select the name of the document class in the Session Configuration Pane.
- Select Configure fields from the Action menu or the bottom of the Tasks Pane on the right. You can also double-click the template name or No template assigned at the top of the Fields tab.
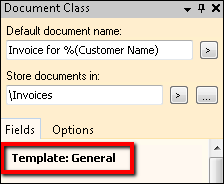
- The Configure Fields dialog box will open.
General
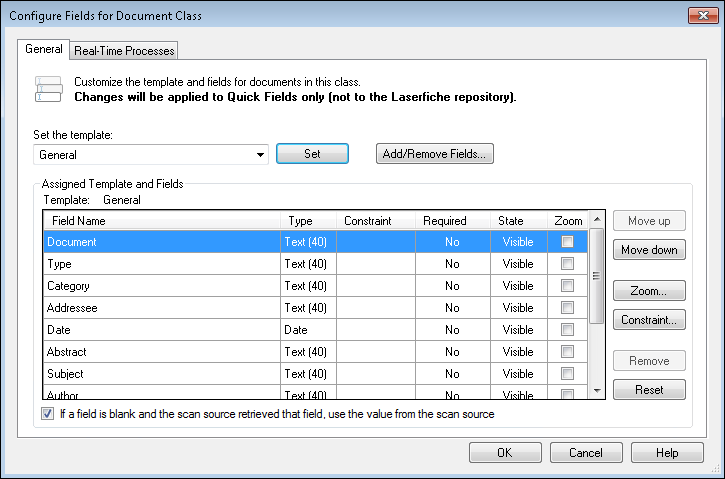
In the General tab of the Configure Fields dialog box, fields can be reviewed, rearranged, and modified in various ways, including:
- Added independently to the templates
- Hidden from scanner operator
- Made required
- Made read-only
- Moved up or down the template
- Connected to zoom fields on the associated image to ease review and editing
- Constrained
Changing the Template
Under Set the template is a drop-down list of all the templates available to you in the Laserfiche repository associated with that document class.
To change the template
- Select a template from the list.
- Click Set. If a different template was previously assigned to that document class, a dialog box may appear asking you to choose which of the existing fields you'd like to keep after reassigning the template.
- Make a selection and click OK. If you choose a particular setting and select Do not show me again, that will become the default setting and the dialog box will no longer appear.
Adding Fields
Click Add/Remove Fields to open the Choose Fields dialog box. This dialog box will display all the fields available to you in the Laserfiche repository associated with that document class.
Modifying the Template and Fields
Under Assigned Template and Fields you will see the fields associated with the template and the properties of each field.
To modify a field, select the field and click
- Move up until the field is in the desired location.
- Move down until the field is in the desired location.
- Zoom to create a Zoom Field to help with reviewing and editing that field during Revision.
- Constraint to enforce a format on the field value using pattern matching expressions.
- Remove to remove the field from the template in Quick Fields (only applies to fields that were added independently to the template).
- Reset to return all settings to their original values.
You can also review or change the properties of the fields.
- Required: If a field is required in Laserfiche, Yes will be displayed under the Required column. If it is not, and you want to make it required, double-click No under the Required column to change it to Yes.
- State: Double-click the text under State to toggle the different possible options.
- Visible: Visible to operators and administrators.
- Read-only: Read-only for both operators and administrators.
- Hidden: Hidden from operators. Visible to administrators unless the Tasks Pane options are set to also hide fields from administrators.
- Zoom: If a Zoom Field is configured for the field, this checkbox will be selected. If it is not selected, and you want to make the field a zoom field, select the checkbox under Zoom. To configure more Zoom Field options, click the Zoom button.
All these options are also available by right-clicking a field, along with one additional option:
- Default: Designating a field as a default field will always place the cursor in this field when clicking through documents during revision if the Edit the document's default field option is selected under Revision Pane in the Quick Fields options. The default field will be in bold text.
If a field is blank and the scan source retrieved that field, use the value from the scan source: This option is only relevant if you are using Laserfiche Capture Engine (with Retrieve fields selected) as your scan source. If a field in Quick Fields is blank, and this same field has a value in the repository, selecting this option will replace the blank field value in Quick Fields with the value being retrieved from the Laserfiche repository. If this option is not selected, the blank field in Quick Fields will remain blank. For more information, see Laserfiche Capture Engine Tokens.
Note: This option only applies to blank fields in Quick Fields. If Quick Fields specifies a value for a field, the field will use the specified value and not the value retrieved from the Laserfiche repository. If an "Author" field in Quick Fields has a value of Misty, and the same "Author" field in the Laserfiche repository has a value of Jacob, Misty will be the resulting field value for that Author field when the document is processed and stored.
When you are satisfied with all your modifications, click OK.
Field Constraints
You can enforce a particular format on fields associated with a document class by using regular expressions.
To create field constraints
- Right-click a document class and select Configure fields. You can also select a document class, then click Configure fields in the bottom of the Tasks Pane on the right.
- In the General tab of the Configure Fields dialog box, select the name of a field.
- Click Constraint.
- In the Field Constraint dialog box, specify a pattern matching expression that will be used to format the field.
- In the Constraint Violation Message box, specify the message that will be displayed to the user that will inform them that a value is invalid and provide tips for how to specify a valid value.
Example: "Social Security numbers must be in the format ###-##-####."
Example: For a field designed to contain Social Security numbers, you could enter the expression \d\d\d-\d\d-\d\d\d\d to restrict the field to data in the format of digits and dashes of a standard Social Security number.
Zoom Fields
Zoom fields are designed to speed up the process of verifying or manually populating data in a field. When a field is designated as a zoom field, the Display Pane will zoom to a specific region on a page whenever a user places their cursor in that field.
Example: After documents are processed, Summer reviews them for quality assurance. Part of this process includes verifying that a social security number has been successfully extracted from the document and entered into a field. Since this data is always located in the top right portion of the page, Summer creates a zoom field. When Summer places her cursor in the corresponding field, Quick Fields will automatically zoom to the portion of the page that contains the social security number.
Note: Zoom Fields are only available for imaged documents.
To create a zoom field
- Right-click a document class and select Configure fields. You can also select a document class, then click Configure fields in the bottom of the Tasks Pane on the right.
- In the Configure fields dialog box, select a field and click Zoom
.

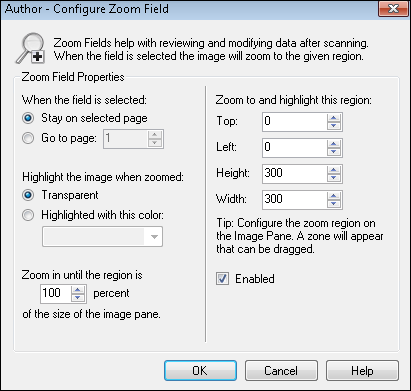
- In the Configure Zoom Fielddialog box, under When the field is selected, you can select Stay on selected page and Quick Fields will stay on the page the operator is currently viewing. Select Go to page and specify a page if you want to be taken to the page that contains the region Quick Fields should zoom to.
Note: If Go to Page is selected but the specified page does not exist in the document, Quick Fields will stay on the current page.
- Under Highlight the image when zoomed, specify whether the zoom region should be highlighted. This feature enables you to visually distinguish the zoom region from the rest of the page.
- Transparent: No highlight will appear.
- Highlighted with this color: Select a pre-defined highlight color from the drop-down menu or select Choose a color for more color options.
- Under Zoom in until the region is ___percent of the size of the image pane, you can define how much of the image pane the zoom field region will occupy. For example, if you choose to zoom in until the region is 100% of image pane, the region will zoom in and cover either the entire width or height of the image pane (whichever is met first). If you choose to zoom in until the region is 75% of the image pane, it will zoom in 75%, leaving space around the region. This can give more context to the region by allowing you to see more of the image.
- Under Zoom to and highlight this region, manually enter coordinates for the region. In most cases, it is easier not to configure specific coordinates and to define the region by dragging and dropping the zone on the image. Ensure the Enabled option is selected if you want the zoom field to zoom.
- Click OK to close the Configure Zoom Field dialog box.
- If necessary, create additional zoom fields.
- Click OK to close the Configure Fields dialog box.
- Zones will appear on the image. If necessary, drag and drop them as you see fit. You can also increase/decrease the size of the zone using its black resize handles.
To modify a zoom field, do one of the following
- With the document class selected, double-click on the zoom field on the image.
- With the document class selected, right-click on the zoom field on the image, hover over Zoom Field, and select Edit or Delete.
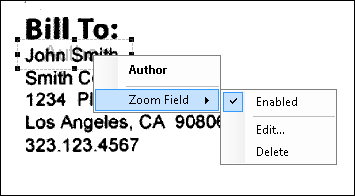
- Right-click anywhere on the image that is not a zoom field, hover over Zoom Fields, hover over the zoom field you want to edit and select Edit or Delete.
Note: You can quickly enable or disable zoom fields without deleting them by toggling the Enabled option on or off in either context menu mentioned above. You can also access this same Enabled option in the Configure Zoom Field dialog box.
To use zoom fields
- Configure zoom fields or open a session that has zoom fields configured.
- Scan documents.
- Select a document using the mouse or keyboard shortcuts.
- In the Tasks Pane, select a field that has been configured as a zoom field.
- The image will zoom to the configured zone. Review or edit the information in the field as needed.
Real-Time Processes
The Real-Time Processes, Field Lookup and Field Verification, extract or compare information from an outside database. They can run at any time during the session, even during Revision. These processes can be configured from the Real-Time Processes tab of the Configure fields dialog box.
Field Lookup (Real-Time Lookup)
Lookup processes retrieve information from a third-party database and store them with the document processed in Quick Fields. As a real-time process, Field Lookup  can be used in various stages of processing, including to update information during Revision. Field Lookup matches one or more values extracted from a document with a column or columns in a third-party database. When a match is found, any value from the corresponding row in the database can be used to identify a page, populate a field, determine the document name, or determine where the document will be stored. The lookup will pull data from the first row whose columns match the specified inputs. The lookup can begin when a field is updated, when a specified key is pressed, or when the document is processed.
Note: Field Lookup works similarly to the Lookup process available in processing, but can run during Revision and does not have access to additional tokens generated by other processes.
Example: A school district is scanning student records. Each student record has the student's ID in the top right corner. The school district has an external database containing each student's name, ID, social security number, and phone number. Quick Fields uses a Zone OCR process to OCR the student's ID in the top right corner of each scanned record and saves it as a token. That token is then compared to the external database. When the student ID that was extracted from the Zone OCR process matches an ID in the database, the other values in the row for that student (name, social security number, and phone number) are returned and used to populate the Name, Social Security Number, and Phone Number fields that are assigned to each student record scanned.
To configure a Field Lookup
- Select the name of the document class.
- At the bottom of the Tasks Pane, select Configure fields. You can also right-click the document class and select Configure fields from the context menu.
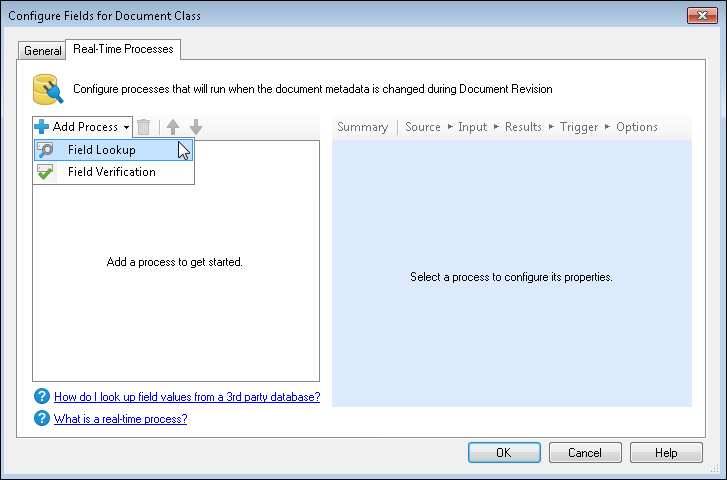
- In the Real-Time Processes tab of the Configure Fields for Document Class dialog box, select Add Process and Field Lookup.
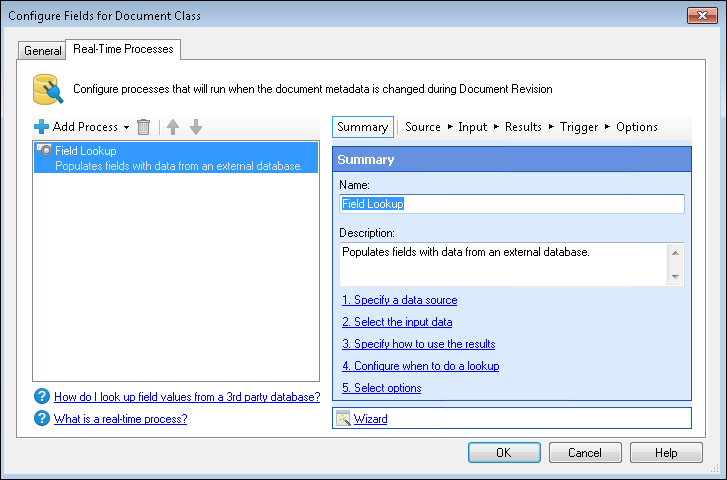
- In the Summary step, you can specify a name and description for this Field Lookup process to help you or others remember its purpose at a glance.
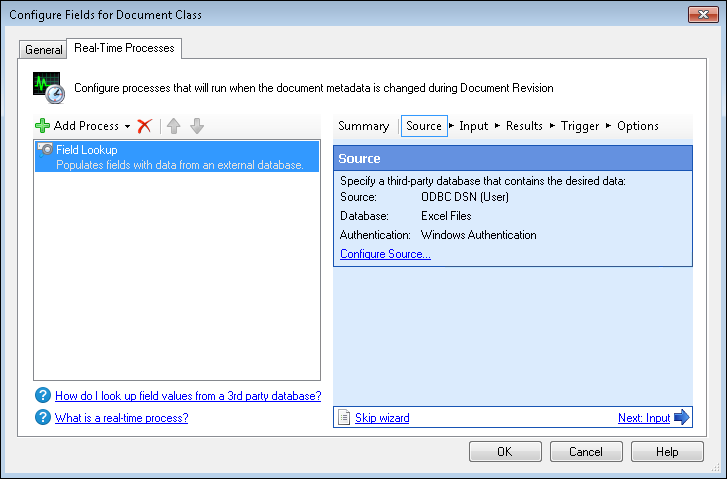
- In the Source step, specify the database to retrieve information from. You have three choices for the Configure Source Wizard: Windows ODBC, Advanced, and Expert.
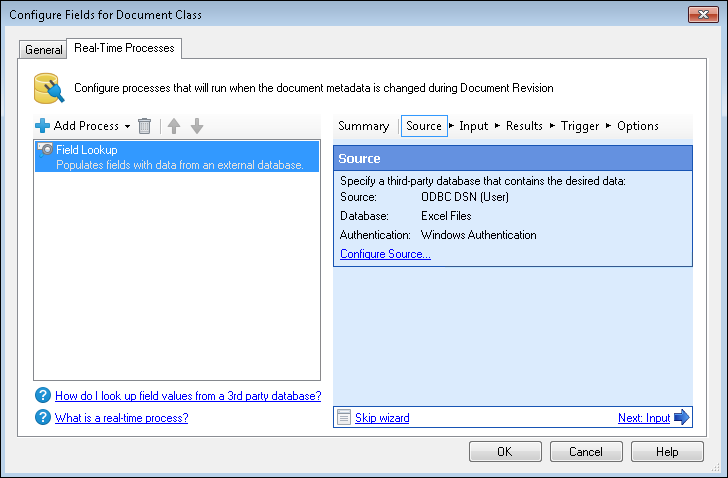
- Once you have configured the database connection, in the Input step, you can specify data to look up in the database.
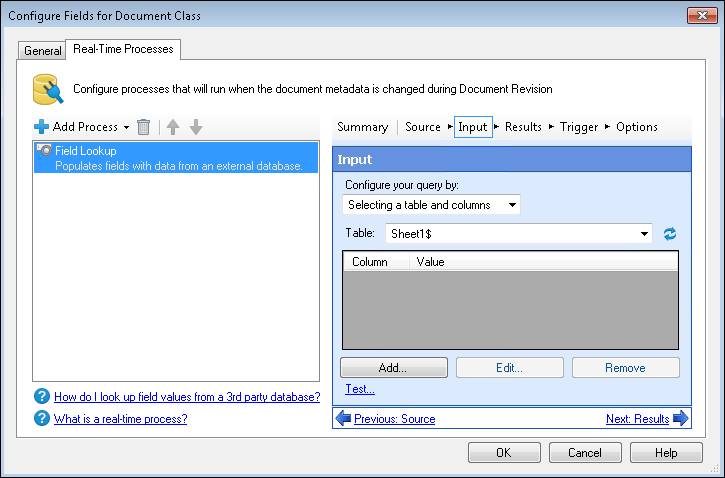
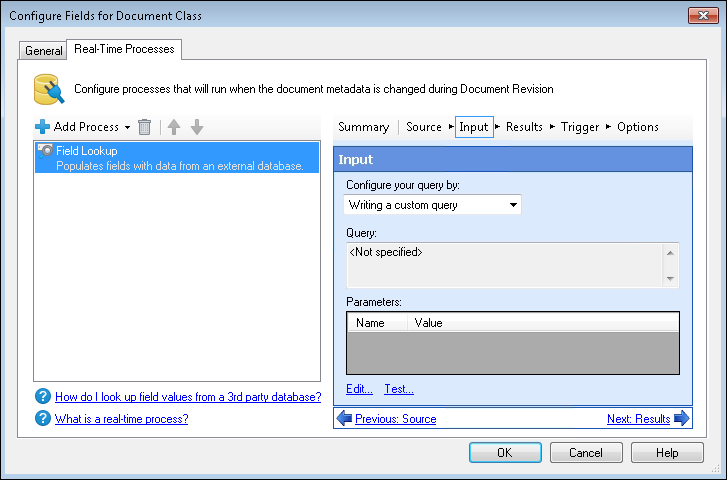
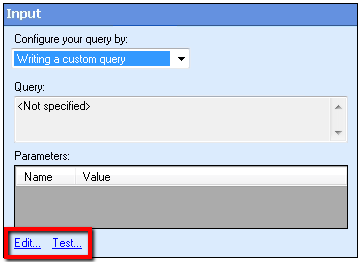
- Under Configure your query by, select if you want to configure it by selecting a table and columns or by writing your own custom query.
- If you selected to configure your query by selecting a table and columns, select the table from the Table list and click Add to choose the data to use in the lookup.
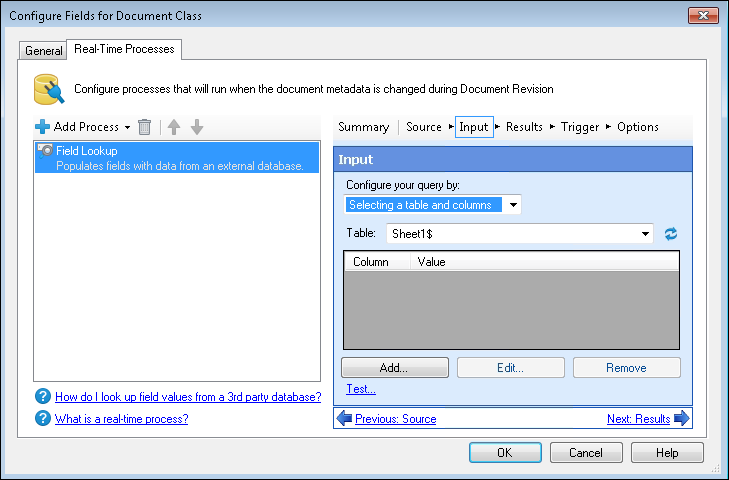
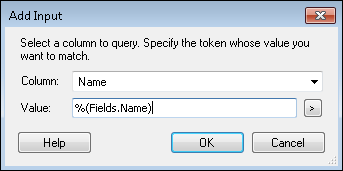
- In the Add Input dialog box, select a column from the database and the token from Quick Fields whose value you want to match and click OK
.
- Click Add again to configure an additional item to use in the lookup. Using more than one item will look up all the specified values. This is useful when more than one item in the database may meet some of the specified criteria. You can continue adding queries until they will identify unique columns.
- To modify an input, select it and click Edit. Make your changes and click OK.
- To remove an input, select it and click Remove.
- If you chose to configure your query by writing your own custom query in step 7, click inside the Query box to create a custom SQL query.
Tip: When writing your own query, the token format to use is %(Column.ColumnName) where Column is always the same and ColumnName is what your query specifies. For example, select X as Y from Z would produce a column named Y, so the token would be %(Column.Y).
-
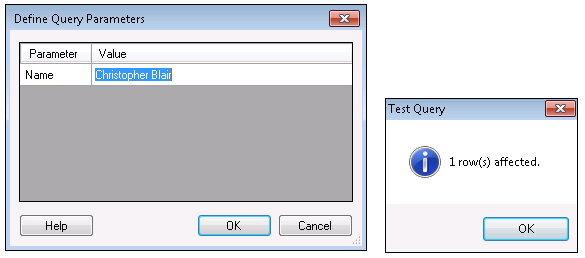
Optional: You can click Test at the bottom of the Input step in the Configure Fields for Document Class dialog box to see how many results were returned or if there were any errors. If you are writing your own query, clicking Edit enables you to edit that query.
- In the Results step, configure which fields will be updated with what information when the Field Lookup process is run.
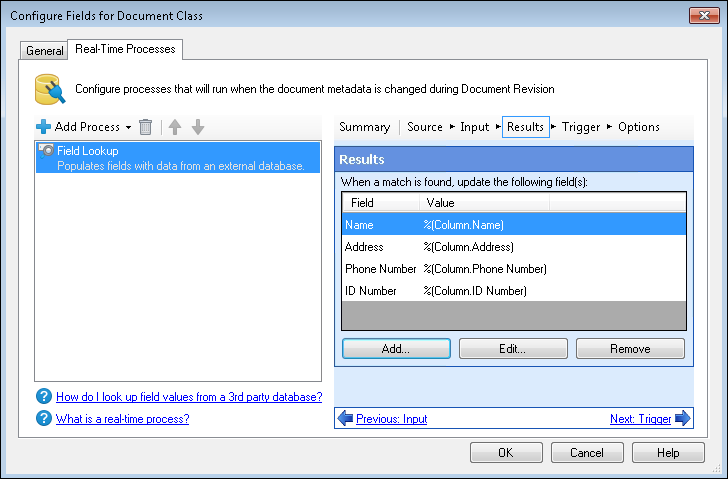
- To configure a field, click Add. The Configure Result Action dialog box will open. Select one of the fields associated with your document class and specify a value that will populate the field when the Field Lookup process is run. Column tokens represent information from the database you configured in earlier steps.
- To edit a result action, select it and click Edit. Make your changes and click OK.
- To remove a result action, select it and click Remove.
- In the Trigger step, you can configure when the process will run. You can select one or multiple options.
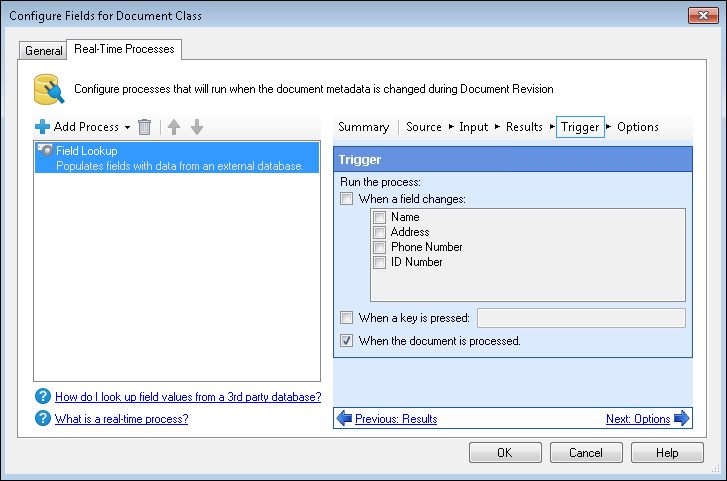
- When a field changes: Select a field or fields.
- When a key is pressed: Select the input box and press the desired keyboard shortcut to trigger the lookup.
- When the document is processed: The lookup will run when the document is processed.
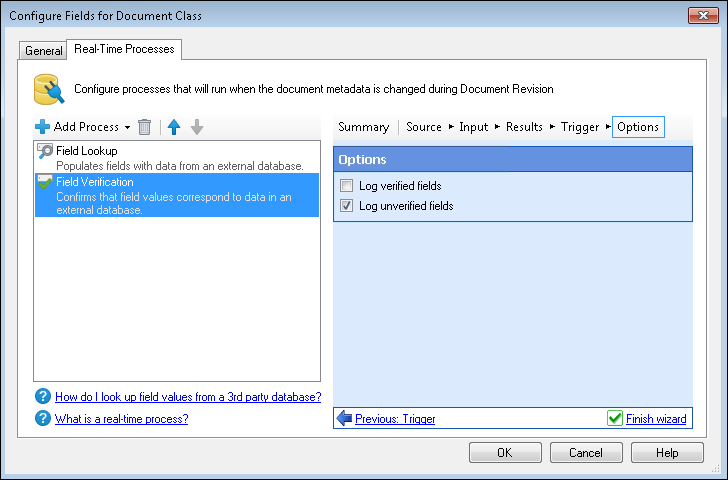
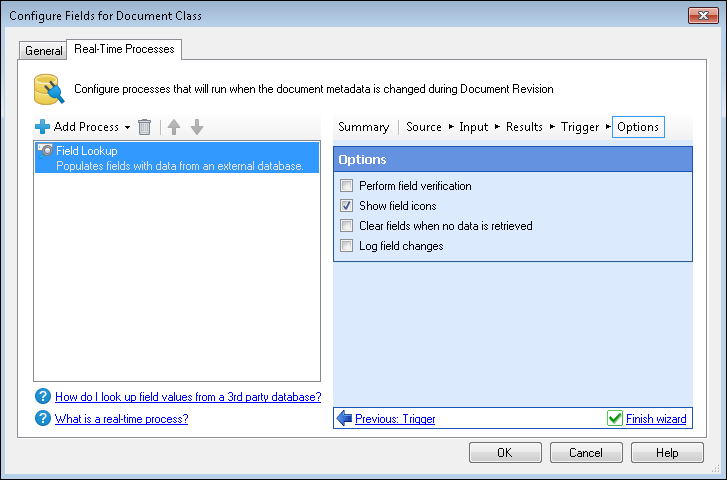
- In the Options stage, you can select additional options for the Field Lookup.
.
Example: Angelica sets a Field Lookup to trigger when a field changes and when the document is processed. When a document is processed, information from the document will trigger the lookup that populates the fields from information from the database. During Revision, when reviewing the scanned documents and their metadata, she can change the field that is set to trigger the lookup and the data will be updated again.
The choices for when to update a process are:
Note: If you are using more than one input value, it is better to run the lookup after processing, when all the values have been generated.
The options are:
- Perform field verification: Fields will be marked as unverified if the lookup returns no data.
- Show field icons: The template will display "input" and "output" icons next to the appropriate fields.
- Clear fields when no data is retrieved: If the database contains no data, the field will be cleared.
- Log field changes: Changes will be logged to the output pane.
Note: Some processes come with the basic Quick Fields installation, and some must be purchased as add-ons. Contact your reseller for more information.
Field Verification
Field Verification  compares information in fields to information in an external database. If the information in the fields does not match the database, the fields can be marked or cleared. As a real-time process, Field Verification can be used in various stages of processing, including to update information during Revision.
To Configure a Field Verification
- Select the name of the document class.
- At the bottom of the Tasks Pane, select Configure fields.
- In the Real-Time Processes tab of the Configure Fields for Document Class dialog box, select Add Process and Field Verification.

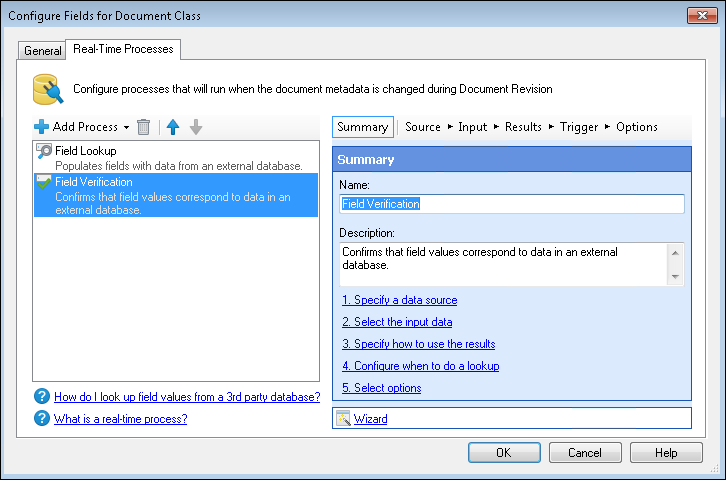
- In the Summary step, you can specify a name and description for this Field Lookup process to help you or others remember its purpose at a glance.
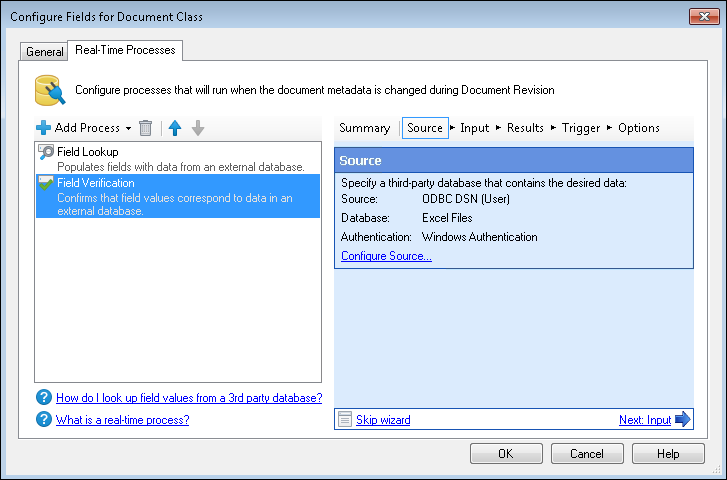
- In the Source step, specify the database to retrieve information from. You have three choices for the Configure Source Wizard: Windows ODBC, Advanced, and Expert.
- Once you have configured the database connection, in the Input step, you can specify data to look up in the database.
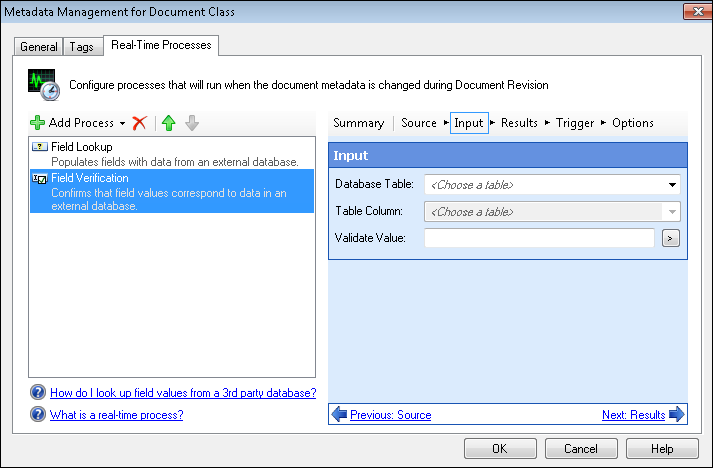
- Choose a database table. The available selections will depend on what you configured in the previous step.
- Choose a database column.
- Specify a value to compare to the information in the database column. Use tokens to represent values generated during processing, specifically field tokens to compare information in fields
.

- In the Results step, you can specify what will happen to additional fields if the information from the Input step does not match the database.
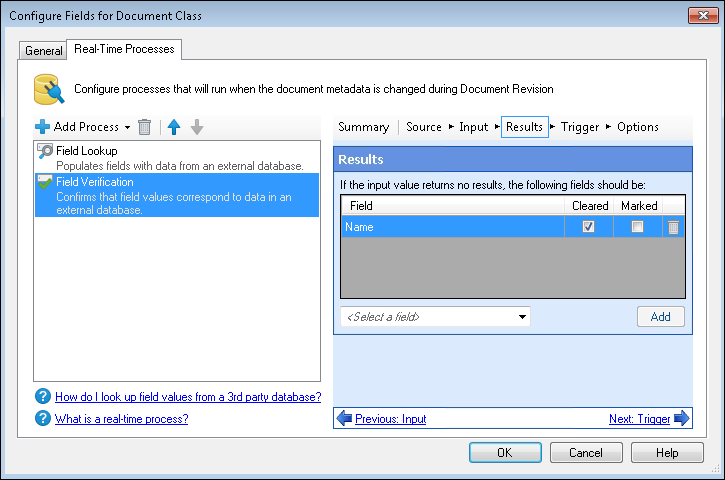
- Select a field from the drop-down menu and click Add.
- Select whether the field will be cleared, marked, or both if no match is found for the input value.
- Optional: Continue adding and configuring fields.
- To delete a field, select it and click the trash can
 icon.
icon. - In the Trigger step, you can configure when the process will run. You can select one or multiple options.
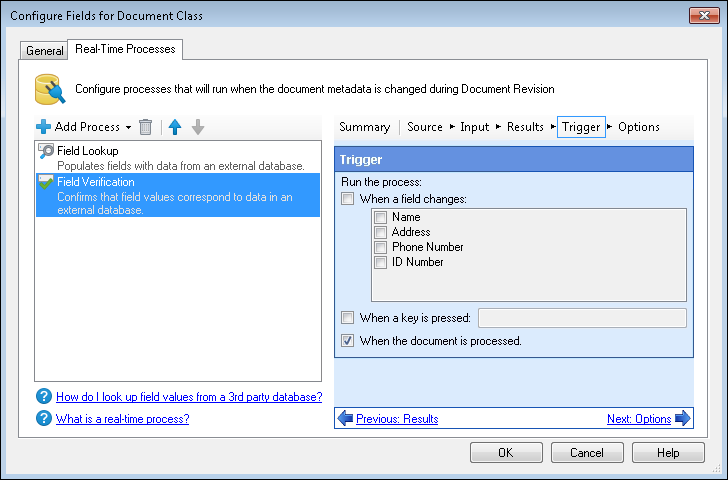
The choices for when to update a process are:
- When a field changes: Select a field or fields.
- When a key is pressed: Select the input box and press the desired keyboard shortcut to trigger the lookup.
- When the document is processed: The field verification will run when the document is processed.
- In the Options step, you can select whether to log fields that have been verified, unverified, both, or neither. The information will be logged to the Processing Information Pane.
