Quick Fields Navigation
In Quick Fields, you can navigate and modify the order and properties of items in your session.
Start Page
The Quick Fields Start Page will be the first thing you see when opening Quick Fields.You can create a new Quick Fields session or open an existing one from this page.
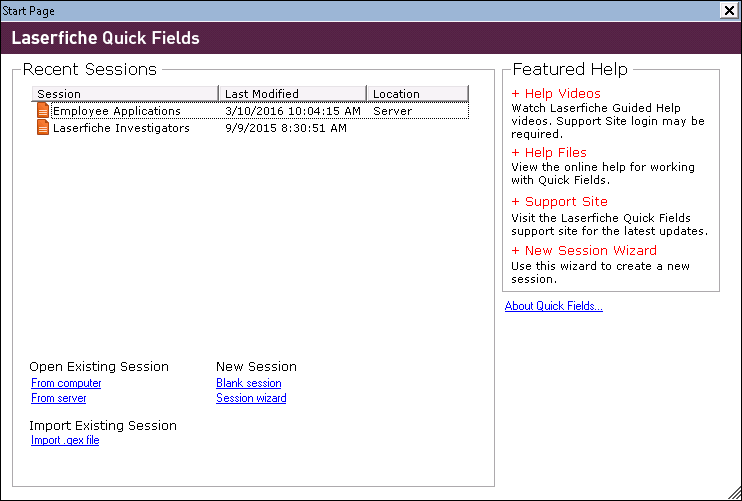
Under Recent Sessions, you will see a list of sessions that have been opened recently that you can click on to re-open.
At the bottom of the start page you can open an existing session, import a previously exported session, or create a new session.
Open Existing Session
- From computer: Click this link to navigate to and open an existing session. Navigate to the .qfx file
- From server: Click this link to navigate to and open an existing session on the Quick Fields Server.
Note: If a server has not been configured, you will be prompted to configure one.
New Session
- Blank session: Click this link to create a new blank session.
- Session wizard: Click this link to open the New Session Wizard which will walk you through creating a new session. There are three levels of help available, Quick, Standard, and Full. We recommend the Full Wizard for first time users.
Import Existing Session
- Import .qex files: Click this link to import a previously exported session. Navigate to the .qex file.
On the right of the Start Page, you will see a Featured Help section listing links to online videos, online help, etc.
To learn more information about your version of Quick Fields, click About Quick Fields below the Featured Help section.
Note: If your license has expired, you will see an Activate button and be prompted to add a valid license to use Quick Fields.
Panes
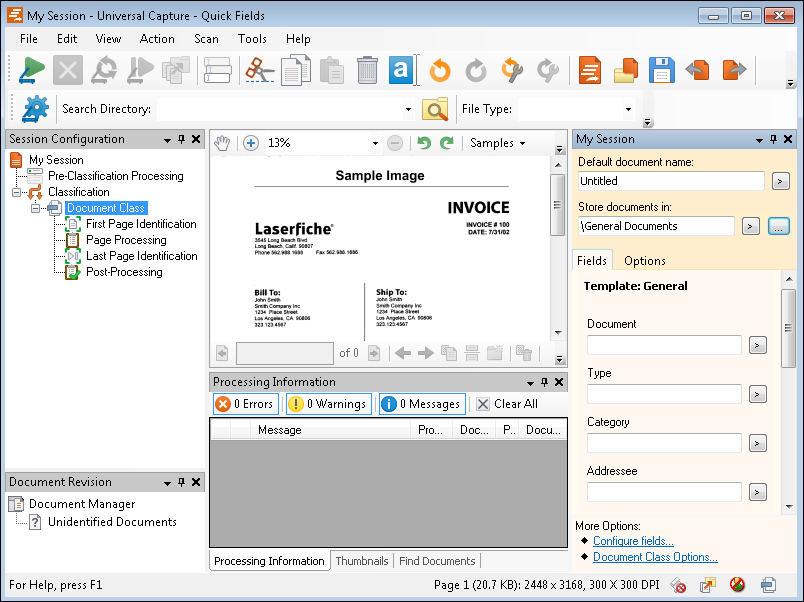
Panes give you an overview of your session, as well as specific documents and their properties. The panes are related: for example, the selection in the Session Configuration Pane can change the contents of the Tasks Pane. If you select the document class name, the Tasks Pane will display the document class properties. If you select a process, the Tasks Pane will display the process's properties. Panes are customizable and can be hidden, resized, set to float, or otherwise arranged to suit your needs.
Session Configuration Pane
The Session Configuration Pane shows which processes and enhancements will be used in the session, which stages of processing or document classes they are associated with, and the order in which they will be performed. When you select an item in the Session Configuration Pane, its properties or possible actions will appear in the Tasks Pane on the right. You can use the options in the Tasks Pane to add processes, modify default document settings, or perform other actions that modify the selected item. You can also right-click an item in the Session Configuration Pane to display a menu of possible actions.
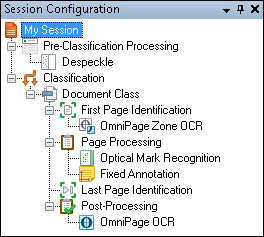
The order of document classes and processes in the Session Configuration Pane can have dramatic effects on the documents processed in the session. For example, if you have multiple document classes and a document meets the First Page Identification criteria for more than one, it will be assigned to the first document class whose criteria it meets. Therefore, changing the order of document classes can drastically alter how your documents are processed and stored. Likewise, processes and enhancements affect one another—for instance, using an image enhancement such as Despeckle or Smooth before OmniPage OCR or OmniPage Zone OCR can greatly alter the ability of the optical character recognition process to identify characters. To change the order of items in the Session Configuration Pane, you can drag and drop or cut, copy, and paste the items.
Document Revision Pane
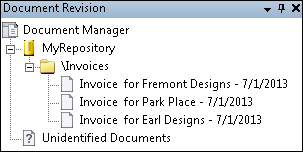
The Document Revision Pane shows the documents that have been scanned and processed by your Quick Fields session, organized by the repository and folder where they will be stored in Laserfiche. When you select a document in the Document Revision Pane,
- its first page appears in the Display Pane,
- its properties and metadata appear in the Tasks Pane,
- information about activities performed on the document will appear in the Output Pane,
- and if the document has imaged or text pages, thumbnails of the pages appear in the Thumbnails Pane
You can make changes to the document or pages, such as editing document metadata, moving pages to separate documents, reordering pages, or running processes again. Once documents have been stored in Laserfiche, they no longer appear in the Document Revision Pane.
Display Pane
The Display Pane shows a document and/or its associated text. What is shown varies depending on whether you are configuring a Quick Fields session or revising processed documents. You can use the Image Toolbar to toggle the contents of the Display Pane to the Image View or Text View, and navigate the image by panning, zooming, etc.
When certain items in the Session Configuration Pane are selected, a sample page will be displayed. When you test processes, you can see them applied to the sample page. This helps you make appropriate modifications to your configuration. For best results, create a custom sample page.
When a scanned document is selected in the Document Revision Pane, the image and associated text are shown in the Display Pane so you can review the documents, make sure they have been processed appropriately, and make changes or re-scan if necessary.
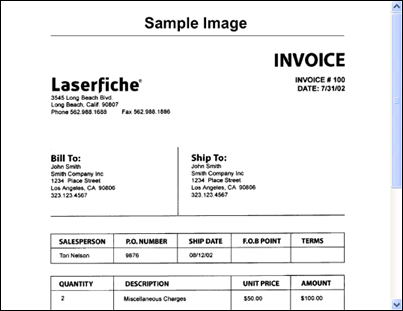
Note: If a document image has text associated with it, you can draw a rectangle around the desired text on the image in the Display Pane and copy and paste it elsewhere to help define the document (field value, document name, etc.).
Tasks Pane
In the Tasks Pane, you can configure:
- General properties of the session, document classes, and scanned documents
- Default properties for documents in a particular class
- Which processes or image enhancements will be used
- The properties of those processes or image enhancements
- A selected document's metadata
The state of the Tasks Pane changes depending on what you have selected in the Session Configuration Pane or Document Revision Pane.
Session Settings
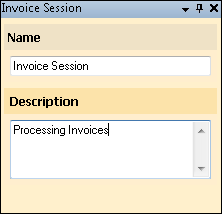
Certain session settings can be viewed or modified in the Tasks Pane when the appropriate node is selected in the Session Configuration Pane or Document Revision Pane. For example, if you select the name of the session in the Session Configuration Pane, you can view or change the name and description for the session. If you select the Document Manager in the Document Revision Pane, you can see an overview of the documents scanned in the session.
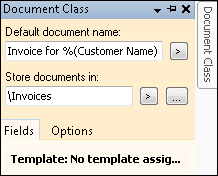
Document Class
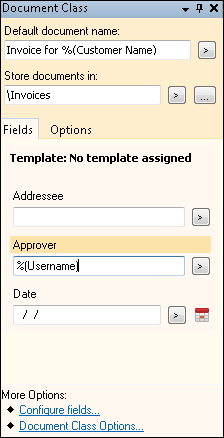
Selecting the name of a document class in the Session Configuration Pane allows you to configure the default properties for documents in the class in the Tasks Pane. You can use tokens to populate the metadata with information that will be dynamically generated during processing.
Processing
If you have selected a stage of processing where processes and image enhancements can be configured, such as First Page Identification or Page Processing, the Tasks Pane will show the processes and enhancements available in that stage. You can search for specific processes or image enhancements by typing in the Search processes text box at the top of the pane. When you hover the mouse over the name of the process or enhancement, a tooltip will appear containing a brief description of the process or enhancement and an illustration of its effects. To disable these tooltips, select Disable tooltips for processes under Tasks Pane in the Options dialog box accessed via the Tools menu.
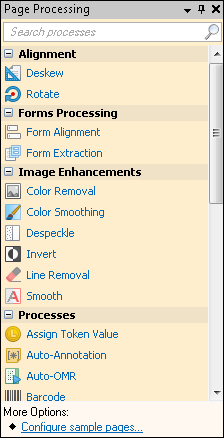
When you select a process or image enhancement, the Tasks Pane will change to display the configuration of that particular process or enhancement. You can change the configuration to suit your needs, test using a custom Sample Page, and adjust them again if needed. By default, when a process or image enhancement is first selected, it will open a wizard that takes you step by step the through each phase of configuring the properties of the process or enhancement. To see all the properties at once with less explanatory information about each, select Skip Wizard at the bottom of the pane.
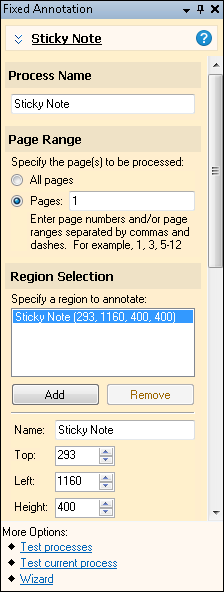
Note: You can configure the wizard to be displayed every time or only the first time you select a document class. This option can be configured in the Options dialog box under Tasks Pane.
Documents
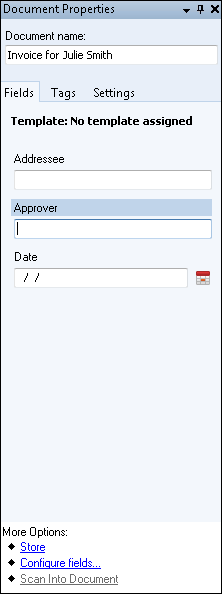
Once you have scanned a document, selecting the name of a specific document in the Document Revision Pane allows you to view and modify that document. If you set default properties for the document class, this information should be filled out accordingly during processing. Document metadata can be reviewed and revised if necessary.
Output Pane
The Output Pane displays information about the processes performed by Quick Fields during processing. This information, the Output Log, can also be exported as a text file. By default, the Output Pane is not displayed when Quick Fields is opened. To open it, click View from the menu, point to Panes and select Output. You can configure the Report events to the Output Pane option to not log anything or appear only when an error and/or a warning is logged. To change this setting, click Tools from the menu, select Options then Output Pane.
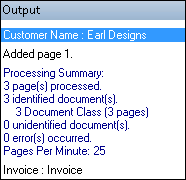
Note: The Processing Information Pane contains some of the same information as the Output Pane, but it is formatted differently. Only the Output Pane contains the processing summary.
The information in the Output Pane is coded by type, with different colors for errors, warnings, messages, tokens, processing summaries, and process names.
To change the colors
- Right-click in the Output Pane.
- Point to Customize Colors.
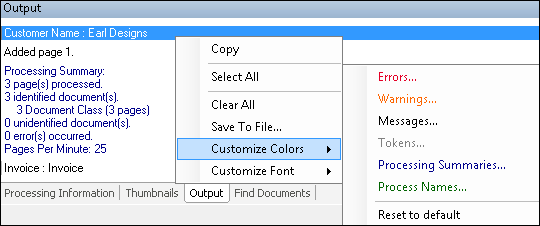
- Select a category.
- Select a color.
- Optional: To create a new color, select a palette box and click Define Custom Colors. Select the color you want and click Add to Custom Colors. The color will appear in the palette box. Then select that color
- Click OK.
Note: You can return to the default colors by pointing to Customize Colors and selecting Reset to default.
To change the font
- Right-click in the Output Pane.
- Point to Customize Font.
- Select Change font.
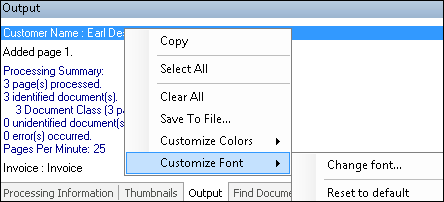
- Pick the desired font, font style, and font size.
- Click OK.
Note: You can return to the default font by pointing to Customize Font and selecting Reset to default.You can also configure the colors and change the font in the Options dialog under Output Pane.
The Output Log can be exported as either a Rich Text Format document (.rtf) to preserve the color settings or as a plain text file (.txt), which will not preserve the color settings.
To export the Output Log
- Select Export Output Pane Contents from the Action menu or right-click in an open area of the Output Pane and select Save To File.
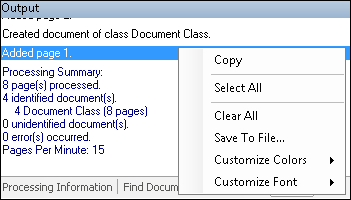
- By default, the file name will be the current date. Rename it if desired.
- Select Rich Text Format or Text File.
- Click Save.
You can copy some or all of the information in the Output Pane and paste it into the application of your choice, such as Microsoft Word.
To copy some of the information from the Output Pane
- Select the desired text.
- Right-click and select Copy.
- Paste it into the application of your choice.
To copy all the information from the Output Pane
- Right-click in an open area of the Output Pane and click Select All.
- Right-click again and select Copy.
- Paste it into the application of your choice.
You can clear all the information in the Output Pane. For instance, if you begin scanning and then stop, the information up to the point where you stopped will be recorded in the Output Pane. You may want to keep this information, or clear it all and start over.
To clear all the information from the Output Pane
- Right-click in the Output Pane and select Clear All.
Tip: You can double-click on an action in the Output Pane to be taken directly to the page where the action took place. For example, double-clicking "Added page 5" will take you to page 5 of the document.
Processing Information Pane
The Processing Information Pane contains information generated by the processes in your session, including extracted data, warnings about processes used incorrectly, and error messages. You can filter the items in the Processing Information Pane by toggling the appropriate buttons in the toolbar.

Note: Some of the information in the Processing Information Pane is similar to that in the Output Pane. However, the Processing Information Pane is formatted in a grid and contains some additional information as well.
When documents have been scanned, the Processing Information Pane can be used to see whether the documents have been processed correctly or whether they need to be re-scanned or revised before they are stored in Laserfiche. In First Page Identification, Last Page Identification, or Page Processing, the Processing Information Pane can be used when testing and adjusting processes and enhancements.
Example: If you want to use OmniPage Zone OCR to extract text from certain areas of the document, you can add a sample page, configure OmniPage Zone OCR and click Test Processes to see the words generated by the OmniPage Zone OCR process. If the words were read correctly, you may be ready to scan documents. If the results were not as good, you may want to configure an image enhancement, then click Test Processes again to see if the enhancement improved the results of the process.
To clear all the information from the Processing Information Pane
Do one of the following:
- Click the Clear All button
 .
. - Right-click inside the pane and select Clear All.
To rearrange the columns shown in the Processing Information Pane
- Click and drag the column headers.
To show or hide columns
- Right-click inside the Processing Information Pane.
- Select Columns.
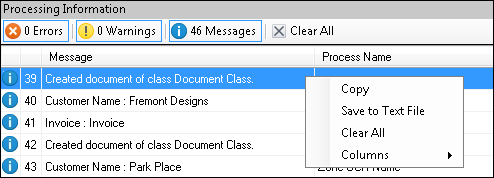
- Select or deselect the appropriate column header.
To save all the information from the Processing Information Pane
- Right-click inside the pane and select Save to Text File. The information will be saved as a tab-delimited text file, so you may open it in a spreadsheet program such as Microsoft Excel and see the same column structure.
Tip: You can double-click on an action in the Processing Information Pane to be taken directly to the page where the action took place.
Thumbnails Pane
The Thumbnails Pane displays thumbnail images of each page in the selected document, which allows you to navigate among and modify pages in a different view. You can rearrange the pages by dragging and dropping them in different locations within the same document, or by dragging them over the icon in the Document Revision Pane representing another document.
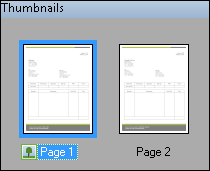
In the Thumbnails Pane, you can select a page or pages, and, by right-clicking:
- Add or clear bookmarks
- Rescan
- Delete pages
- Split a document into multiple documents
- Create a new document from the selected page
- Run a process or the processes configured for a particular document class.
- Rotate the page
- Zoom in or out
You can also change the Thumbnails Pane to List Mode, which will provide a list of all the pages in the selected document.

Find Documents Pane
From the Find Documents Pane, you can search for processed documents that contain a particular term in their path, fields, tokens, or text.

You can also right-click and perform some actions such as:
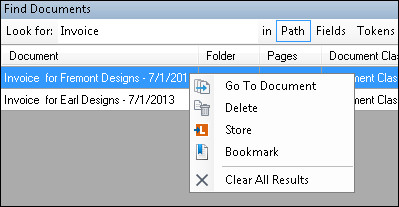
- Bookmarking the documents
- Storing the documents
- Deleting the documents
You can use this feature before storage to see how many documents had a particular piece of information generated during processing.
For more information, see Searching for Processed Documents.
Application Errors Pane
The Application Errors Pane displays any errors you encounter when scanning into Quick Fields. You can email errors to your administrator or technical support from this pane.
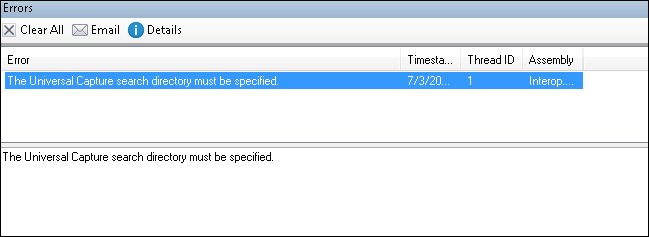
To open/close this pane
- Select Application Errors under Panes in the View menu. Alternatively, use the keyboard shortcut F12.
To view an error's details
- Select an error to display additional information in the bottom portion of the Error Log Pane. You can copy and paste this information if you want.
To clear the error log
- Click Clear All
 .
.
To email an error
- Select an error from the list.
- Click Email
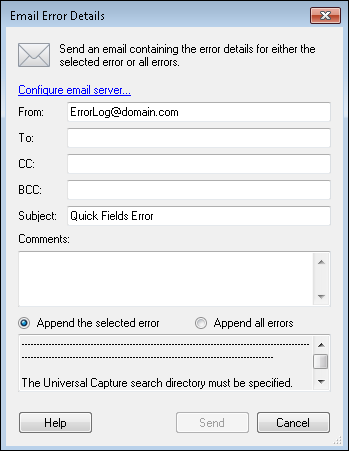
 to open the Email Error Details dialog box.
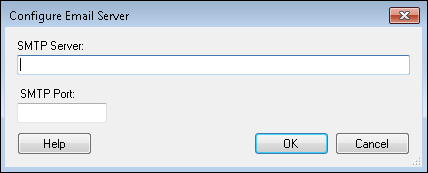
- Click Configure Email Server at the top of the dialog box to enter an
 SMTP Server and port.
- In the Email Error Details dialog box, next to To:, CC:, and/or BCC:, insert the email addresses of the people you want to send the error log(s) to.
- Optional: Change the From email address and/or Subject if desired.
- Optional: Type in comments about the error log(s).
- Select to only Append the selected error or to Append all errors.
- Click Send to send the email. Click Cancel to return to the Application Errors Pane without sending an email.
Showing and Hiding Panes
You can show and hide panes to customize Quick Fields to your needs.
To show or hide panes
Do one of the following:
- From the View menu, select Panes and select the name of the pane you want to show or hide.
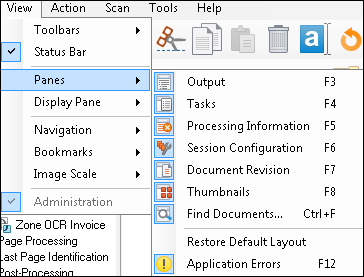
- Select the toolbar button for the pane you want to show or hide. Hovering over the button will display the pane name.

- Use Keyboard Shortcuts to quickly show or hide panes.
Rearranging Panes
The panes in Quick Fields can be rearranged or nested inside each other. This helps you customize the interface to the way you work.
Example: If you are scanning documents in landscape orientation you may want to move the Tasks Pane to the bottom of the window to make it easier to see the contents of the page in the Display Pane.
Note: The Display Pane cannot be rearranged.
To rearrange a pane
- Right-click at the top of the pane or click the down arrow at the top of the pane to see the different options.
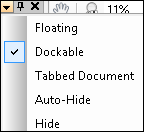
- Select the desired arrangement.
Floating
A floating pane is open in its own window. It can be moved around on top of the main Quick Fields window.
To expand a floating pane
- Click and drag the corner of the pane.
Dockable
A dockable pane can be lifted from its usual location and dropped into another one.
To undock a pane
- Click on the top of a pane.
- Begin dragging.
- Docking guides will appear.
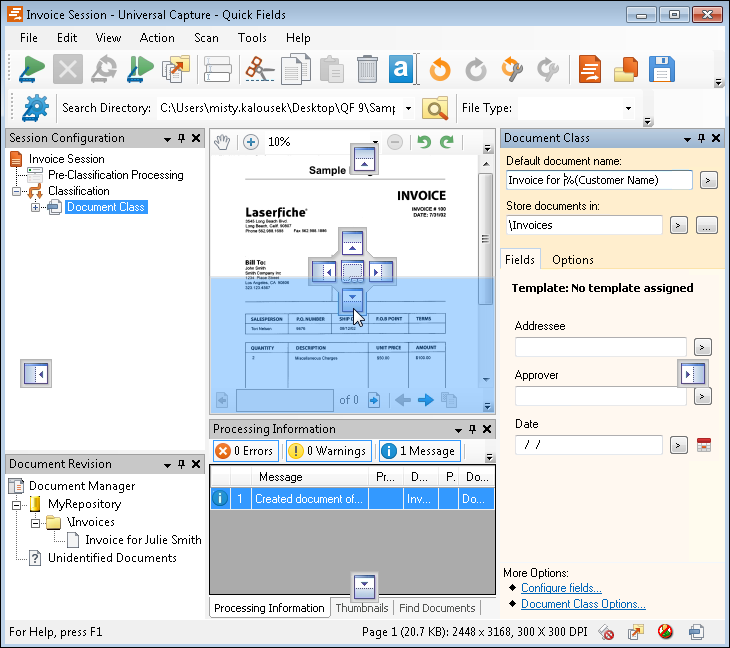
- Docking guides for the entire Quick Fields window appear in the center of each edge of the window. When a dockable pane is dragged over one of these, it will be aligned all the way to that side of the Quick Fields window.
- Docking guides for each pane appear in the center of the pane. When a dockable pane is dragged over one of these, it will be aligned to the corresponding side of that pane.
- Clicking the pin icon in each pane will minimize the pane and turn it into a tab at the bottom left. To display the pane again, click the tab. To keep the pane open at all times, click the pin icon again.
Tabbed Document
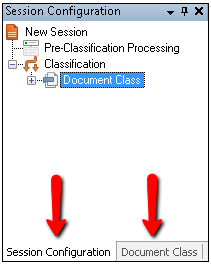
Setting any pane to Tabbed Document will cause it to appear as a tab within the Display Pane.
Auto-Hide
Setting a pane to Auto-Hide will hide the pane, but its name will appear at the edge of the window. When you mouse over the name of the pane, the entire pane will appear again.
Hide
Selecting Hide will hide the pane. To display it again, you will need to use the View menu.
Tip: You can restore the panes to their default layout by selecting View, pointing to Panes, and selecting Restore Default Layout.