Processing
Processing consists of the various operations performed on documents scanned in a session. Quick Fields processes extract or add information to a page or document. Image enhancements improve image quality to generate better results from processes. These operations are configured before you begin scanning and can be saved with the session to be used repeatedly on different documents. During scanning, they are performed in the order determined by the Session Configuration Pane.
Processes and image enhancements can be used at various stages within the session. Where they are used in the session and in relation to each other will affect the outcome of the session. For instance, you must configure Text Extraction in Pre-Classification Processing in order to be able to use processes that require extracted text (e.g., Substitution) on electronic documents in Page Processing. Also, image enhancements should be used before data extraction processes; for instance, you would configure Despeckle before Optical Mark Recognition to ensure you are reading intended marks and not stray dots introduced during scanning. In addition, you can reduce the amount of time it takes to run a Quick Fields session by configuring time-consuming processes that other processes do not depend on in Post-Processing so they will run when the documents are stored to Laserfiche. Before scanning, you can change the order of processes and enhancements and test processes to confirm that the configuration produces the desired results.
The stages of processing are:
Pre-Classification Processing
Processes or image enhancements in Pre-Classification Processing will be applied to all pages of all documents scanned into the session. This can be useful when you want to apply a process or enhancement to every page without having to configure it in each document class. Another use is to configure a data extraction process in Pre-Classification Processing and use the information extracted from that process in First Page Identification or Last Page Identification, which can help sessions run more efficiently.
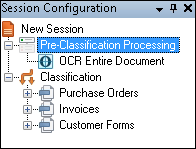
Example: Golden State Financial Advisors is scanning different types of client records from old files. They know that most of the documents have been filed in the same orientation within the files, but a few may be upside down. They configure Rotate in Pre-Classification Processing so that all identifications and other processes will be performed on documents that have been rotated to the correct position.
Example: Alabama Blood Bank is scanning donation forms that have been printed with barcodes encoding the donors' blood types. They want to use multiple document classes and classify the documents by blood type. They configure a Barcode process in Pre-Classification Processing to read the bar codes, and Token Identification processes in First Page Identification to identify the documents by the information extracted from each barcode. This way they can run Barcode once in the entire session rather than in the First Page Identification process for each document class.
Page Processing
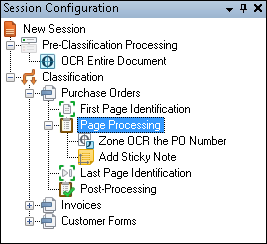
The Page Processing stage in each document class includes the processes and image enhancements that will be applied to the pages in that document class. In Page Processing, processes and image enhancements can be configured to apply to all pages of each document or only certain pages. The processes and enhancements will be applied in the order listed, but only to the pages specified for each process or enhancement. Processes applied in Page Processing will be permanently applied to the pages. Image enhancements can be applied in two ways: permanently or locally.
Post-Processing
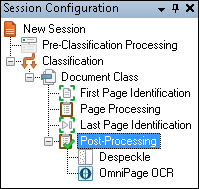
Processes and image enhancements configured in Post-Processing can either be applied after each document is processed (before they are sent to Laserfiche) or on storage to Laserfiche. The processes or enhancements can be applied to some or all pages of the documents.
When should these processes run?
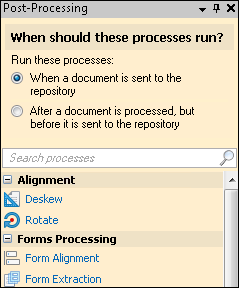
- When a document is sent to the repository: If you select to run the processes when a document is sent to the repository, the processes will run as your documents are being sent to the repository. If you manually store your documents, the processes will run when you click Store. If you automatically store your documents, the processes will run when the conditions of the automatic storage are met. Once you choose to manually or automatically store your documents, the processes run and the documents will immediately be sent to the repository without review. This option is useful for running time-consuming processes, such as OCR, on the documents when they are sent to the repository and not during a Quick Fields session is running.
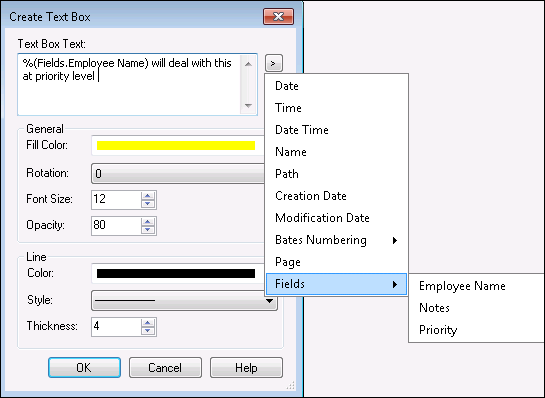
Note: You can use field tokens in processes when you choose to run processes as your documents are being sent to the repository (if you have selected When a document is sent to the repository.
- After a document is processed, but before it is sent to the repository: If you select to run the processes after a document is processed but before it is sent to the repository, Quick Fields will run these processes as soon as it completes defining and processing the document, regardless of when the documents are stored.
Example: Quick Fields determines page five is the last page of the document. After page five is processed, Quick Fields will immediately run the Post-Processing processes. Once finished, you will be able to see the results of the processes and revise the documents in the Revision Pane before sending them to the repository.
Note: Post-Processing was previously called Storage Processing in Quick Fields 8.3 and earlier.
Testing Processes
Once you have configured processes and image enhancements, you can test them on a sample page (image or text) or electronic document before scanning large numbers of documents. For best results when testing processes, add a custom sample page that represents a typical document you will be scanning for the document class. Once a process is configured, you will have the option to test all processes, test processes on electronic document, or test the process currently selected.

- Test processes tests the current process (and the processes before it) on the current sample image. The results will be displayed on the sample image or Text Pane and in the Processing Information Pane. You can adjust or add processes and enhancements until you are satisfied with the results.
- Test processes on electronic document tests the current process (and the processes before it) on the sample electronic document. The results will be displayed either in the Text Pane or Processing Information Pane. You can adjust or add processes until you are satisfied with the results.
- Test current process tests only the currently selected process. The results will be displayed on the sample page or Text Pane and in the Processing Information Pane. You can adjust the settings for that process and test until you are satisfied with the results.
You can use test processes, test processes on electronic documents, and test current process alternately to view and adjust the results of the processes you are configuring.
Note: Testing processes on electronic documents is primarily used in Pre-Classification Processing.
Example: Michael wants to perform Optical Character Recognition (OCR) on documents during processing. He configures OmniPage OCR in Page Processing and a representative sample page for the document class. He clicks Test Current Process and opens the Text Pane to see the results. He discovers that the results contain some errors. He notices that there are some extra speckles on the scanned document that may be interfering with the character recognition, so he decides to use the Despeckle image enhancement to remove them. He configures Despeckle and clicks Test Current Process to see the results on the sample page. It seems to have removed most of the speckles, so he selects OmniPage OCR in the Session Configuration Pane and selects Test Processes. Because Despeckle is configured before OmniPage OCR, this will test the effects of Despeckle on OmniPage OCR. Buster notices that the Despeckle has removed some segments of characters, such as periods and the dots on the letter i. He selects Despeckle in the Configuration Pane and in the Tasks Pane adjusts its properties so it removes only smaller speckles. He selects OmniPage OCR in the Configuration Pane again and clicks Test Processes. Now the OmniPage OCR is accurate, and Jack feels confident that the session is configured correctly to meet his goals.
After processes have been successfully tested, you can select the image the processes were tested on, select Samples from the Image Toolbar and hover over Recent tests to see a list of the processes tested. Click any of the recently tested processes to see their results on the image. You can also select Create sample page from image to create a new sample page from the results of tested processes.

Example: If you are resizing each page of a document, your sample image will also need to be resized so zones can be placed accurately. You could test the Resize image enhancement and create a new sample page from the resulting image.
Note:Create sample page from image will only be available if you have selected an image that processes successfully were tested on. For example, if you test an Invert image enhancement that results in an error, the option will be disabled.
Page Ranges
When it is possible to determine a page range for processes and image enhancements in Quick Fields, you can specify certain pages or a range according to the following formatting guidelines.
List of Pages
You can specify a comma delimited list of pages.
Example: 1, 2, 5, 7
Result: 1, 2, 5, 7
Range of Pages
You can also specify a range of pages. The starting and ending numbers in the range determine the first and last pages to be processed.
Example: 1-7
Result: 1, 2, 3, 4, 5, 6, 7
Steps
You can specify a step for the pages the process will run on. This is particularly useful if you want a process to run on only even or odd pages.
Example: 1@
Result: 1, 3, 5, 7...
Example: 2@
Result: 2, 4, 6, 8...
The default step value is 2, as demonstrated above, but you can specify a different step value.
Example: 1@3
Result: 1, 4, 7, 10...
Combination
The above formats can be combined to create a custom page range.
Example: 2, 3-10@3
Result: 2, 3, 6, 9