Permanent Stamp
![]() Permanent Stamp
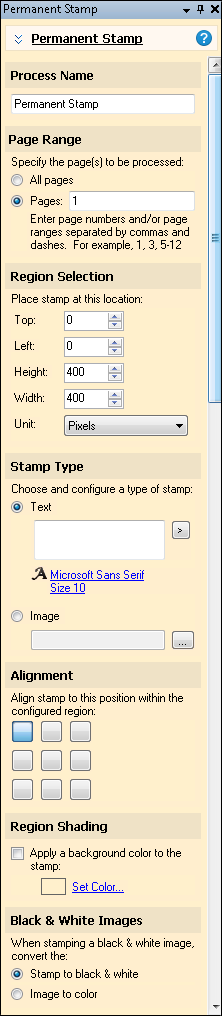
Permanent Stamp ![]() permanently places an image or text on an image. Note that Permanent Stamp permanently burns the information onto the image. Once it is applied, the image cannot be viewed, printed, or exported without it. If text is placed on an image using Permanent Stamp before the OCR process, the stamped text will be OCRed along with the rest of the image and the text will be searchable in Laserfiche. Permanent Stamp can be used in Pre-Classification Processing, Page Processing, or Post-Processing. Permanent Stamp is most often used in conjunction with Bates Numbering. It can also be used to permanently mark other information on the image.
permanently places an image or text on an image. Note that Permanent Stamp permanently burns the information onto the image. Once it is applied, the image cannot be viewed, printed, or exported without it. If text is placed on an image using Permanent Stamp before the OCR process, the stamped text will be OCRed along with the rest of the image and the text will be searchable in Laserfiche. Permanent Stamp can be used in Pre-Classification Processing, Page Processing, or Post-Processing. Permanent Stamp is most often used in conjunction with Bates Numbering. It can also be used to permanently mark other information on the image.
Example: Shipping Company keeps shipping records that will only be used internally, and they want a permanent, unalterable record of which scanner operator processed them and when. They use Permanent Stamp to place the name of the scanner operator and the date and time of processing on each document.
Note: The size of the stamp is determined by the DPI (dots per inch) of the image.
To use Permanent Stamp
- In the Session Configuration Pane, select the stage of processing where you want to use Permanent Stamp.
- In the Tasks Pane, select Permanent Stamp.
- You can optionally enter a name for the process under Process Name.
- Move through each step of the wizard at the bottom of the pane. You can also click Skip Wizard to display and configure the properties all at once.
- Page Range: When configuring a process in Page Processing or Post-Processing, you will be prompted to specify a page range. In other stages, default settings will be automatically applied.
- Region Selection: Specify the region where the stamp will be applied. To define a region, select Region and either drag and resize the zone on the Display Pane or specify coordinates in pixels or by percentage in the Tasks Pane.
Tip: If you are zoomed in to a specific area of an image, adding a zone will place it in the top left corner of the zoomed in image for convenience.
Note: Zones can be copied and pasted within this and other processes that contain zones. When copying a zone within this process, pasting using CTRL + V will paste the zone directly on top of the zone you copied. Right-clicking on a different area of the image and selecting Paste Zone from the context menu will paste the copied zone where you right-clicked.
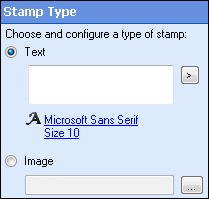
- Stamp Type: Select a type of stamp and configure
 its properties.
 - Text: Specify the text for the stamp. You can use the token button (right arrow)
 to stamp the page with a variable value generated by another process or the computer you are using. Click the font underneath the text box to alter the size, color, or font of the text. You can use field tokens if you are using this process during Post-Processing.
 - Image: Specify the location of the image you want to use or click the Browse button
 to browse to an image saved on your computer.
 - Alignment: Select the desired position of the stamp within the region.
- Region Shading: To color the specified region, select Apply a background color to the stamp:. Click Set Color to choose a color or create a custom color.
- Black & White Images: Choose what will happen when a color stamp is applied to a black and white image. Either the entire page can be converted to the same image format as the stamp, or the stamp can be converted to the same image format as the page.
- Optional: To preview how this enhancement will affect scanned images and OCRed or extracted text, test processes. For the best results, add a custom sample page before testing. Adjust and test until you are satisfied with the results.
Note: If you define a permanent stamp region using percentages for scanned pages of a certain size, the size and placement of the region will change if a page of a different dimension is scanned. For example, the region defined for a scanned page that is 8.5 x 11 in size will be a different size and in a different location on a scanned page that is 8.5 x 14.