The ![]() Color Removal
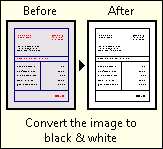
Color Removal ![]() image enhancement converts images or portions of images to black and white format. Several processes, including OmniPage Zone OCR and Smooth, are designed to operate on black and white images, so you will get more accurate results if you use Color Removal before using data extraction processes, or before applying other image enhancements such as Invert. The stage of processing where you use Color Removal depends on your overall goals. For example, when configured in Pre-Classification Processing, Color Removal can optimize text for other processes, such as OmniPage Zone OCR, used in First Page Identification, Last Page Identification, or Page Processing. Configured in Page Processing, it will optimize text for other processes used after it within Page Processing. Used as a local image enhancement, it will optimize the text during processing, but will allow you to keep the image in its original color format for storage.
image enhancement converts images or portions of images to black and white format. Several processes, including OmniPage Zone OCR and Smooth, are designed to operate on black and white images, so you will get more accurate results if you use Color Removal before using data extraction processes, or before applying other image enhancements such as Invert. The stage of processing where you use Color Removal depends on your overall goals. For example, when configured in Pre-Classification Processing, Color Removal can optimize text for other processes, such as OmniPage Zone OCR, used in First Page Identification, Last Page Identification, or Page Processing. Configured in Page Processing, it will optimize text for other processes used after it within Page Processing. Used as a local image enhancement, it will optimize the text during processing, but will allow you to keep the image in its original color format for storage. ![]() See an example.
See an example.
Note: Color Removal was previously known as Dynamic Thresholding.
To use Color Removal
- In the Session Configuration Pane, select the stage of processing where you want to use Color Removal.
- In the Tasks Pane, select Color Removal.
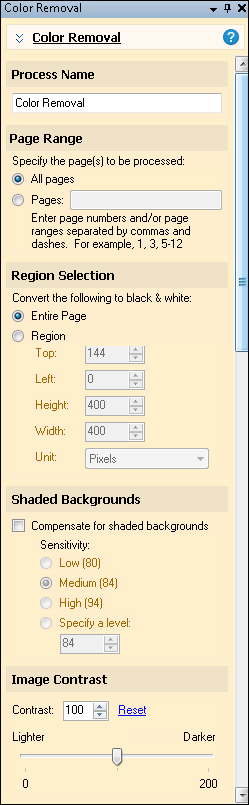
- You can optionally enter a name for the process under Process Name.
- Move through each step of the wizard at the bottom of the pane. You can also click Skip Wizard to display and configure the properties all at once.
- Page Range: When configuring an image enhancement in Page Processing or Post-Processing, you will be prompted to specify a page range. In other stages, default settings will automatically be applied.
Tip: A black and white image takes up less disk space than color or grayscale images. A reason to convert the entire page to black and white and store it that way in Laserfiche would be to maximize disk space.
- Region Selection: Specify the region that will be converted to black and white. You can convert the entire page or a selected region. To define a region, select Region and either drag and resize the zone on the Display Pane or specify coordinates in pixels or by percentage in the Tasks Pane.
Tip: If you are zoomed in to a specific area of an image, adding a zone will place it in the top left corner of the zoomed in image for convenience.
Note: Zones can be copied and pasted within this and other processes that contain zones. When copying a zone within this process, pasting using CTRL + V will paste the zone directly on top of the zone you copied. Right-clicking on a different area of the image and selecting Paste Zone from the context menu will paste the copied zone where you right-clicked.
Tip: You can convert regions containing text to black and white while retaining illustrations on the page in their original color format in order to optimize the text regions for processing and storage without compromising the quality of your illustrations.
- Shaded Backgrounds: To optimize processing for images with shaded, colored, or non-uniform backgrounds, select Compensate for Shaded Backgrounds. If you do choose this option, select or specify a level of sensitivity to determine how carefully the background color of the image will be calculated and adjusted. The higher the number, the greater the sensitivity.
- Image Contrast: The Image Contrast setting determines how dramatically the image contrast will be modified. Specify a value or use the slider to adjust the contrast for processed images.
- Optional: To preview how this enhancement will affect scanned images and OCRed or extracted text, test processes. For the best results, add a custom sample page before testing. Adjust and test until you are satisfied with the results.
Note: If you define a color removal region using percentages for scanned pages of a certain size, the size and placement of the region will change if a page of a different dimension is scanned. For example, the region defined for a scanned page that is 8.5 x 11 in size will be a different size and in a different location on a scanned page that is 8.5 x 14.